The i7500 can use Brady specific materials or non-Brady materials. If the labels are specific for the i7500 (i75-series), the printer automatically senses and calibrates the printer in what is called Smart Mode. If the labels are non-Brady or non-i75-series, there are more steps to installing the labels, Manual Mode.
Media information
Smart Mode: i75-series ribbon and labels causes the printer to be in full Smart Mode where the adjustments are fully automated.
Smart Mode benefits (click to expand)
- Part size is automatically detected.
- Print speed and print heat are automatically set.
- The sensor automatically moves to correct location over the notch or gap.
- Sensor setting in the printer menu is automatically set to gap, notch or continuous.
- Printhead pressure is automatically set for the installed material.
- Warning message if the incorrect ribbon is installed for the label material.
- Part Numbers for the installed materials and approximate amount remaining are displayed.
- Label parts are detected in Brady Workstation.

Manual Mode: non-i75 series manual label and ribbon causes the printer to operate as a thermal transfer printer with traditional setup and changeovers. Ribbon must be determined by the user.
The part number and amount remaining does not display on the LCD screen.
Manual Mode settings (click to expand)
- Determine the correct ink side of the ribbon and load it correctly.
- Visual center-align the ribbon manually.
- Calibrate the printer by feeding out a few wasted labels.
- Set print speed and print heat. Test prints are required to achieve correct print quality.
- Know the label type installed and set the sensor mode to notch, gap, continuous or black mark.
- Move the sensor to the correct place.
- Set the printhead pressure.

Partial Smart Mode: Combination of i75-series smart labels or ribbon and manual labels or ribbon. Some settings are automated and others need to be set by the user.
i75-series Labels and Manual Ribbon (click to expand)
- User must determine the ink side of the ribbon and load it correctly.
- User must visually center-align the ribbon.
- No need to feed out wasted blank labels because the part size is automatically detected.
- Print speed and heat are automatically set for the label material, but there may be some adjustments due to the manual ribbon.
- Sensor automatically detects the type of label and moves to the correct location.
- Printhead pressure is automatically set for the installed labels.
- No warning displayed if the incorrect ribbon is loaded for the installed label material.
- Display shows the part number with approximate amounts remaining but no information about the ribbon.
- Brady Workstation detects the label in the software.

Manual Labels and i75-series ribbon (click to expand)
- Ribbons can only be loaded one way and automatically center-align.
- User feeds out wasted blank labels to "teach" the sensor the label size.
- Set print speed and print heat. Test prints are required to achieve correct print quality.
- Sensor mode must be set to notch, gap, continuous or black mark, depending on the type of labels installed.
- Sensor must be set manually to the correct sensor for the labels: notch or gap.
- The correct ribbon ink formula must be known for the installed labels.
- Display shows the installed ribbon and amount remaining, but no information about the labels.

Load the Labels
Brady and non-Brady materials are loaded the same. The sensor setting and printer settings must be done manually for non-i750-series materials.
Before installing labels, confirm that the leading edge is cleanly cut straight across. This ensures proper alignment of the labels for accurate printing.
- Open the cover.
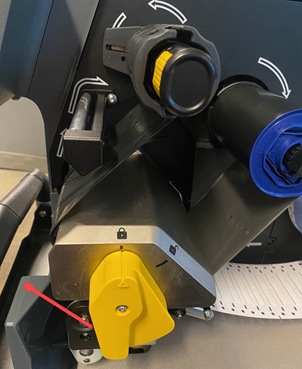
- Open the locking lever to lift the printhead.
- Lower the label roll flange by squeezing the yellow tabs on each side and pull down.
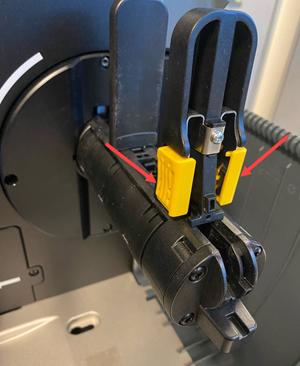
- Slide the label roll onto the label roll hanger.
All labels except permasleeves are loaded with the labels coming from the top. Permasleeve materials are loaded the opposite way with the labels coming from the bottom.
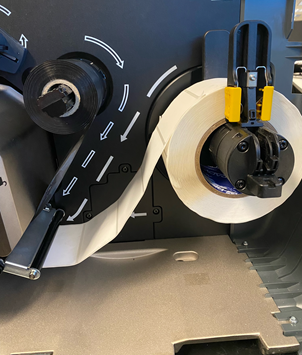
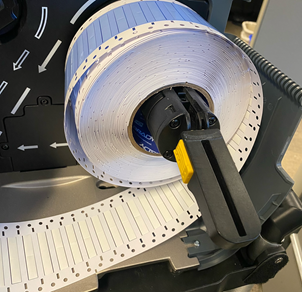
- Press the yellow tabs up until it is against the label roll and centered. The rolls will automatically center.
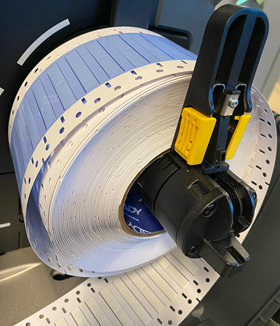
- Feed the labels into the printer path, following the white arrows on the inside of the printer.
If loading i75-series smart labels, the printer display will show “Brady material roll detected.” If this does not display, then remove label roll and replace back onto the label roll hanger until the auto-detection message displays.
If loading Manual (non-i75-series) labels, the printer display shows "New Label Roll Installed." If this displays, the sensor must be manually set.
- Route the labels under the dancer bar, forward beneath the printhead, and through the two gray label guides stopping the material with the leading edge in the center of the black rubber print roller. Do not feed short of the roller or past the roller.
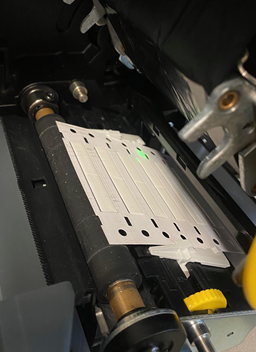
- Roll the yellow label guide adjuster wheel to narrow the label guides until the guides just touch the edges of the label.
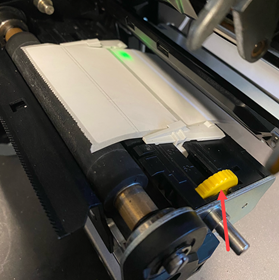
- If using i75-series labels, leave the printhead open.
If using non-i75-series labels:
-
- Select the Label Roll Type: Continuous, Notched, Gapped or Black Mark.
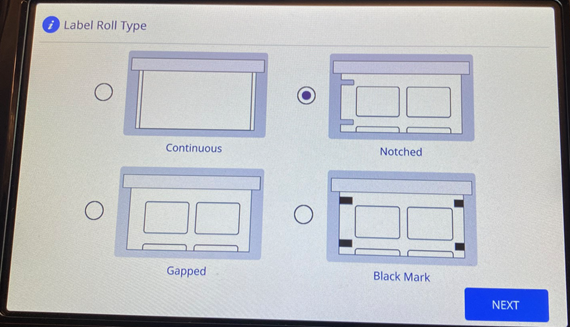
-
- Tap Next.
-
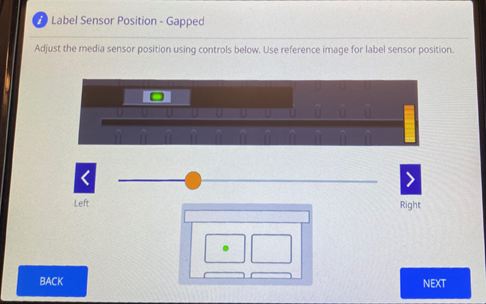
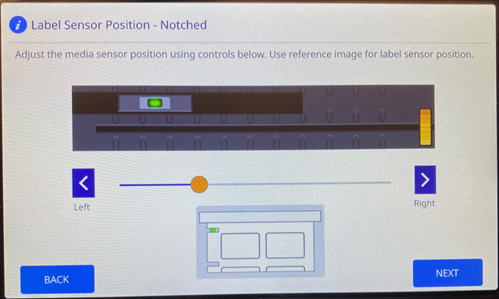
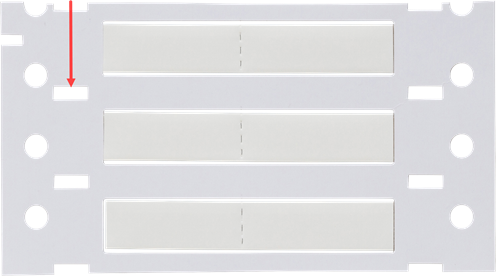
- Move the optical sensor using the slider and arrow buttons on the screen. Press, hold and slide the yellow slider to make large movements or tap the arrows for minor movements: i7500 - Adjust Label Sensor Position.
A green light on the label on the LCD screen demonstrates where the sensor position should go on the labels.
-
- Tap Next.
-
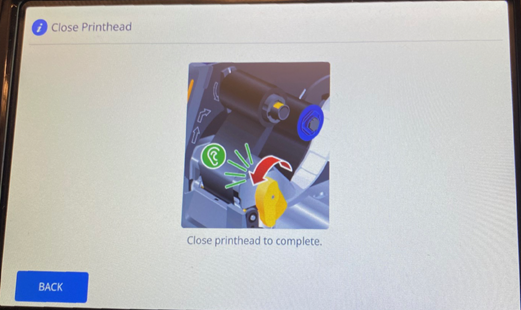
- Close the printhead.
-
- Tap Feed / Calibrate.
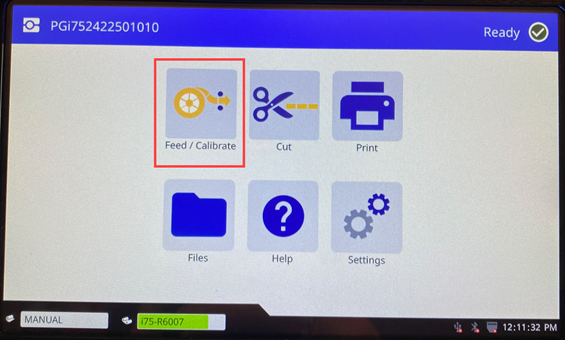
-
- If a few labels dispense and no errors appear, the printer is calibrated. Continue to load the ribbon.
If more than a few labels dispense and the Failure Calibrating Labels error appears, the correct sensor and position were not chosen or the printer must be calibrated. Repeat the steps above and verify the sensor is in the right position or review i7500 - Label Sensor Calibration to calibrate the printer.
Load the Ribbon
Important: Direct thermal labels do not require a ribbon - remove any ribbon before proceeding to next step.
The i7500 printer can use i75-series ribbons or open core ribbons. There are two different sets of instructions:
i75-series ribbon
- If loading i75-series smart ribbon, ensure the spring-loaded shaft on the ribbon take-up spindle is pushed all the way in and locked in place with a “click.”
- Position the black end-cap of the ribbon cartridge against the end of the ribbon supply spindle aligning the flat dimension of the hole in the end-cap with the flat dimension in the end of the spindle.
The blue side of the ribbon core goes towards the outside. The ribbon can only be installed one way.
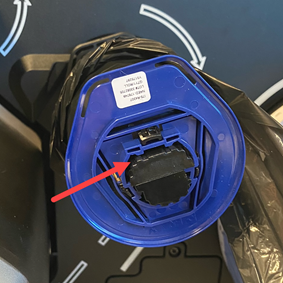
- Slide the cartridge onto the spindle until it stops. The ribbon is automatically centered with the ink correctly facing the label.
- Pull ribbon material off the roll and feed into the ribbon pathway following the white outline arrows shown on the printer.
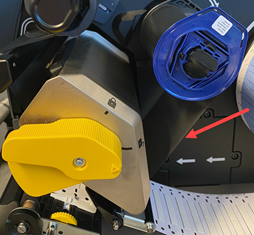
- Feed the ribbon under the printhead, out the front and then upward over the anti-wrinkle roller, then back again underneath and counter-clockwise onto the ribbon take-up spindle, tucking the ribbon under the metal tab on the take-up spindle.
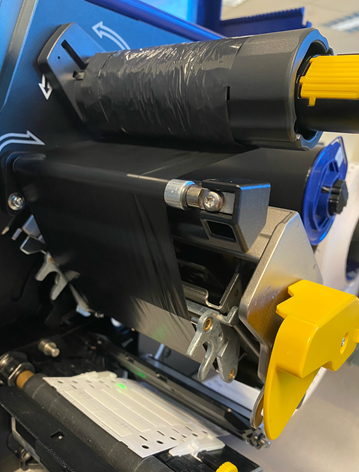
- Rotate the ribbon take-up spindle clockwise several turns to ensure ribbon is pulling through and until any wrinkles in the ribbon are gone: i7500 - Ribbon Wrinkle.
- Close and lock the printhead.
When you hear it click, it is locked in place. If not, press down until locked.
- Close the cover.
Non-i75-Series Ribbon
The non-i75-series ribbon does not have the black and blue core, it is an open core.
- Slide the ribbon roll onto the spindle and visually check to be sure it is centered on the spindle and centered over the labels.
- Confirm the correct ribbon ink formulation is being used with the installed label material: i7500 - Label Materials Guide. This will not display on the LCD screen.
- Make sure the ink side of the ribbon will face downward against the label once installed. The top of the ribbon should be towards the right side.
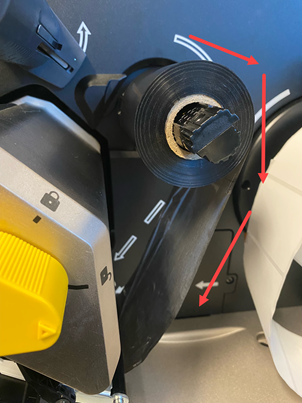
- Pull ribbon material off the roll and feed into the ribbon pathway following the white outline arrows shown on the printer.
- Feed the ribbon under the printhead, out the front and then upward over the anti-wrinkle roller, then back again underneath and counter-clockwise onto the ribbon take-up spindle, tucking the ribbon under the metal tab on the take-up spindle.
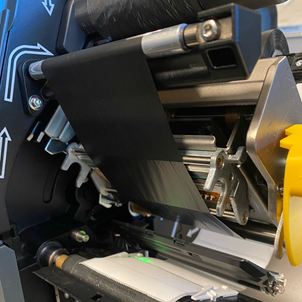
- Rotate the ribbon take-up spindle clockwise several turns to ensure ribbon is pulling through and until any wrinkles in the ribbon are gone.
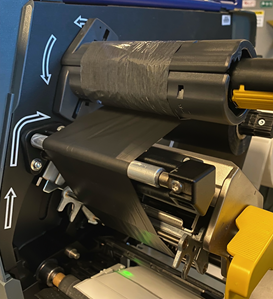
- Close and lock the printhead.
When you hear it click, it is locked in place. If not, press down until locked.
- Close the cover.
Related information


