Label Sensor Calibration is only available when non-i75-series labels are installed. If i75-series labels are installed, the option is grayed out.
Note: The instructions may vary slightly depending on the materials installed in the printer.
- Load the labels and ribbon: i7500 - Load Labels and Ribbon.
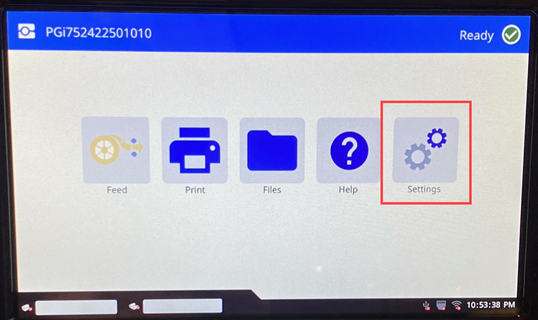
- Tap Settings.
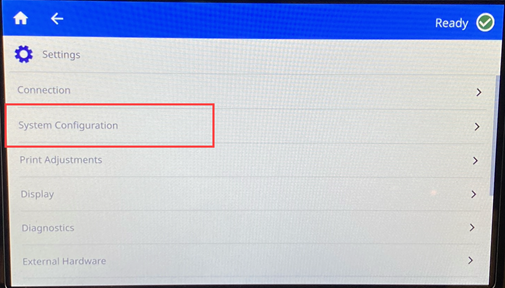
- Tap System Configuration.
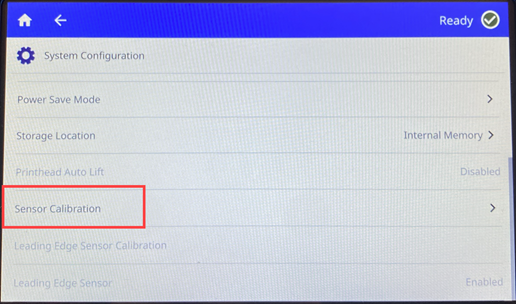
- Tap Sensor Calibration.
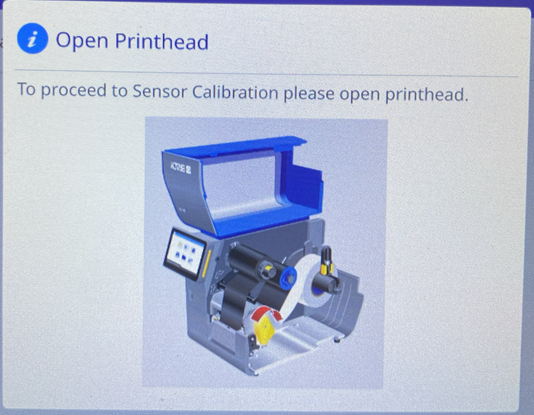
- Depending on how the sensor calibration is started, there may be an initial screen to open the printhead. If this screen does not appear, proceed to the next step.
- Select the Label Roll Type and tap Next.
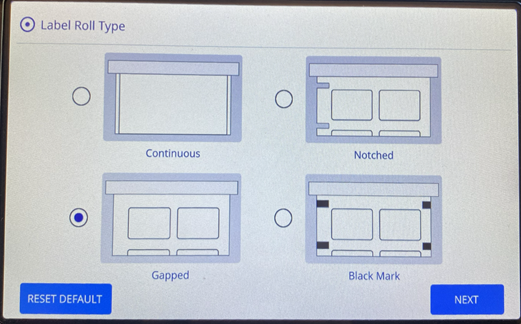
Steps are slightly different for each material type. Refer to the section for the type of labels: Gapped and Notched. Label Sensor Calibration is not necessary for Continuous materials.
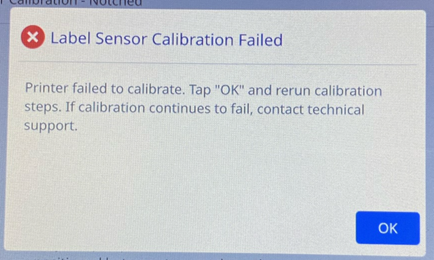
If the Label Sensor Calibration Failed message displays, the step on the screen were not completed. Press OK and repeat the step that displays.
Gapped
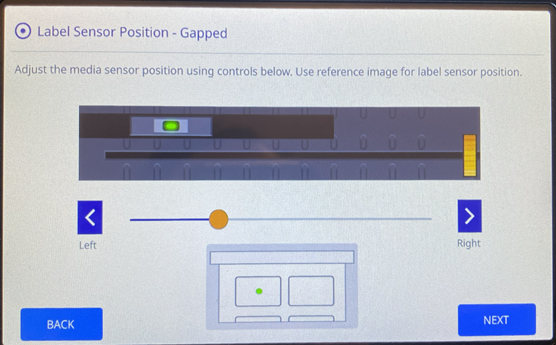
- Move the sensor by pressing the left or right arrows or dragging the circle to move the sensor. Tap Next.
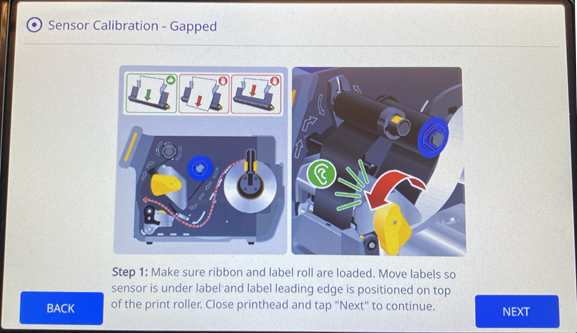
- Open the printhead. Make sure the sensor is in the correct position. Close the printhead and tap Next.
- Open the printhead and remove 3-4 inches of labels from the liner. Close the printhead and tap Next.

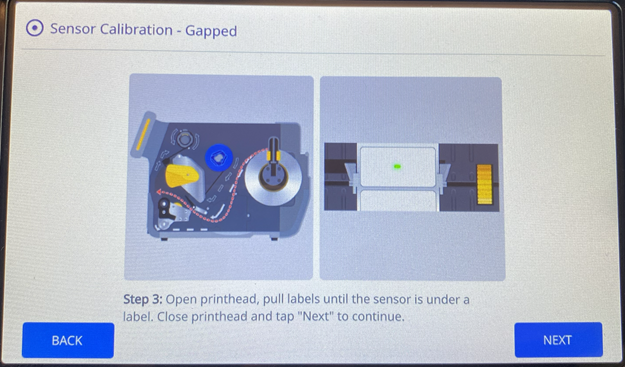
- Open the printhead and pull labels so the sensor is under a label. Close the printhead and tap Next.
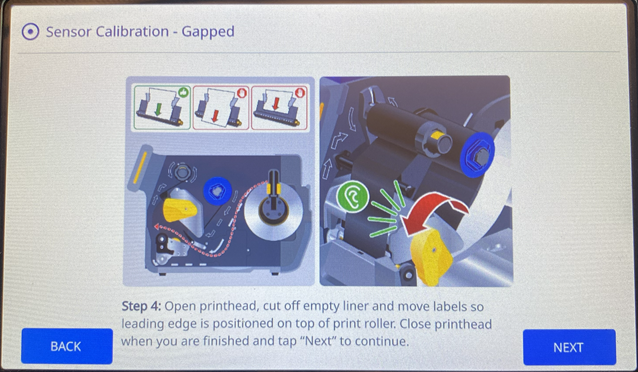
- Open the printhead and cut off the empty line. Reload the label roll. Close the printhead and tap Next.
- Open the printhead and reload the label. Close then printhead and tap Verify.
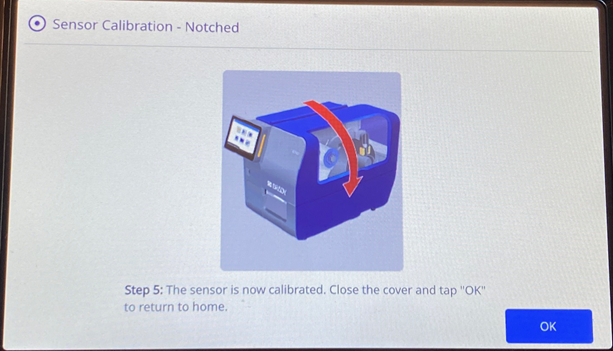
The sensor calibration is complete.

Notched
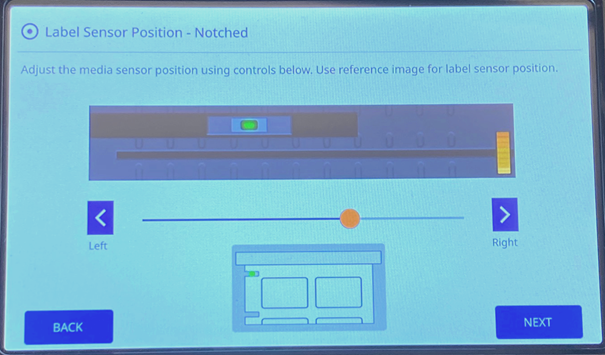
- Move the media sensor using the arrows or move the circle. Tap Next.
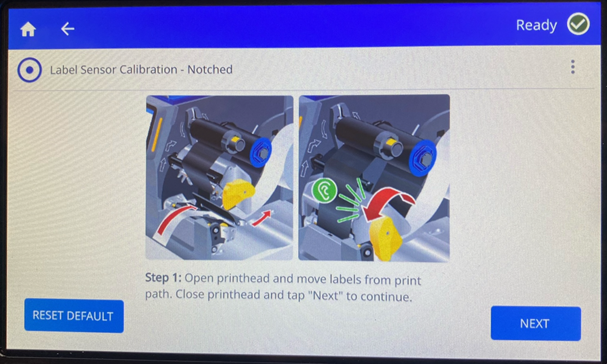
- Open the printhead. Remove the labels from the path. Close the printhead and tap Next.
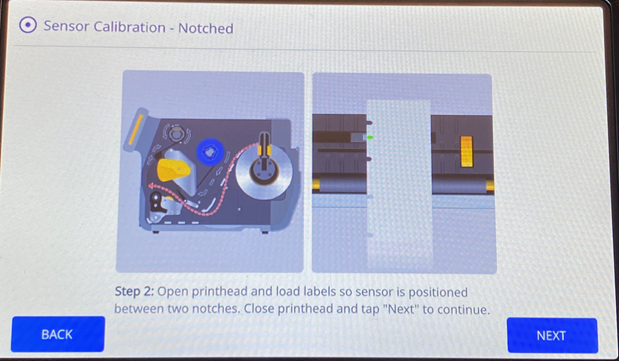
- Open the printhead and put the sensor between the two notches. Close the printhead and tap Next.
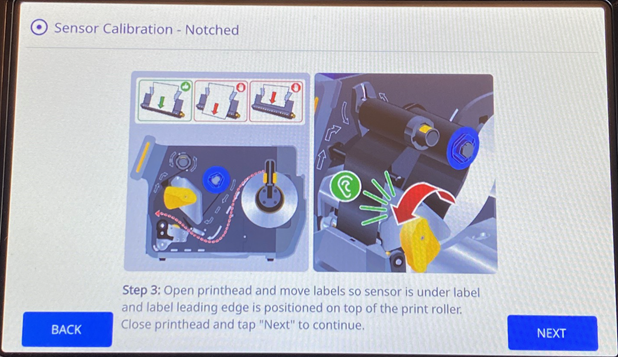
- Open the printhead. Load the labels so the leading edge is partway over the platen roller. Close the printhead and tap Next.
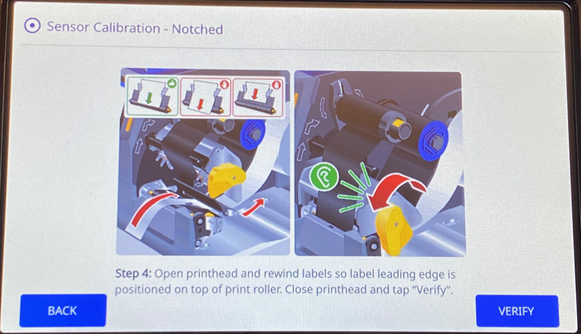
- Open the printhead and reload the labels. Close the printhead and tap Next.
- Close the lid and tap OK.
Related information

