Installing the IP300 / IP600 Driver
Use this driver for Brady Workstation and LabelMark.
We have found this driver also works well with Bartender, however we do not actively test to verify functionality of Brady drivers with 3rd party software. If you're using CodeSoft, use the internal driver: CodeSoft - Configuring Internal Printer Drivers.
Note: Regardless of communication interface type used (USB or Network) see the last step at the end to enable bidirectional communication once the print driver is installed. This only needs to be done once.
The driver was not tested for Windows 10 or Windows 11 so there is no guarantee that this will work.
- Select IP 300 & 600 Printer Driver from BradyID.
- Select Begin Download.
- Open the Downloads folder or wherever you download files to. Right-click and choose Extract All.
- Select the path for the extracted file and select Extract.
- Double-click the extracted folder. Right-click the IP Series executable and choose Run as administrator.
- Choose your language and select Next.
- Choose your DPI model and select Next.
- Connect the printer to your PC.
- If connecting via USB, choose Add a Local printer or network printer with manual settings. If you are networking your IP Series printer, complete the driver installation using this article: How to Network Your IP300 and IP600 Printer or skip to the below Networking section.
- Choose the virtual USB port.
- Select the appropriate printer model.
- Select sharing preferences.
- Select Finish.
Networking the IP300 and IP600 Printers
- Choose Add a printer using TCP/IP address or hostname.
- Choose TCP/IP Device from the drop down and Enter the configured IP address.
Note: You can view this on the IP printer by going to Menu > Short Status > scroll down to IP address listing.
- Wait for the printer to be detected.
- Choose Generic Network Card.
- Choose the appropriate printer model.
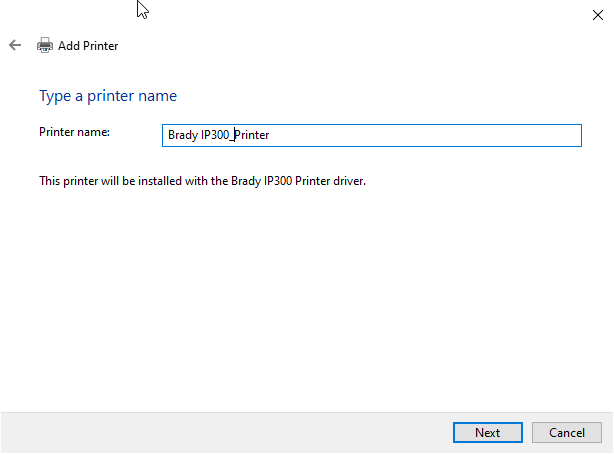
- Type in a name for the printer in Printer Name.

- Select sharing preferences.
- Select Finish.
Enable Bidirectional Communication Access (Bidi)
See this article to ensure bidirectional communication is enabled: Printer Drivers - Enable Driver Security Permissions.
This only needs to be done once per driver install. This allows our software to talk to the print driver, which reads the RFID Tag on most Brady Labels (not metalized labels as metal interferes with the RFID). The driver reads the tag then tells our software what labels are currently loaded to accurately load page size and sensor type for calibration.
Related information


