Body | i7100 Peel Model Considerations - Which Settings Need to Be Configured?Two peel modes are available for the i7100 - manual and automatic.
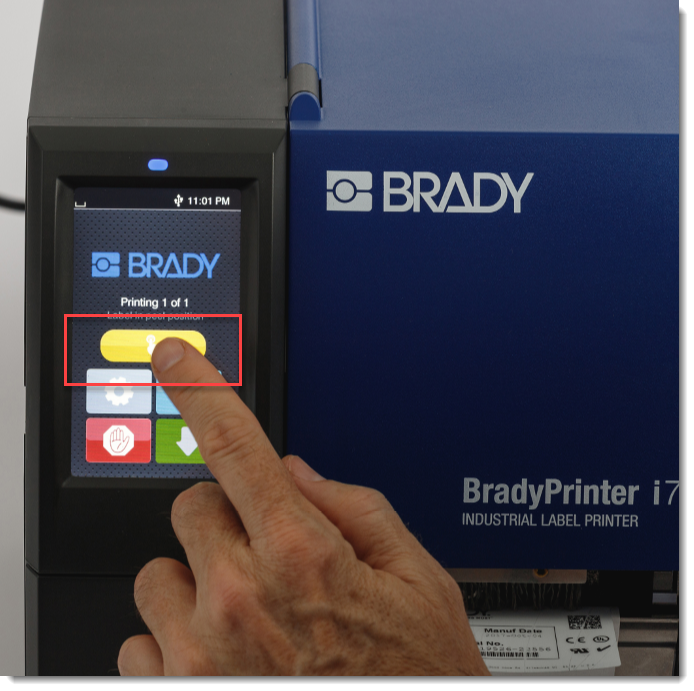
Manual mode - Manual is the default mode configured for peel model i7100 printers. This requires manually advancing each label by pressing a button on the touch screen.

Automatic Mode - An additional fixed or adjustable sensor can be purchased to add automatic present functionality. Automatic present means the labels will automatically advanced after the user removes the peeled label from the liner.
Reference this chart for required configuration depending on the peel and present mode used. Instructions to configure each of these settings are listed below the chart.
| Print on Demand (Manual Mode) | Present Sensor (Automatic Mode) | | Peel off mode in driver OFF | Peel off mode in driver ON | | Print on Demand in printer ON | Print on Demand in printer OFF. | | Tear off mode in printer ON | Tear off mode in printer OFF
| | Peel off position in printer NOT APPLICABLE | Peel off position in printer ADJUSTS PEEL POSITION | | Tear off position in printer ADJUSTS HOW FAR THE LABEL FEEDS | Tear off position in printer NOT APPLICABLE |
Configure Settings for the Present Sensor 1. Set the Driver to Peel Mode: i7100 Peel Model Driver Configuration When Using the Present Sensor 2. Print on demand in the printer should be unchecked:
- This setting can be found by selecting the gear icon on the screen, selecting Setup, and going into the Printing menu. When Print on demand is unselected the checkbox should be gray with a light dotted line around the check mark. See also: What is the Print On Demand Setting on the i5100 and i7100?
3. Tear off mode in the printer should be unchecked:
- This setting can be found by selecting the gear icon on the screen, selecting Setup, and going into the Tearing-off menu. When tear-off mode is unchecked there should be no other settings in this menu.
4. If you need to adjust the peel position of the label (how far out the label is feeding) this can be done by changing the peel-off position in the printer.
- Peel-off position can be found by selecting the gear icon, selecting Setup, then selecting Peeling-off.
- Increasing the peel-off position will feed the label out further, decreasing the peel-off position will feed the label out less.
Configure Settings for Print on DemandThe print on demand mode requires the user to press a button on the screen of the printer to print and feed out the next label in the print job. The following settings should be set when using this manual peel mode.
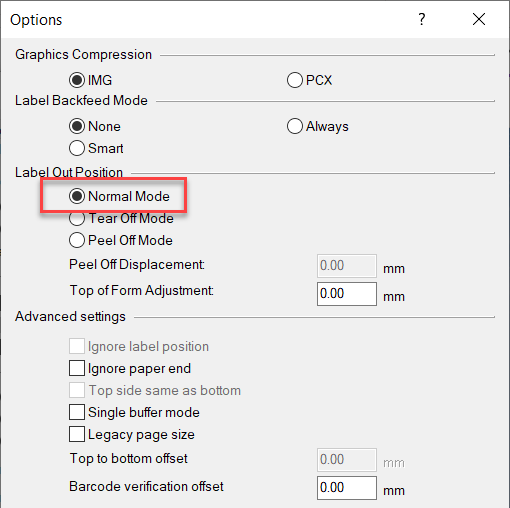
1. The driver should be set to normal mode, this must be verified in two separate menus within the driver:
- Right click the driver > Printer Properties > Preferences > Advanced Setup > Options > Make sure the Peel mode radio button is not selected.
- Right Click the driver > Printer Properties > Advanced > Printing Defaults > Advanced Setup > Options > Make sure the peel mode radio button is not selected.
 2. Print on Demand in the printer should be checked: 2. Print on Demand in the printer should be checked:
- This setting can be found by selecting the gear icon on the screen, selecting Setup, and going into the Printing menu. When Print on demand is selected the check mark should be white
3. Tear off mode in the printer should be checked:
- This setting can be found by selecting the gear icon on the screen, selecting Setup, and going into the Tearing-off menu. When tear-off mode is checked there should be a tear-off position setting in this menu
4. If you need to adjust the peel position of the label (how far out it feeds) you'll need to adjust this by changing the tear-off position in the tear-off menu:
- Increasing this value will feed the label out further
- Decreasing this value will feed the label out less
Note: When using print on demand, the peel-off position setting in the printer will not change how far out the label is feeding, this setting is only active when using a present sensor.An extended peel plate can be purchased which may increase the peel consistency for smaller labels and labels with tough adhesives.
- Note: The automatic peel sensors cannot be used with the extended peel plate
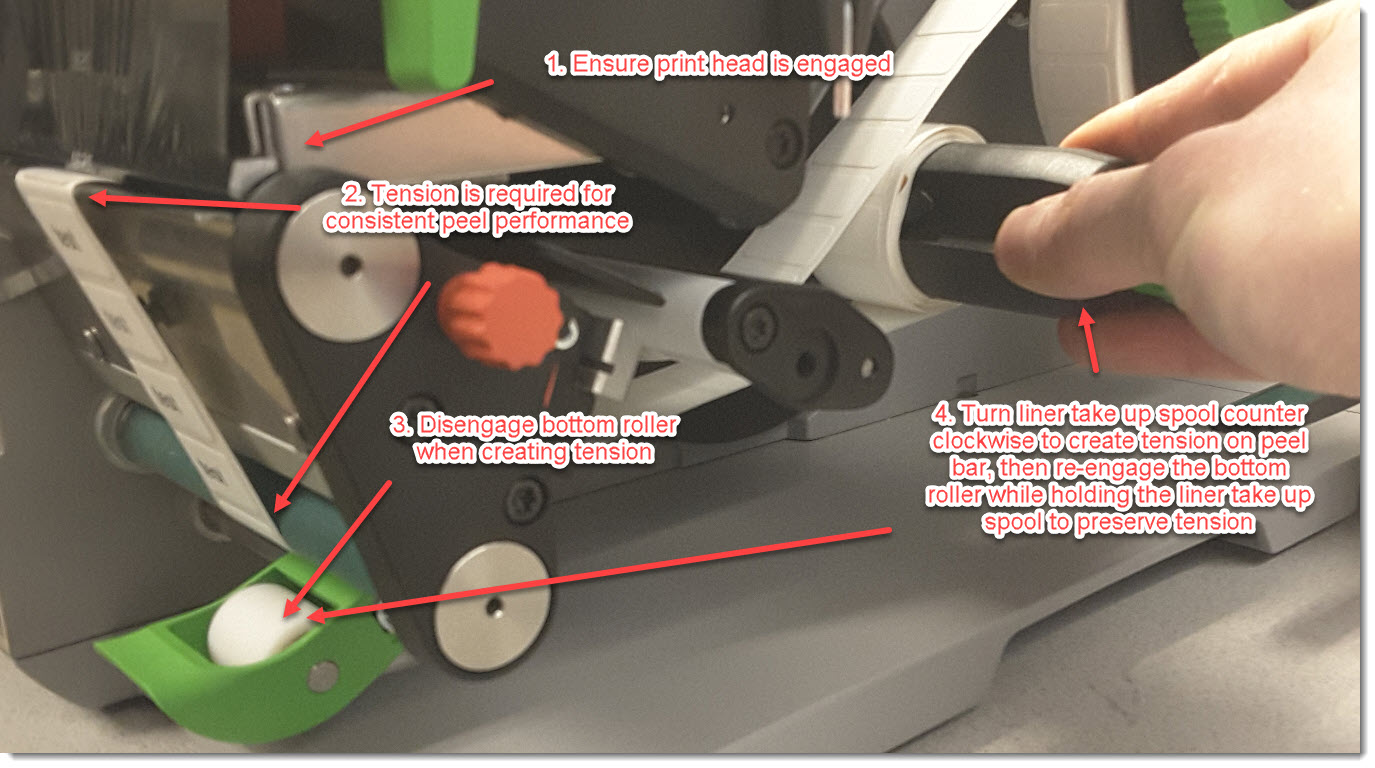
Loading MaterialsThe labels must be loaded in a special orientation: PR 300/600 Plus and i7100 - How to load the labels when using the Peel & Present versionFine Tuning AdjustmentsAdjusting Peel Position on the i7100
Ensure the label liner has tension on the peel plate (this image is also attached).  Label Materials Compatible with Peel ModePlease note, compatibility varies across label material types. Adhesive type, label thickness, and label size affects a label’s ability to separate from the liner. While some adjustments can be made, consistent peeling is not possible on all materials and sizes. Label Materials Compatible with Peel ModePlease note, compatibility varies across label material types. Adhesive type, label thickness, and label size affects a label’s ability to separate from the liner. While some adjustments can be made, consistent peeling is not possible on all materials and sizes.
Labels shorter than .5” will have difficulty separating from the liner. This is only a general likelihood, material type and adhesive type are also a factor. Brady has not extensively tested every label offered for the i7100/PR series to confirm peel compatibility. Results below reflect limited testing for popular material types.
- B-427 - Fail
- B-423 – Pass for material greater than 0.5 in width and height. Multiple labels across not recommended
- B-457 – Pass
- B-483 – Pass
- B-8423 – Pass
- B-593 – Pass. Minor jamming occurred. Not recommended for more than batch of 50
- B-498 – Pass for single up labels. Multiple across labels fail.
- B-109 - Fail
- B-352 – Pass
- B-422 – Fail for 3 across labels
- B-430 – Fail for 3 across labels
See Also
|
|
|---|


