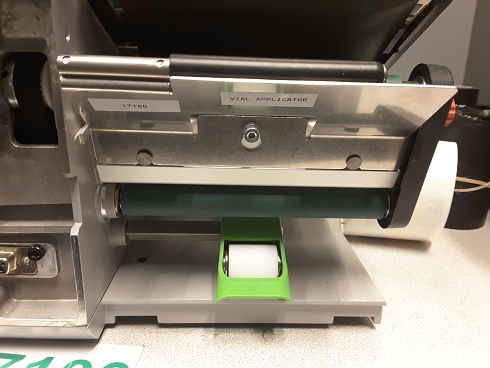
Vial Applicator Setup for the i7100 Peel and Present Model
The Vial Applicator ships separately. View the attachment for more detailed instructions.
- Turn the printer off.
- Loosen the three screws several turns. Remove any existing plate that is not the Vial Applicator Dispense Plate.
- Place the Dispense Plate onto the screws and slide it downward so the plate slides behind the middle pin.
- Tighten the screws.

- Load the labels and ribbon: i7100 - How to Load Labels and Ribbon. Slide the labels under the black roller.
Note: Make sure there is enough label liner to wind to the back of the printer so that it can be wrap on take up spindle.
- Wind up the end of the labels in the take-up spindle as shown below.
- Remove the cover below the LCD screen on the left-hand side.
- Remove the Allen Key from the printer.
- Remove the two screws on the Vial Applicator to remove the cover.
- Install the Vial Applicator by inserting the pins on the applicator into the printer and connecting the peripheral port.
- Use the Allen Key tool to tighten the screw on the front of the Vial Applicator.
- Place the cover back onto the Vial Applicator, insert the two screws and use the Allen Key to tighten the screws.
- Turn the printer on. Select the Gear icon.
- Select Setup.
- Select Labeling.
- The Labeling default settings display.
- Select Teach-in product.
- Remove the tube and select Continue.
- Insert the tube and select Continue.
Note: Make sure to setup the vial so that the pressure roller sits evenly on it. If there is a flange on the vial, make sure to arrange the vial to sit between the swing arm and the platen roller so it sits evenly in the vial applicator.
- Once the printer is taught, the LCD screen displays "Product successfully taught-in”.
- Use the “Opening width” in the Labeling settings to set the distance between the transport rollers and pressure rollers for tube input.
Note: This controls how many labels feed out onto the tube. The default setting is 1.
- Set the driver: How to Enable Peel-Off Mode in the i7100 Driver.
Related information


