Installing the i7100 Driver
Note: If the Driver will not install, the driver may need to be downloaded manually: Access the Inf File to Manually Install Brady Printer Drivers.
- Download the driver from BradyID.
- Right-click and choose Extract All.
- Right-click the executable and choose Run as administrator.
- If connecting the printer via USB: Choose the "USB" Option, then follow instructions to complete installation. If you're unable to print following installation of the printer driver, it's possible the wrong port was assigned. See: Unable to Print from Software - Troubleshooting Driver Communication Issues.
Networking
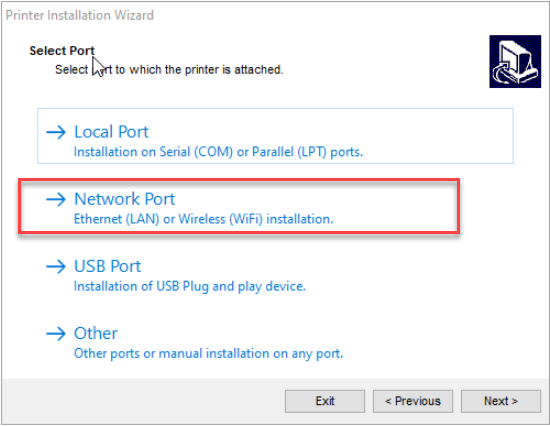
- Network Port: Choose Network Port option.
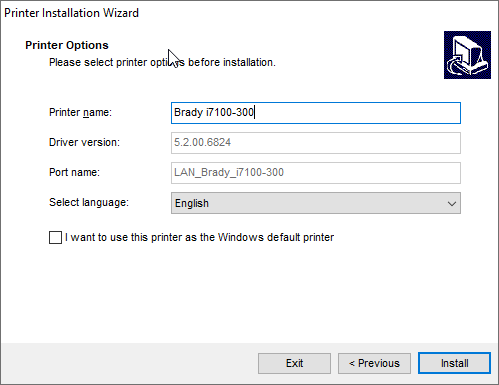
- Choose your i7100 300 or 600 DPI printer model and click Next.
Note: Select the version ending with a "P" if using the peel and present version. See this article for more information about setting up the i7100 peel model: i7100 Peel Mode Setup and Considerations
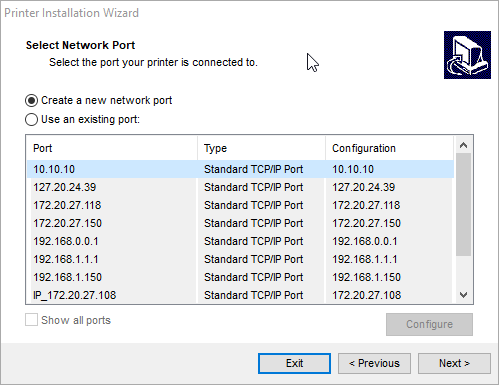
- For first time setup, choose Create a new network port.
- Enter your printer's IP address. This can be viewed from the printer touch screen under Settings > Info.
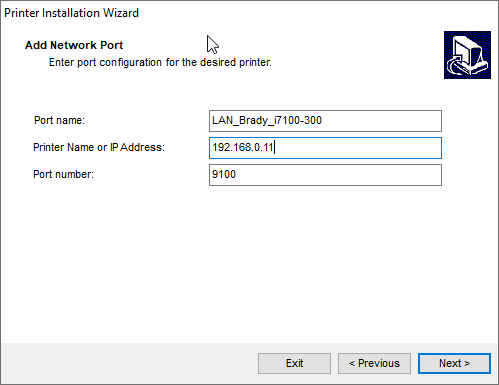
- Confirm settings and click Install.
Related information

