Printing Two-Sided Sleeve Material on the i3300 and BBP33
When printing two-sided sleeve material, side one is loaded and printed directly from the roll. To print side two, the material is cut at the end of the job, then the printed strip of sleeves is loaded from the back of the printer for the second print pass.
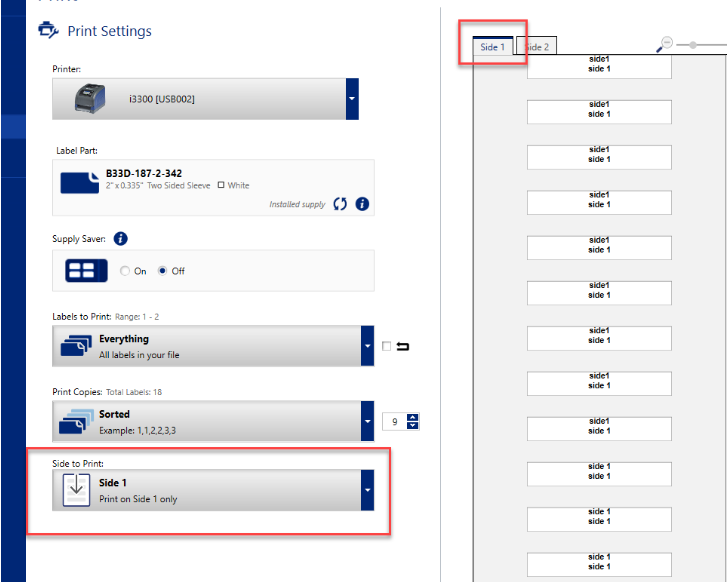
- Print side one of the two-sided markers.
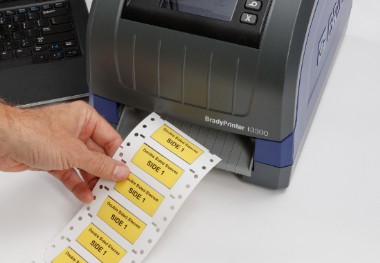
- When the job is done, cut the printed markers.
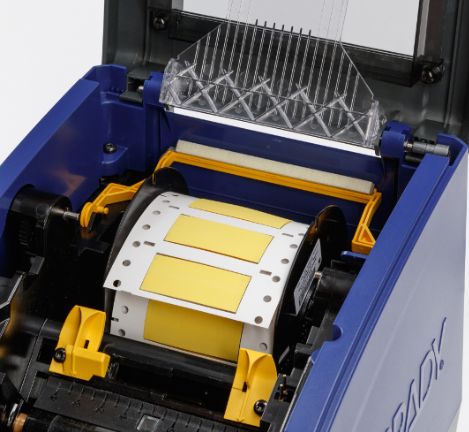
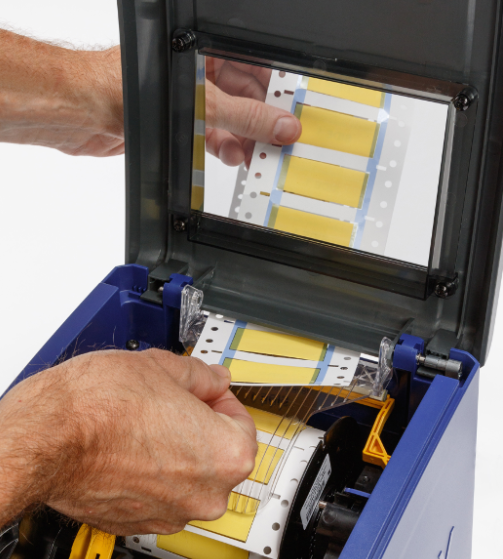
- Open the enclosure cover and print head door. Pull the leading edge of the supply backward out of the guides towards the roll, but do not remove the roll itself.
Note: The roll must remain in the supply slot or the printer will indicate a tape out condition.
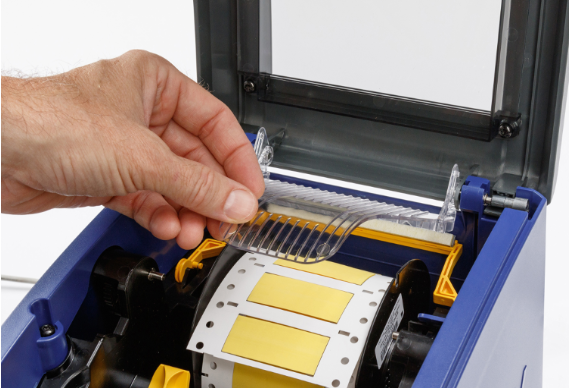
- Flip the supply bridge down so it lays over the roll.
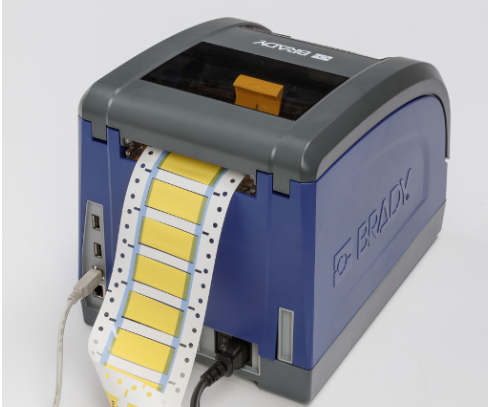
- From the back of the printer, feed the leading edge of the PRINTED strip of sleeves through the slot between the enclosure cover and the printer body.
Note that the leading edge is the first sleeve in your print sequence. Be sure the printed side is facing DOWN.
Lay the markers over the supply bridge and feed the markers to the top of the black roller approximately one quarter inch (6.35 mm) from the exit.
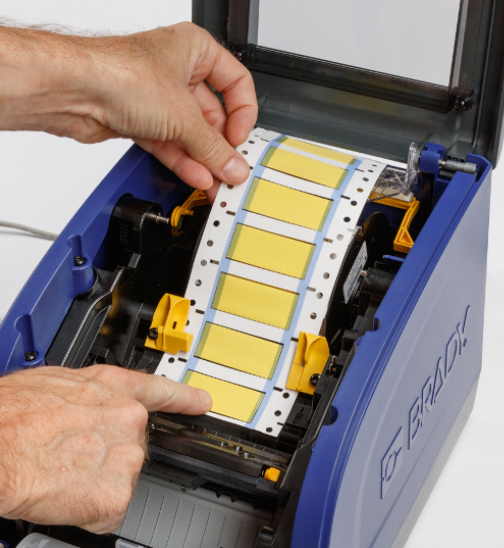
- Close the print head door and the enclosure cover.
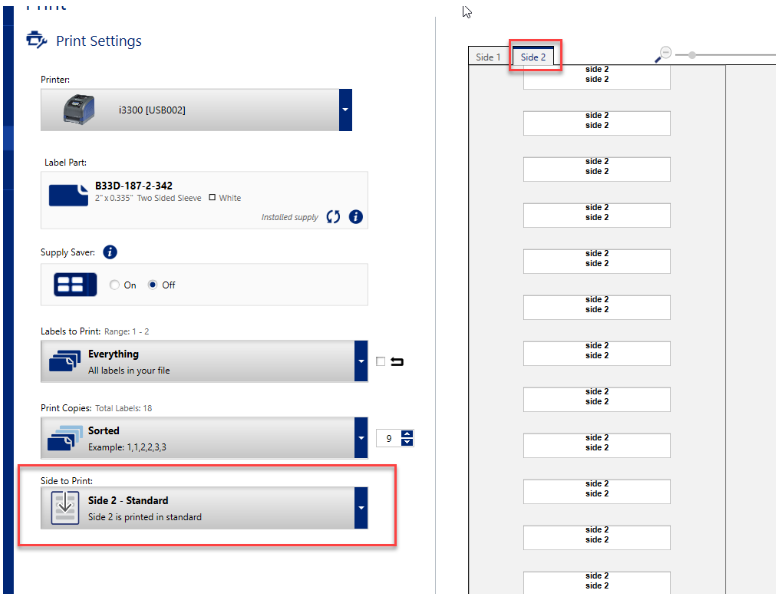
- Select to print to side 2 from the Brady Workstation print menu.
Related information


