i7100 Sensor Calibration Utility
The i7100 may require sensor calibration after updating to firmware version 5.14 or higher. This should not be required if updating from a firmware version later than 5.14. This sensor calibration can also be performed if the printer has difficulty maintaining calibration despite having configured proper calibration settings: i7100 Sensor Position for Gapped, Sleeve, Notched, and Multiple Column Gapped Material.
This process re-exposes the sensors to the light and dark conditions of a passing label. These instructions must be followed exactly or sensor values will be out of range. For Brady labels, sensor values should fall within this range: Lowest (1-10) - Mid (10-20) / Mid (10-20) - Highest (120-160).
i7100 Calibration
Note: Older firmware versions will have the calibration utility under : Settings > Extras > Calibrate Label Sensor Setup.
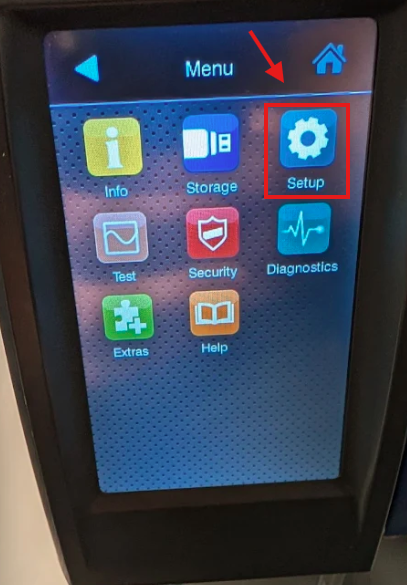
- On the printer screen, select the Gear icon.
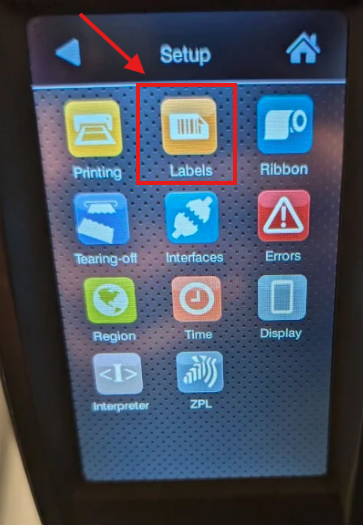
- Select Setup.

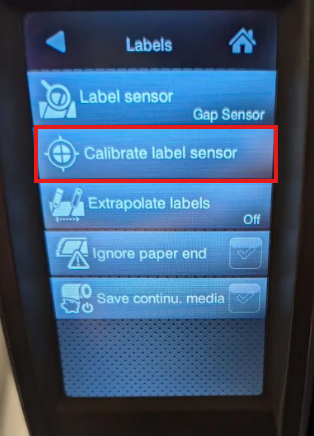
- Select Labels.

- Select Calibrate label sensor.

- Remove the labels from under the sensor (orange light), then close the print head and press Continue.
i7100 with labels removed and print head open.
- Printer will say Insert Liner, remove a couple of labels from the liner and place the blank liner under the sensor (orange light).
- Press Continue. The sensor is now calibrated and you can reload the labels and press Feed a couple of times until one label feeds out each time.
Related information


