Issue
Adjusting the print head pressure is sometimes needed when using B593 Raised Panel Labels when used with IP series and i5100 model printers.
Resolution
Use with caution and only if necessary.
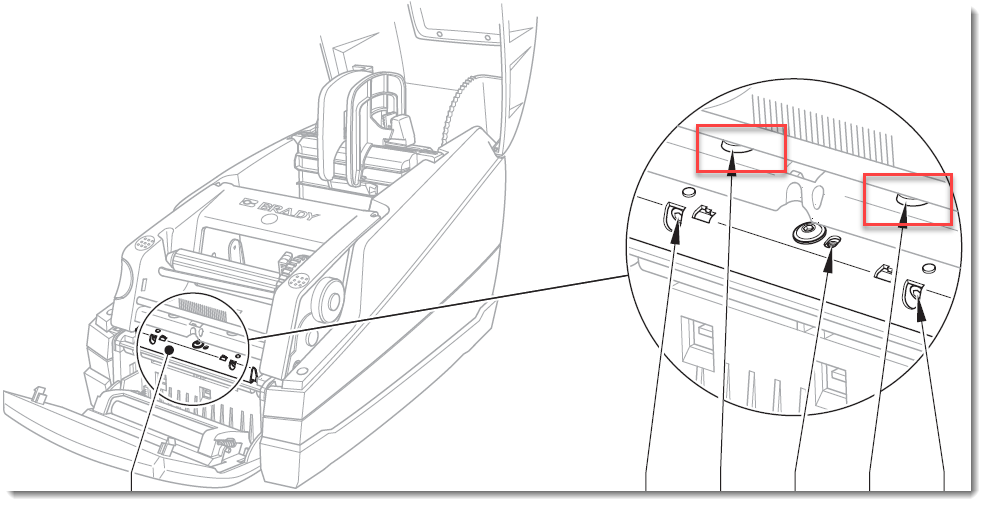
- Turning the screws clockwise will decrease the printhead pressure on the corresponding side.
- Turning the screws counter-clockwise will increase the printhead pressure.

- Turn the two screws clockwise until “snug” – not tight. Over tightening will strip the screws and require repair. This is the “start” position. (If already tight, turn counter-clockwise until snug). From here you should have 10 total counter-clockwise revolutions to increase pressure. If you do 11 turns, the screws will pop out of the black plastic pressure deployment units (which look like standard plastic screw anchors) that the screws push down to apply pressure. Then you may have trouble restarting them.
- From the Start position, apply one counter-clockwise turn then test print and evaluate the quality. If print still has poor print quality, try additional one (or one half) counter-clockwise turns and testing it until optimal print quality is achieved.
If your poor print quality was more on one side than another, you will find that you probably had to turn one screw a little more or less than the other in Step 1 above to get the screws into the “start” position.
.jpg)
Sometimes the settings within the Printer Driver to the i5100 should be adjusted.
We recommend referencing these articles for additional considerations when printing raised panel labels on these printer models:


