Issue/Symptoms
A printer with a cutter is not cutting, mirror print in the driver is not applying, tear-off mode is not working, heat level or print speed changes, or other settings in the driver are not working with Data Automation but do work when printing from Brady Workstation.
Resolution
Change User Settings on DA Service when using a Printer that is not applying driver settings. Make sure the user also has appropriate driver permissions in the driver security tab.
Note:
- The account may need to be a user account with admin rights, not a service account.
- The user account configured must be the same account configured for security access in driver properties: Printer Drivers - Enable Driver Security Permissions.
- If the user's password changes, they will need to update it separately as well.
Configure the Driver
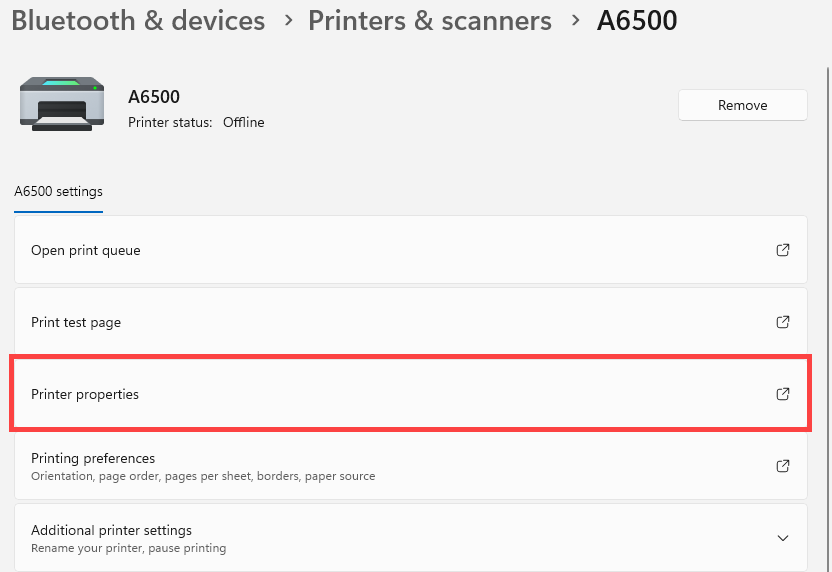
- Go to start menu on the computer and open Printers & Scanners.

- Find the printer in the list and select it.
- Click Printer Properties.
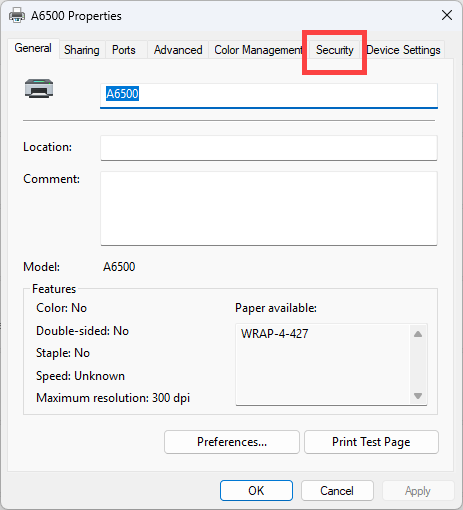
- Click Security tab.
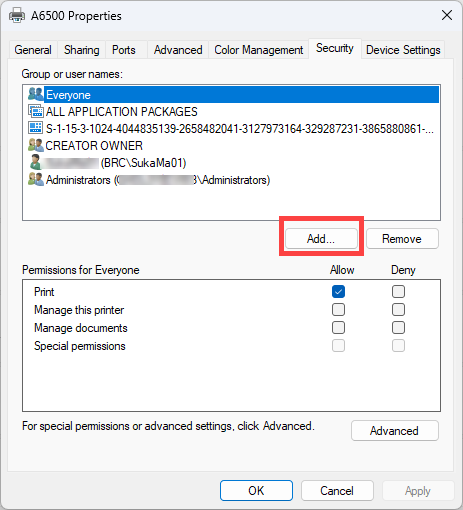
- Click Add and add the user account that will be used when Data Automation is run.
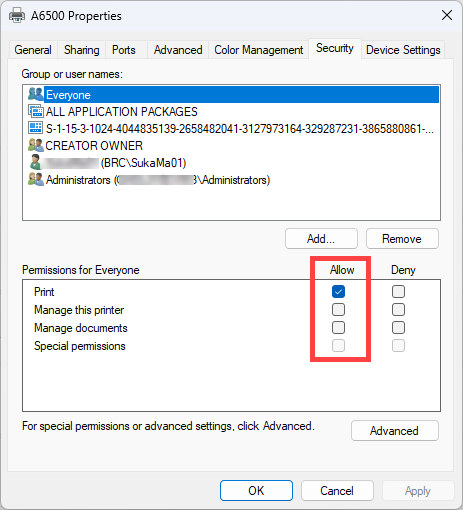
- Click all of the boxes to Allow.
- Click Apply.
- Click OK.
Configure the Data Automation Service
- Stop the Channel in Brady Workstation Data Automation App.
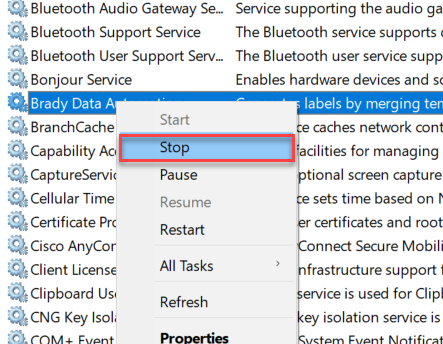
- Go to Services > Right Click on Brady Data Automation > Stop the Service.
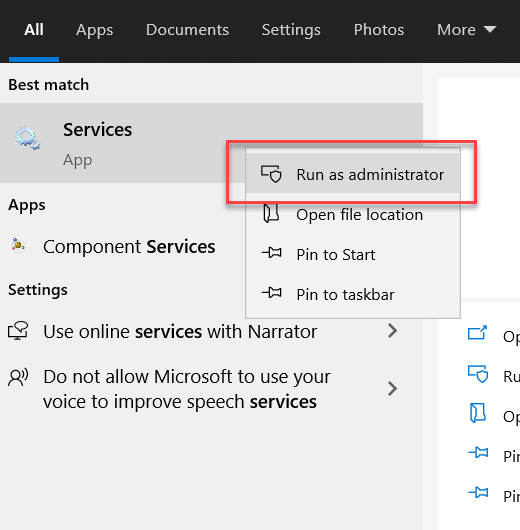
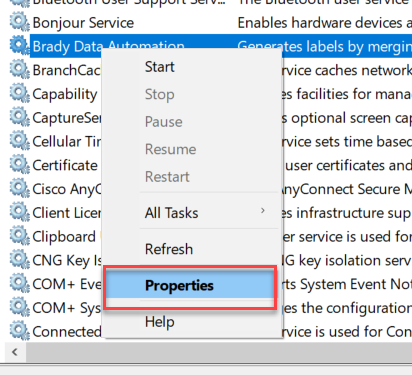
- Right Click on Brady Data Automation > Properties > Log on Tab (default selected will be Local System account) > Click on “This account” > Browse.
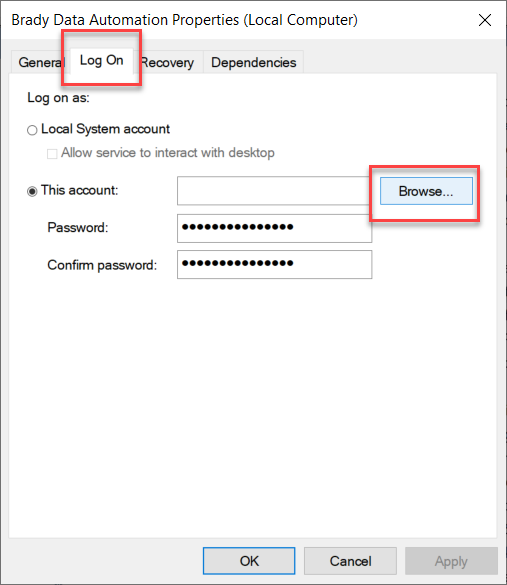
- If the customer is on domain on their network > Click Locations > Entire Directory (expand) > Select Customer Domain > Click OK.
- “Under Enter the object name to select” type in their windows log on user name > click Check Names (It will update the field with their full domain name) > Click Ok. Make sure this user is the same user configured for drive access in the above driver section.
- This account will then be filled in with that information.
- Enter your windows log on password > Click Apply > Click Ok.
- Go to Services > Click on Brady Data Automation > Start the Service.
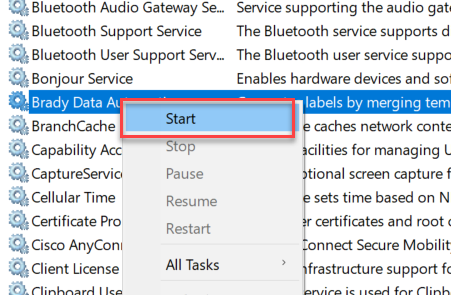
- Start the Channel in Brady Work Station Data Automation App.
Related information


