Setting up the Brady BBP12 printer
- Install the printer driver: How to Install the BBP12 Driver.
- Load the label material. Place the roll of labels onto the green media holders making sure that the roll is held tightly in place and that the locking switch is in the locked position (push the switch all the way down until it clicks).
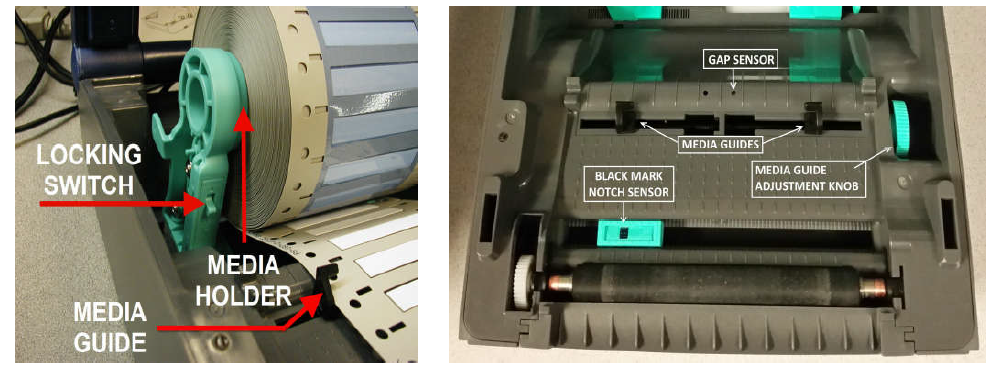
- Adjust media sensors as needed. After loading the labels, adjust the media guides so that they are snug against the sides of the label liner to prevent horizontal drift, but not so tight the material buckles.
If using NOTCHED media, move the Notch sensor also known as Black Mark sensor to the proper position. The sensor is the black rectangle located inside the movable green plastic piece near the platen roller. Slide the sensor to a position where the material’s notches pass directly over it.

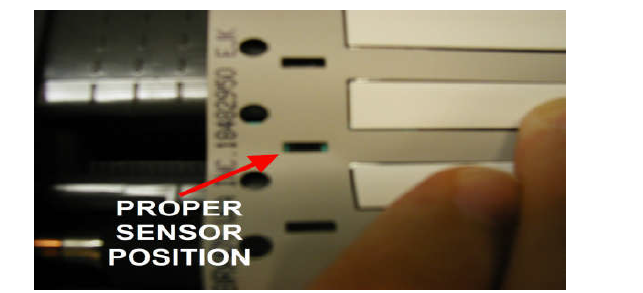
The above picture shows the proper sensor position for permasleeve labels.
* Note that you can see a bit of green in both the left and the right sides of the notch. If using gapped media (non-notched, non-continuous), no sensor adjustments are needed because the Gap sensor is a fixed sensor.
Calibrate the Printer (from the LCD screen)
- On the printer’s LCD Menu, press the left gray button under Menu.
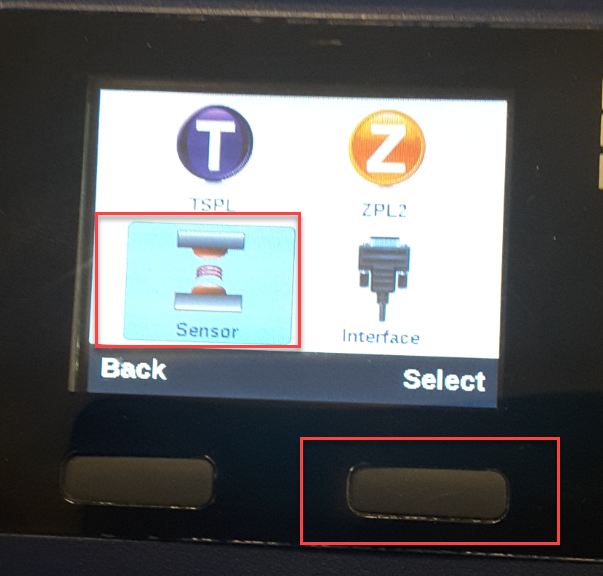
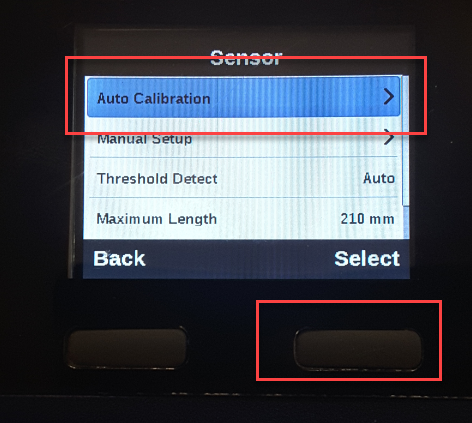
- Navigate to Sensor and press Select.
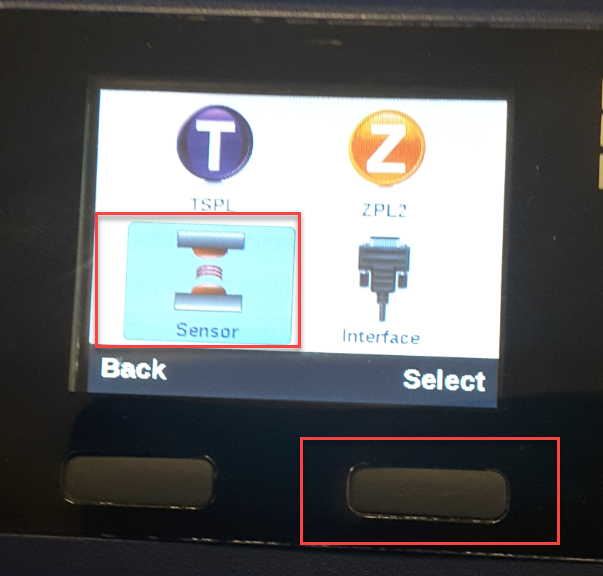
- Press Select on Auto Calibration
- Navigate up or down to select calibration type – Gap, Black Mark or Continuous.
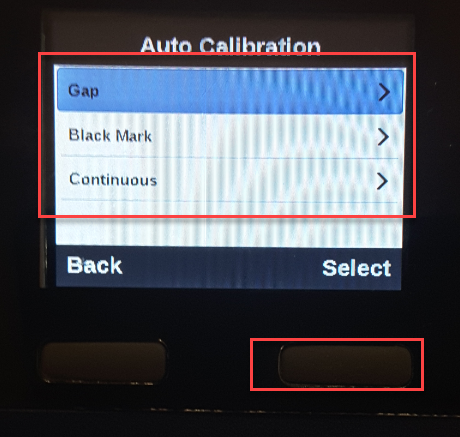
- Press Select button. If die cut labels, several labels will feed then stop. If continuous, nothing appears to happen.
Calibrating the Printer Using the Diagnostic Tool
This can be done as an alternative to the LCD screen calibration method. This utility is available on the CD the printer ships with and can also be accessed here:
- Run DiagToolBBP12.exe: BBP11/12 - Diagnostic Tool for the BBP11/12 printer.
- See instructions to run calibrate from the diagnostic tool here: How to Calibrate the BBP11 and BBP12 Using the Diagnostic Software Tool.
Making Print Position Adjustments from the LCD Screen
We have found that out-of-the-box BBP12's often require minor offset adjustments to fine-tune print position. If the print is consistently coming out in the same spot on every label, but is too high or too low:
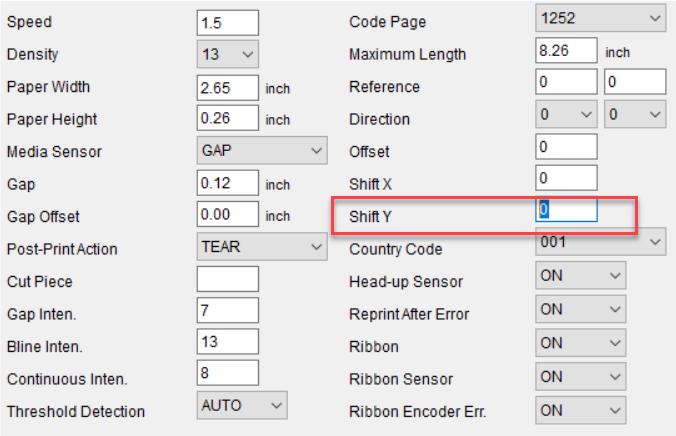
Make a Shift Y (vertical) adjustment in either the printer’s LCD Menu (shown below) or using the DiagToolBBP12.exe.

Positive numbers move the print up on the labels, negative numbers move the print down.
If you need to move the print horizontally, use Shift X. For x, positive numbers move the print right, negative numbers move the print to the left.
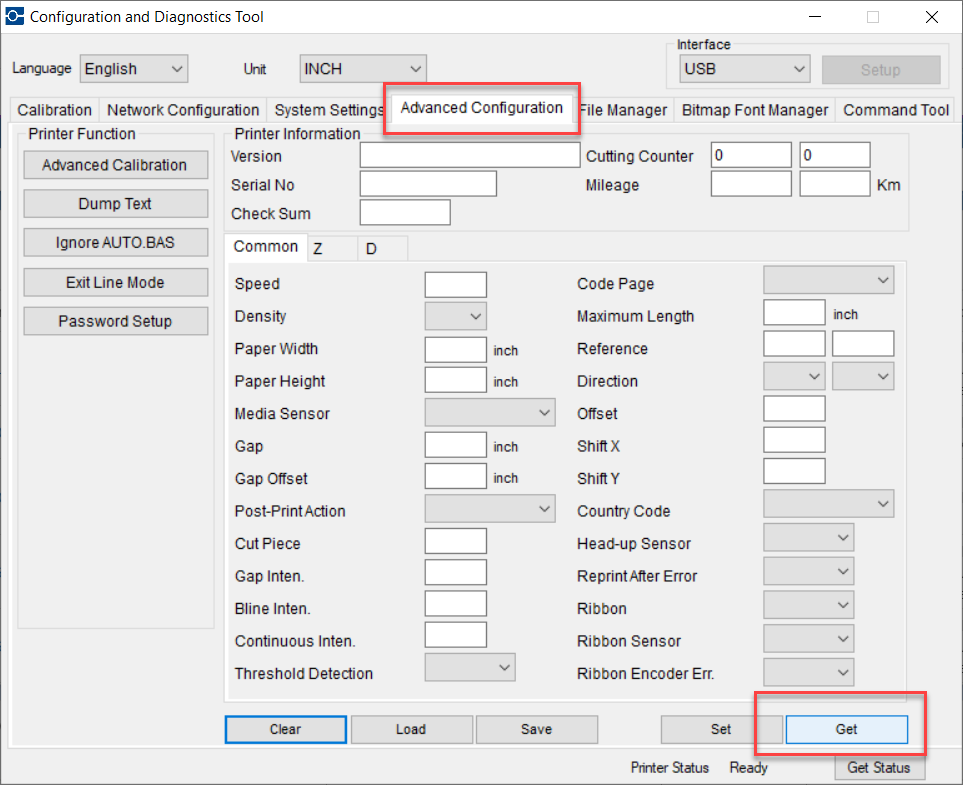
You may also calibrate the printer or make print position adjustments (Shift Y for vertical, Shift X for horizontal) in the DiagTool - the Diagnostic and Configuration utility that allows you to configure and diagnose the BBP12 printer from a PC screen.
Adjusting Vertical Print Position Using the Diagnostic Utility
This can be done as an alternative to the LCD screen print position adjustment method.
- Go to Advanced Configuration tab: click Get.
- Enter a number in the “Shift Y” field then click Set. A positive number moves the print up, a negative number moves the print down.
Print Position Adjustment Considerations
Do not enter Print Position Adjustments in Brady Workstation or LabelMark's Print screen if you have to move the print more than just a small amount, if you have a very small label, or if you have data in the label close to the edges. Print Position adjustments in Labelmark and Brady Workstation will move the print as desired, but it also reduces the printable area by the same amount, and may result in print that is truncated, cut off. For print position adjustment best practices, see: Printing Adjustments - Best Practices & Troubleshooting
Related information


