The BBP12 can also be calibrated using the calibration option accessible from the printer's LCD screen menu: BBP12 - Printer Setup and Calibration.
- Run the diagnostic tool: BBP11/12 - Diagnostic Tool for the BBP11/12 printer.
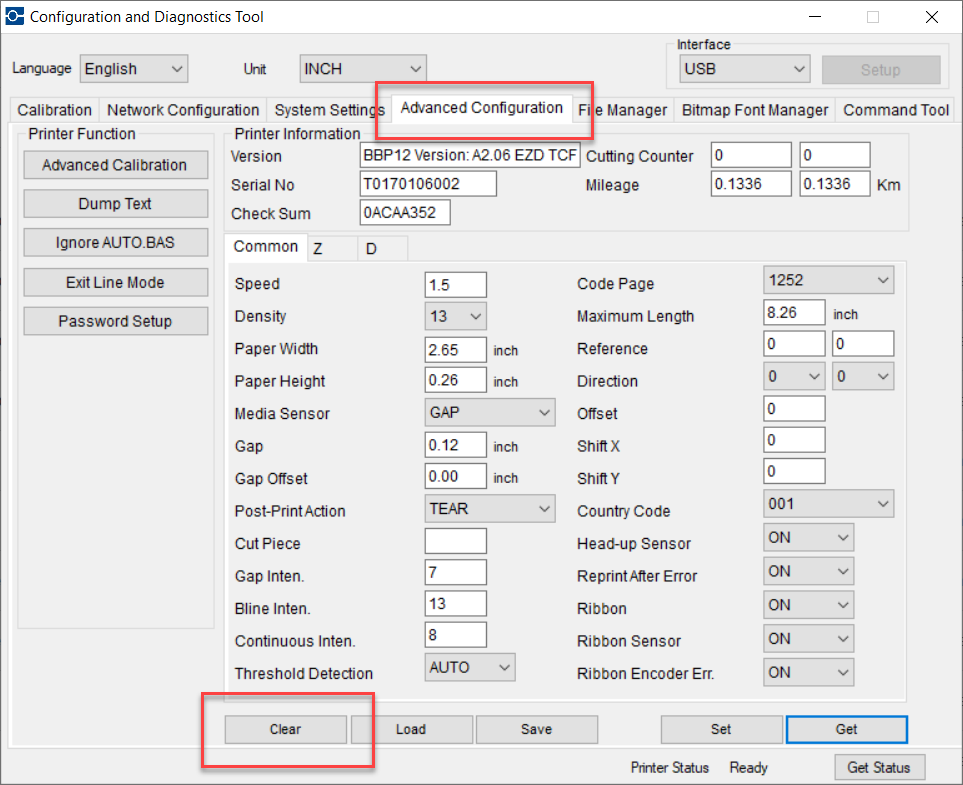
- Click on the Advanced Configuration tab, then click the Clear button.
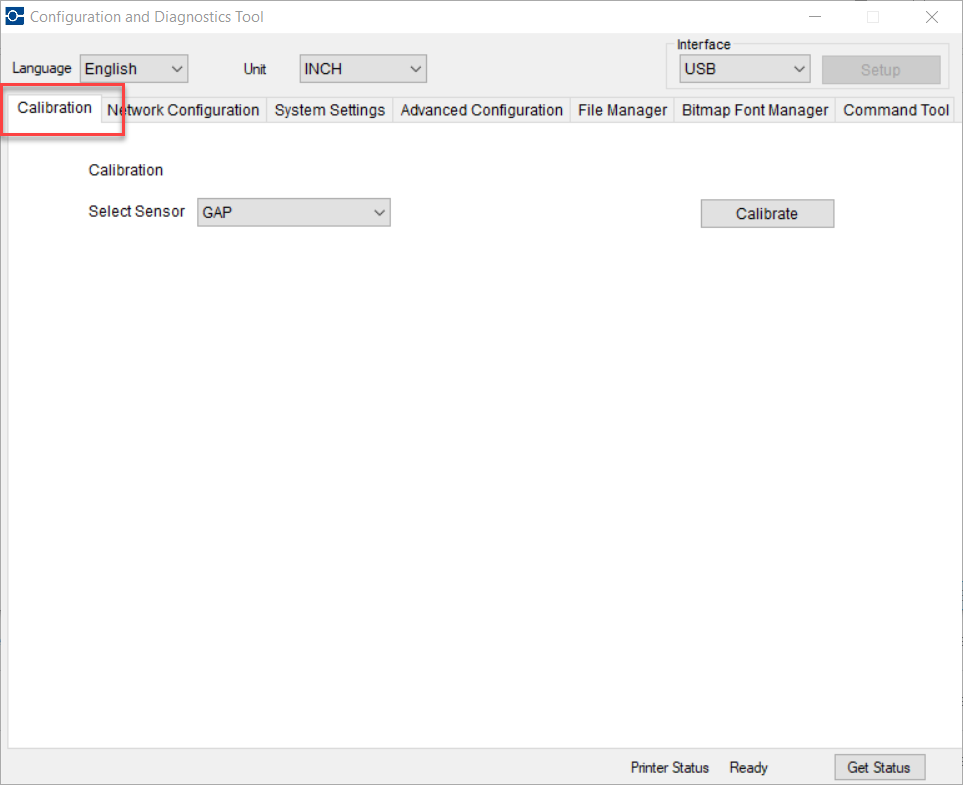
- Click the "Calibration" tab.
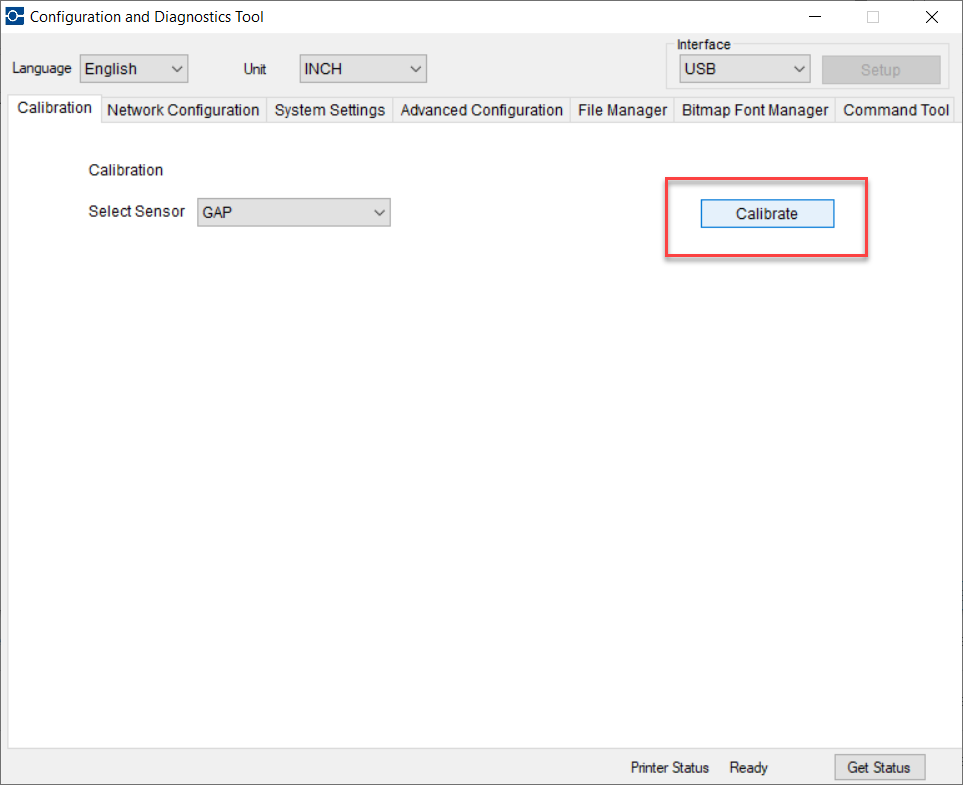
- Select the Media Type:
- "GAP" for die-cut labels without a notch
- "Black Mark" for die-cut labels with a notch
- "Continuous" for continuous label media
- If your labels have a notch, be sure to place the notch sensor in a position where it will see the notch (see images at end of article).
- Then click "Calibrate".
- As with any THT printer, to test calibration, press the feed button on the physical printer. Each time you press Feed, it should feed one label at a time, stopping at the exact same place each time.
How to Position the Notch Sensor on the BBP11 and BBP12
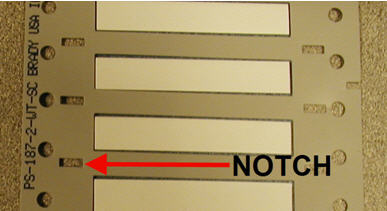
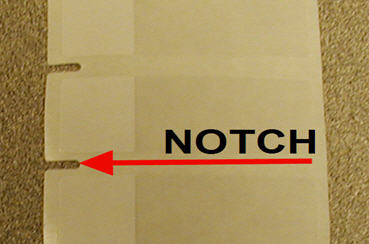
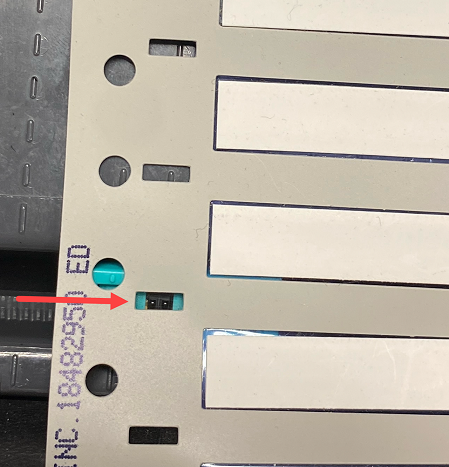
The notch sensor is the black rectangle. It is necessary to place this directly beneath the notches of the labels.
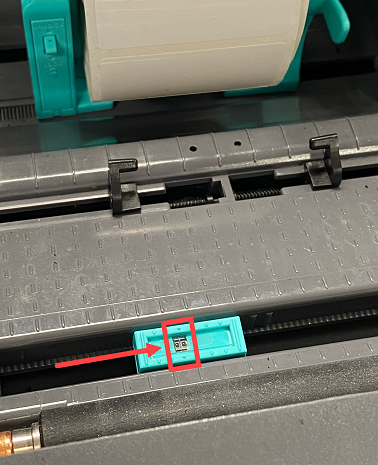
Example of notch in Permasleeve media (do not align sensor with the circular holes).
Example of notch in Self-Lam media
It is best to center the sensor in the middle of the notch as shown below. Notice that you can see a little bit of the green part of the sensor within the left and the right sides of the notch.
Related information


