Issues/SymptomsOver time driver clutter can occur on the Windows operating system. This can cause a variety of printing issues:
- An old or incorrect driver version is installed.
- Calibration issues caused by conflicting drivers.
- Print jobs get stuck in the print queue.
- Reset all driver settings to clear unknown changes.
- A driver was installed with insufficient permissions.
- A driver was installed for a Direct Print printer when using Brady Workstation: Brady Workstation - Direct Print Compatibility.
Summary of Steps
- Close Brady Workstation or LabelMark.
- Restart the Print Spooler.
- Disconnect the printer from the PC.
- Remove the driver from Devices and Printers.
- Delete the driver files using Print Server Properties.
- Reboot your PC.
- If issues continue, remove the printer and driver in Print Management.
Steps to Fully Remove a Printer DriverRestart the Print Spooler
- Close Brady Workstation or LabelMark.
- Go to the Start menu and enter Windows Services. Select the Services app.
- Select Print Spooler.
- Restart the Print Spooler.
Remove the Driver
- Disconnect your printer from your PC.
- Go to the Start Menu, type "Control Panel" and press enter on the keyboard.
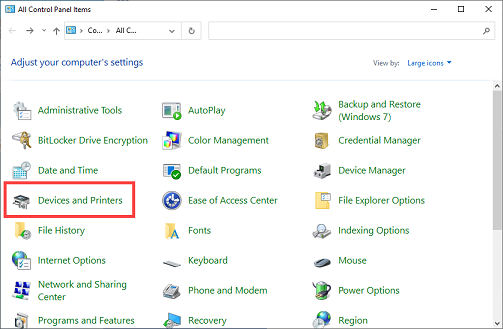
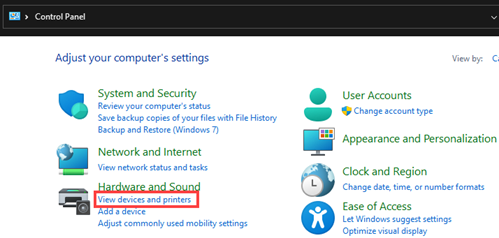
- Select Devices and Printers.
Windows 10 and prior
 Windows 11
- For Windows 11, select Printers & Scanners. For prior Windows Versions, proceed to step 10.
- For Windows 11, click the corresponding printer in the list.
- Remove the device:
- For Windows 10 and prior, right-click the driver you need to remove, select "Remove Device".
- For Windows 11, click Remove.
- Print Server Properties
- Windows 10 and prior: Select any other driver and then click Print Server Properties.
- Windows 11: Scroll to the bottom of Printers & Scanners and select Print server properties in the Related settings section.
- Select the Drivers tab. If necessary, click "Change Driver Settings", then select the driver to be removed.
- Select Remove.
- Choose Remove driver and driver package.
- If the popup appears with the printer model you are deleting, select Yes.
- Select Delete.
- If the driver removes successfully, reboot your PC. Do not skip this step. If it does NOT remove (file in use) go into Windows' Services and Restart the Print Spooler. Then Remove Driver Package again.
Note: You can also use the driver removal wizard from Seagull Scientific: Remove Drivers Using the Seagull Driver Removal Wizard. This will only work if the installed driver is a Seagull Scientific driver.
If you need to re-install the driver, search the knowledge base for your corresponding printer/driver and follow those instructions.
Print Management
- Go to the Start menu and enter Print Management.
- Click to expand All Printers.
- Select the printer from the list. If your printer is not listed, proceed to step 23.
- Under the printer name on the right side, select More Actions.
- Select Delete.
- Select Yes on the pop-up message.
- Select All Drivers under Custom Filters.
- Select the driver name for the printer, if listed. If the driver is not listed, it was successfully removed and no further steps need to be taken.
- Select More Actions.
- Select Remove Driver Package.
- Select OK on the pop-up message if the Driver was removed successfully.
Note: If there is an error message stating the driver is in use, verify that the printer or software is not open on the computer and try again.
Related information


