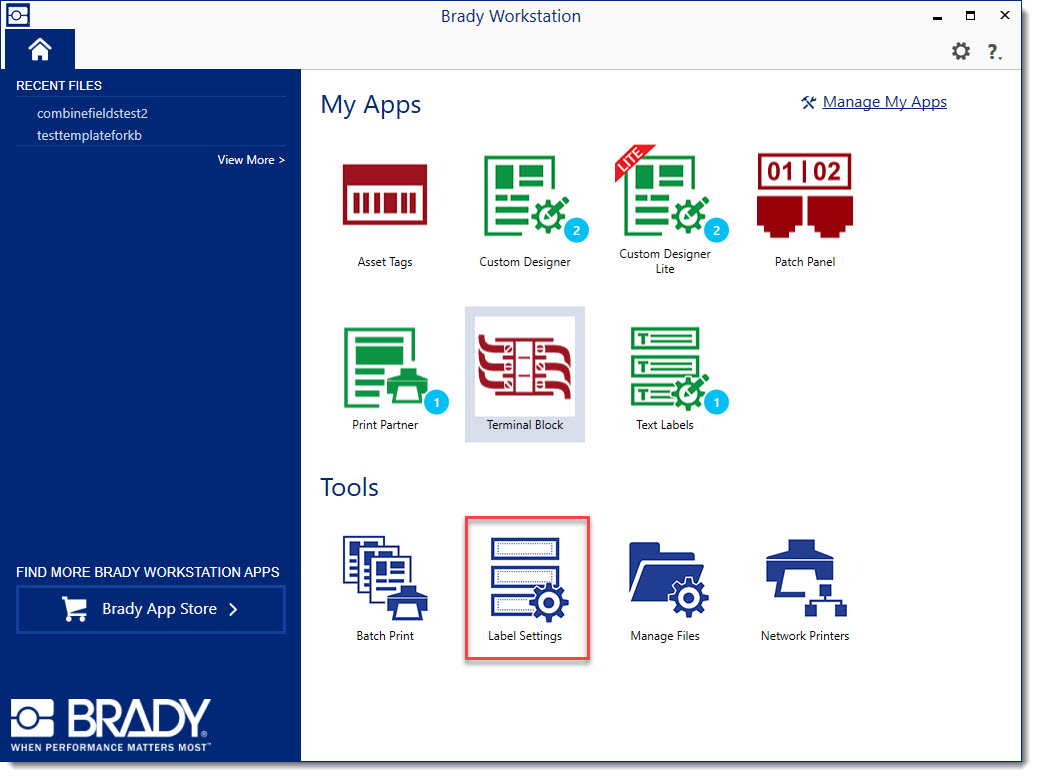
Body | Create a Printer-Part Pairing Offset in BWSPrinter-part pairings allow configuring a label part and offset that will be applied when a specific printer is used. This matches functionality offered in LabelMark 6. This allows the system to default to the assigned printer when printing a label on the designated part and designate specific offsets for each part on a specific printer.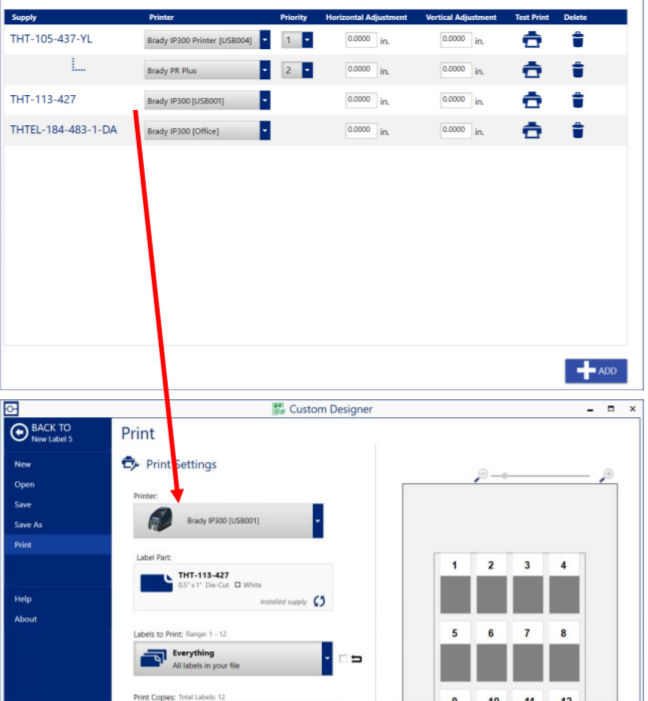 1. Launch Label Settings 1. Launch Label Settings
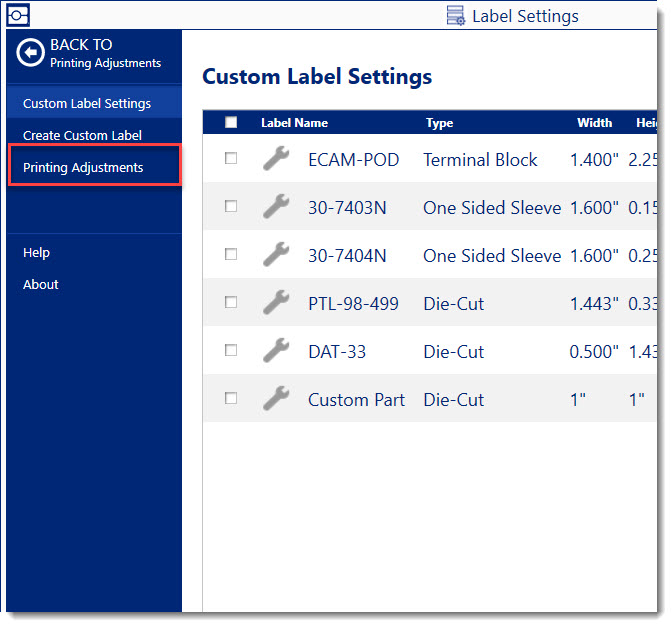
2. Choose Printing Adjustments
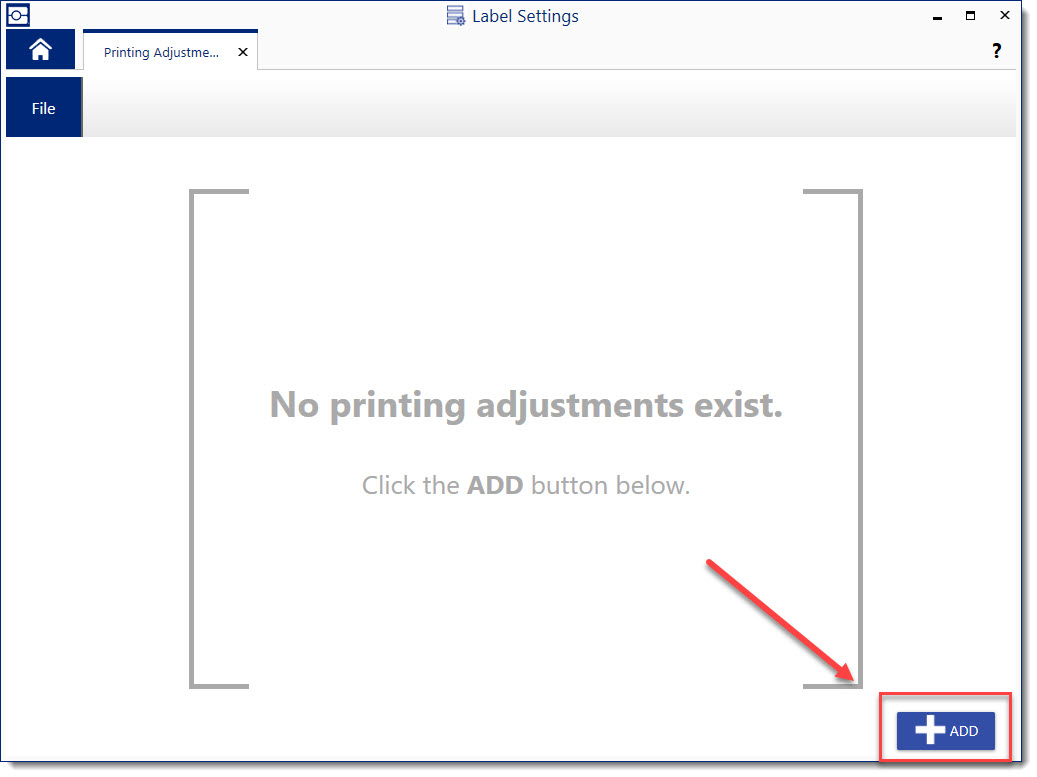
3. Click Add
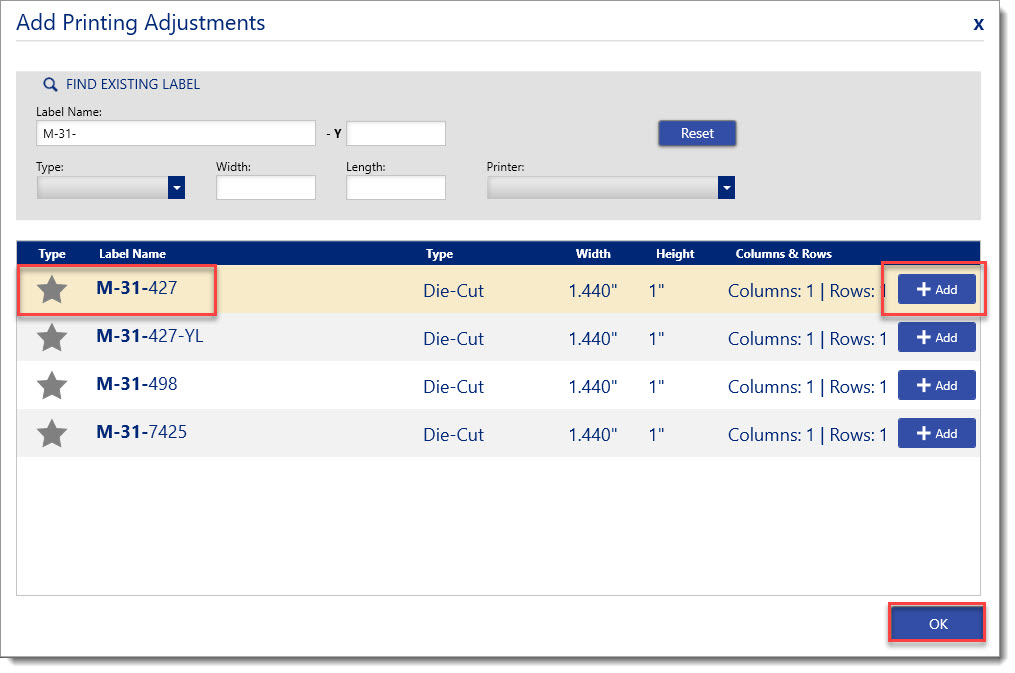
4. Click "Add" the specific part number of the label requiring offset settings, click OK
- Note: Make sure it is the exact part number you are using for your label file
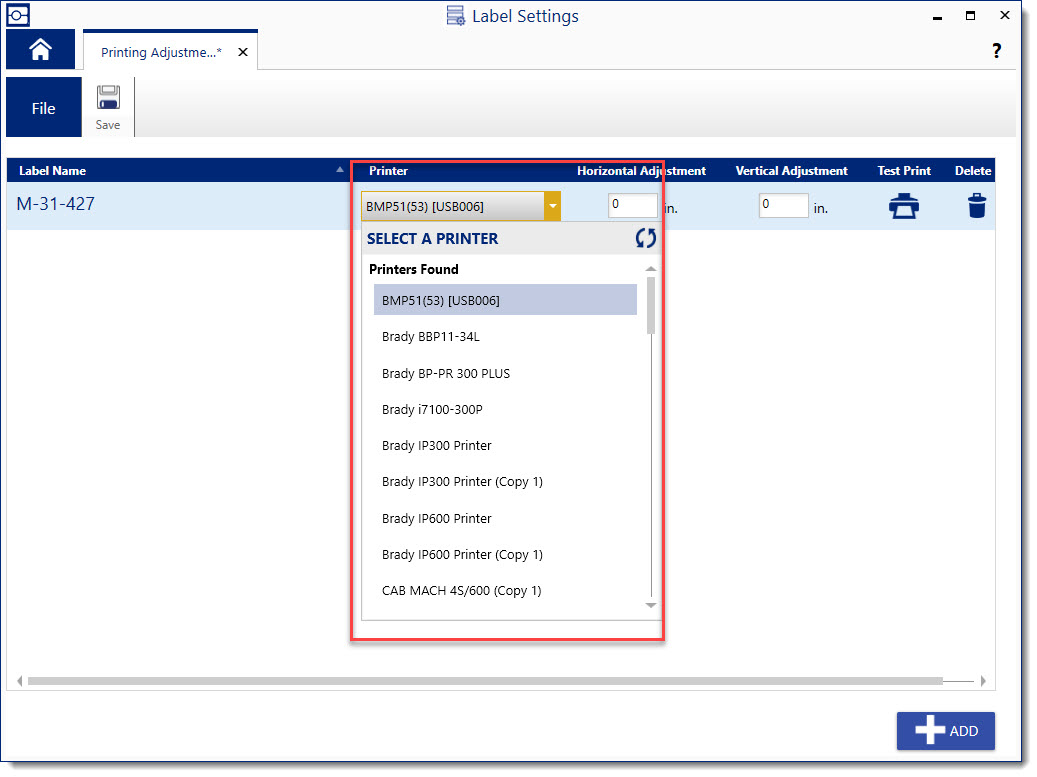
5. Choose the printer model that will be used when these offset settings apply
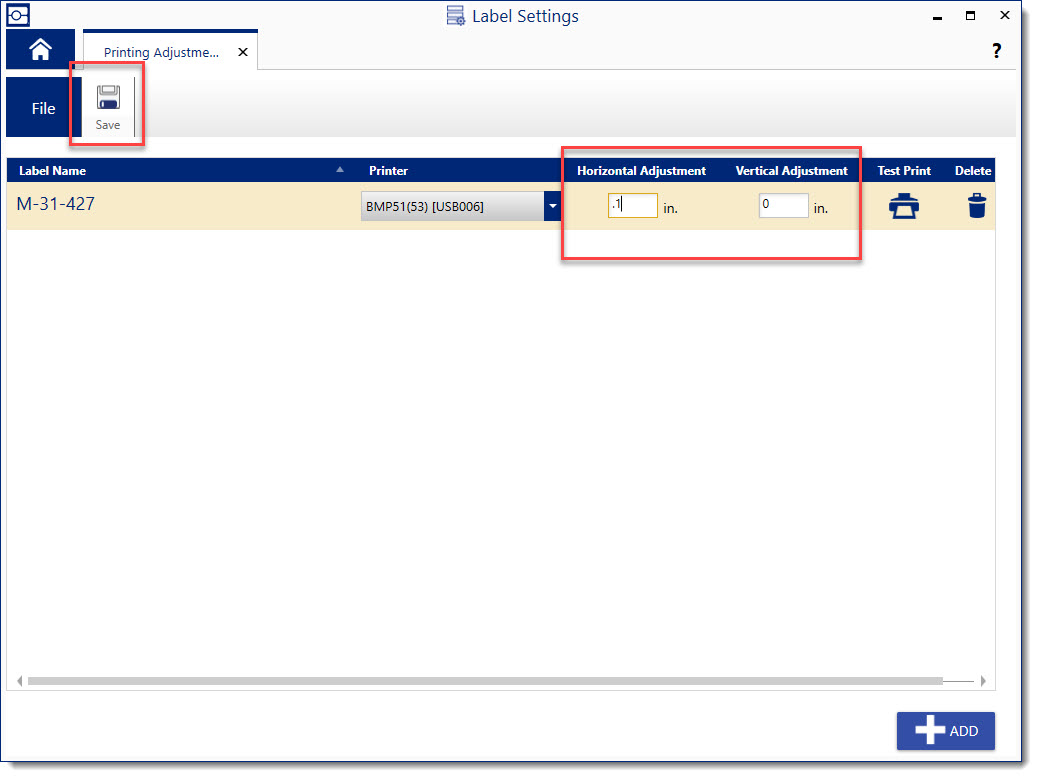
6. Enter adjustment settings and hit Save
- Positive Vertical = Down
- Negative Vertical = Up
- Positive Horizontal = Right
- Negative Horizontal = Left
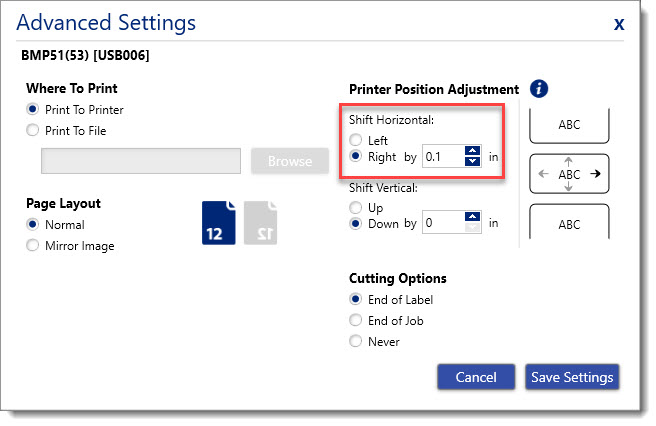
These settings will now be used every time this specific label is used with this specific printer. You can confirm this by creating a new label with this printer and label, go to Print Settings and see that the offset already exist in Advanced Settings.
 See Also See Also
|
|
|---|
