Body | Note: The September 2020 release (4.10.0.3) of BWS introduced a bug that causes apps to crash when printing labels with offsets configured using Label Settings (2nd method listed below). This has been resolved in the December release (4.11.0.3). If your software crashes when using a label file with a custom offset configured in Label Settings, update Brady Workstation: How to Update Brady Workstation Setting Print Offsets in Brady WorkstationPrint offsets can be adjusted in the Print menu for most Brady printers. Permanent adjustments can be applied in the Label Settings utility and by modifying the sizing and position of label objects. This can be useful if text is printing slightly too high, low, left or right. This article covers 3 separate methods for adjusting offset print, click the links below to jump to each method.
1. Make a Temporary Adjustment from the Print Menu
2. Make a Permanent Adjustment for a Specific Label and Printer
3. Modify the Positioning of Label Objects
Make a Temporary Adjustment from the Print Menu
These adjustments allow you to make print position correction on the fly, these adjustments will not save after you close the software. Use this option to test different values, then apply the best offset values in Label Settings.
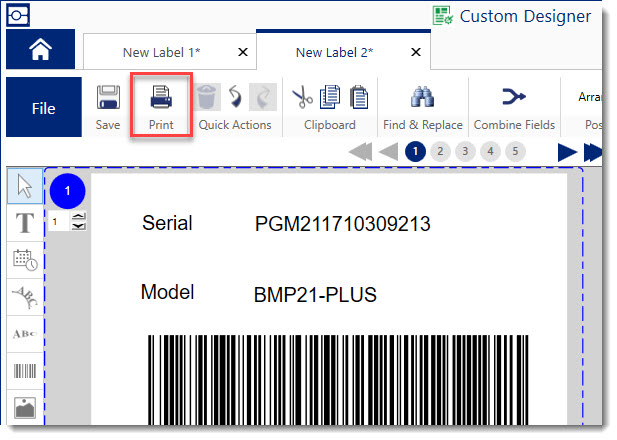
1. Click Print to get to the Print Settings menu
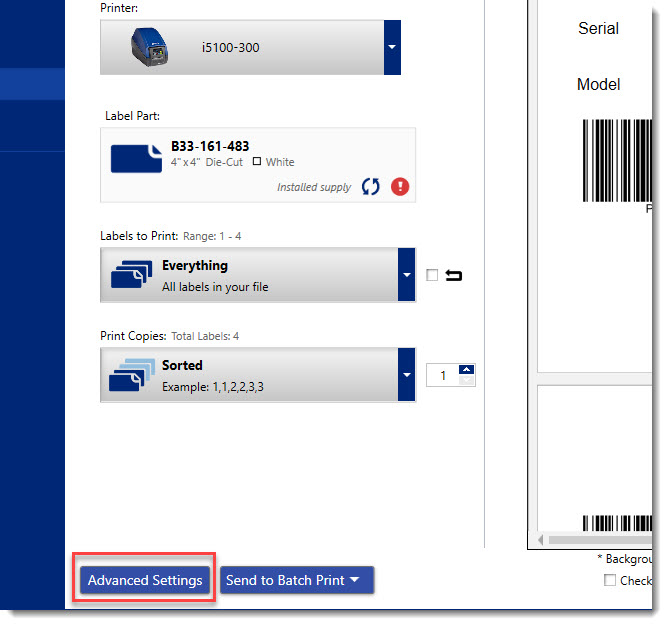
2. Click Advanced Settings
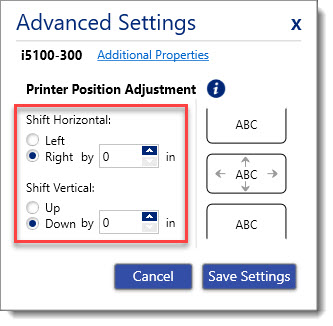
3. Apply offset adjustments
- Note: You may need to do some guess and check to find the best offset settings. Make a small adjustment, test printing, repeat until print position is satisfactory.
 Make a Permanent Adjustment for a Specific Label and Printer Make a Permanent Adjustment for a Specific Label and Printer
Print adjustments made in Label Settings will save, these adjustments will apply every time you open the software and print using the specified label and printer. We recommend using the option detailed above in Print Settings to first determine appropriate offset settings.
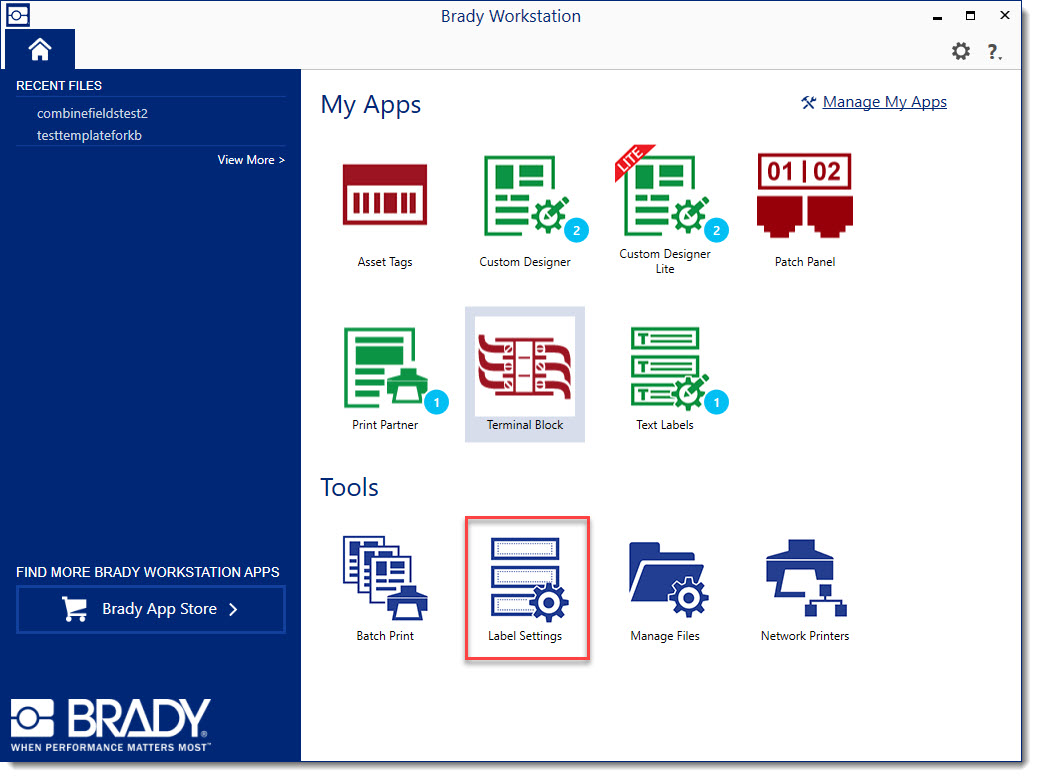
1. Launch Label Settings
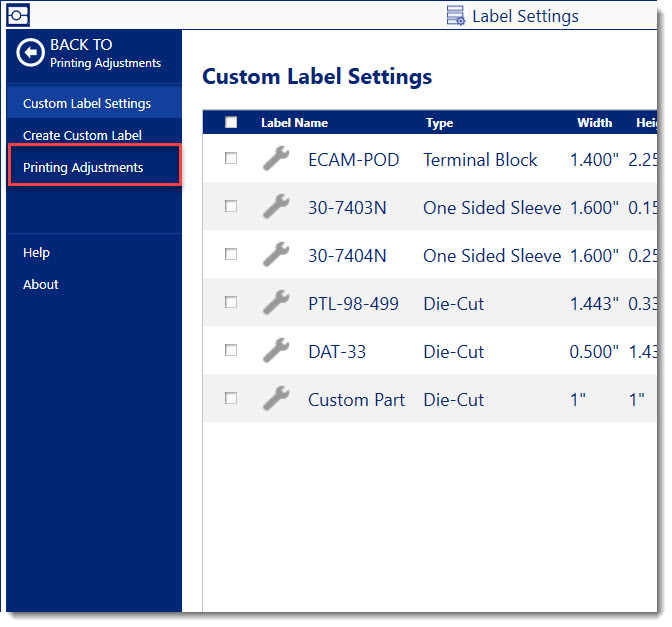
 2. Choose Printing Adjustments 2. Choose Printing Adjustments
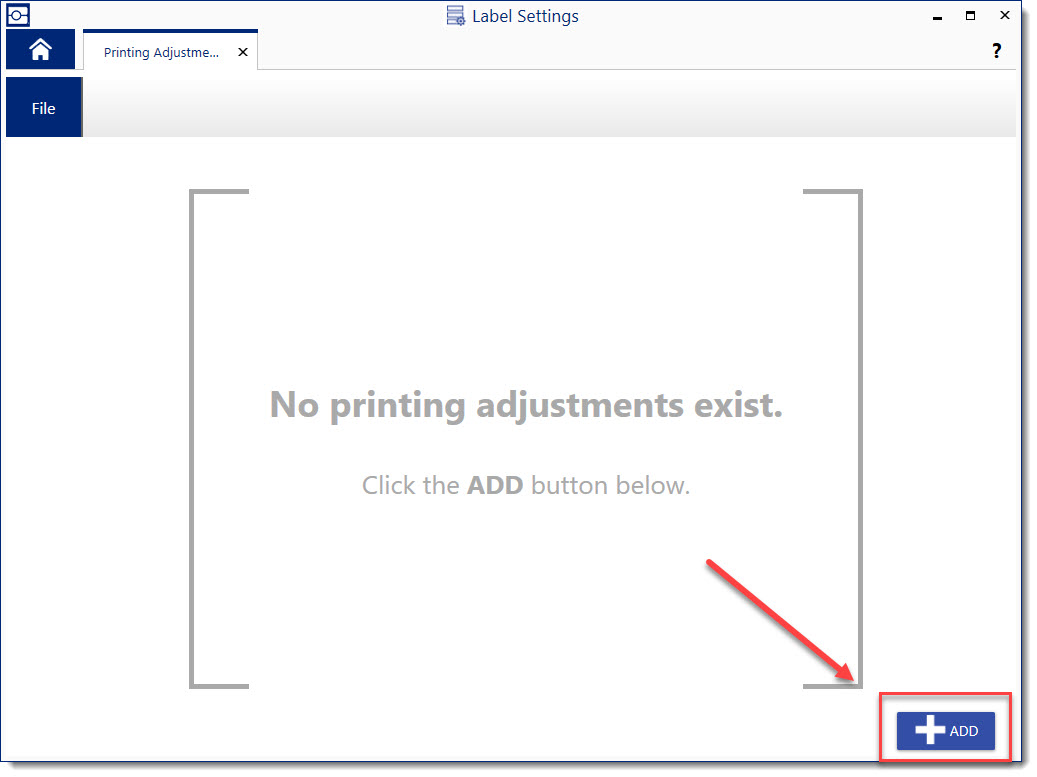
3. Click Add
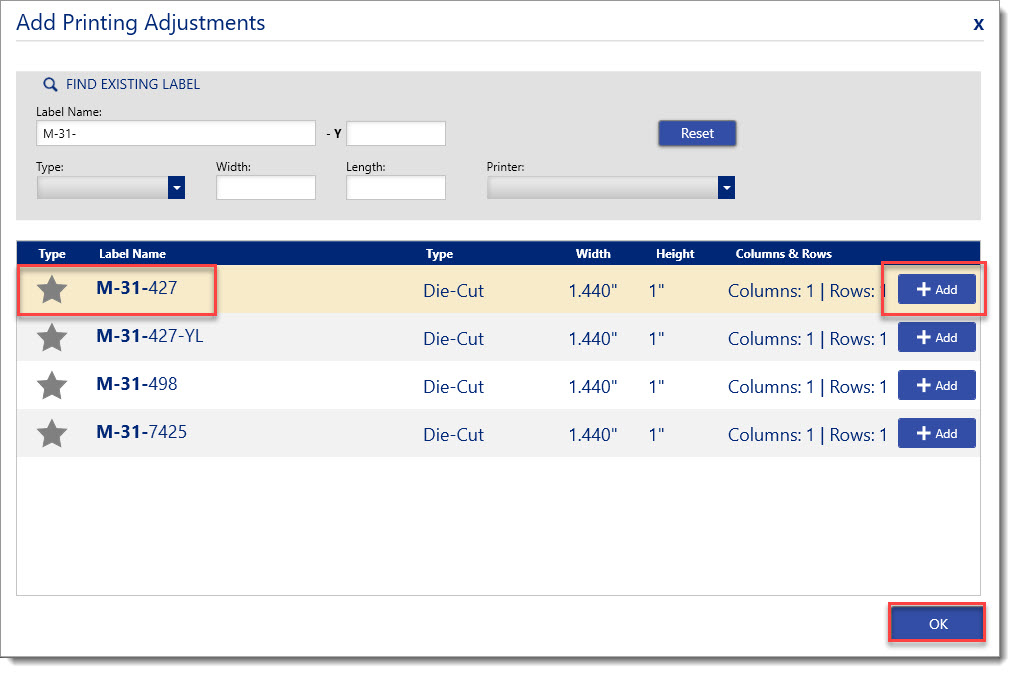
4. Click "Add" the specific part number of the label requiring offset settings, click OK
- Note: Make sure it is the exact part number you are using for your label file
5. Choose the printer model that will be used when these offset settings apply
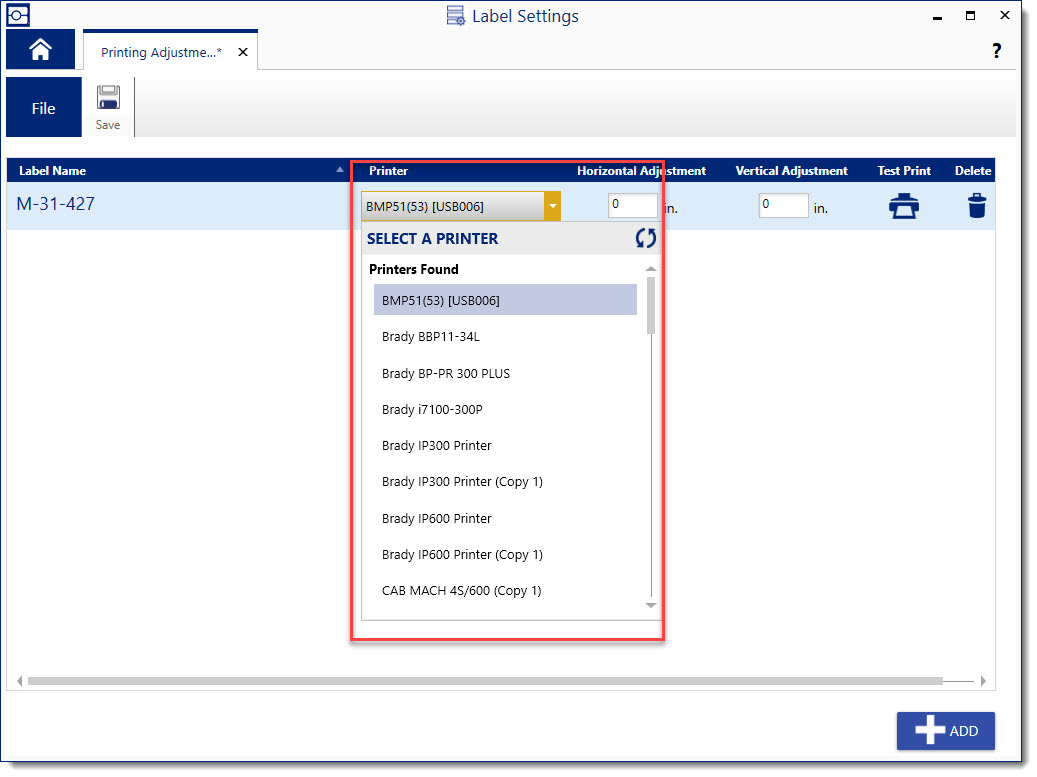
6. Enter adjustment settings and hit Save
- Positive Vertical = Down
- Negative Vertical = Up
- Positive Horizontal = Right
- Negative Horizontal = Left
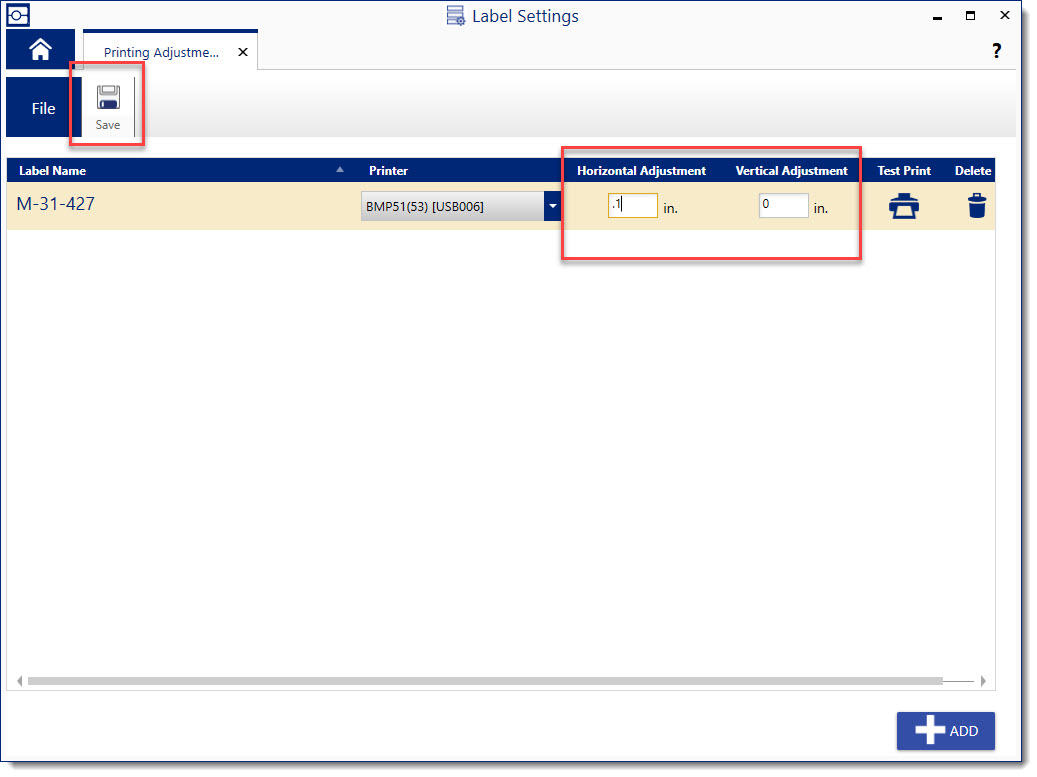 These settings will now be used every time this specific label is used with this specific printer. You can confirm this by creating a new label with this printer and label, go to Print Settings and see that the offset already exist in Advanced Settings. These settings will now be used every time this specific label is used with this specific printer. You can confirm this by creating a new label with this printer and label, go to Print Settings and see that the offset already exist in Advanced Settings. 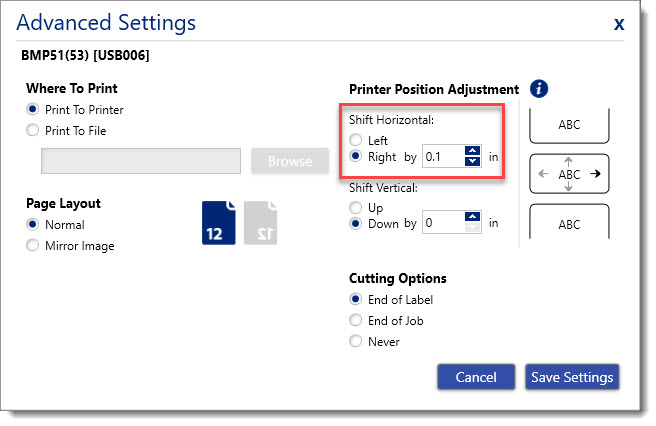 Modify the Positioning of Label Objects Modify the Positioning of Label Objects
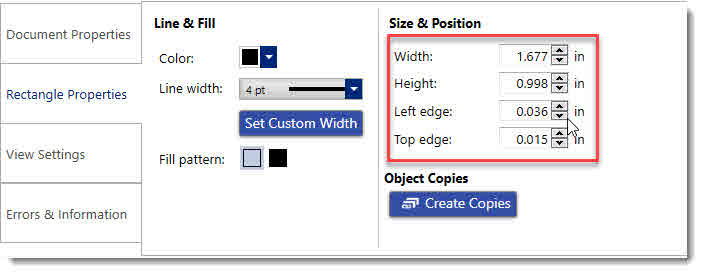
You can modify the properties of label objects. This is useful if content is not printing to a desired alignment. For example, some parts may have a non-printable area programmed into the parts database.
1. Select the object in the label editing screen and choose the properties menu
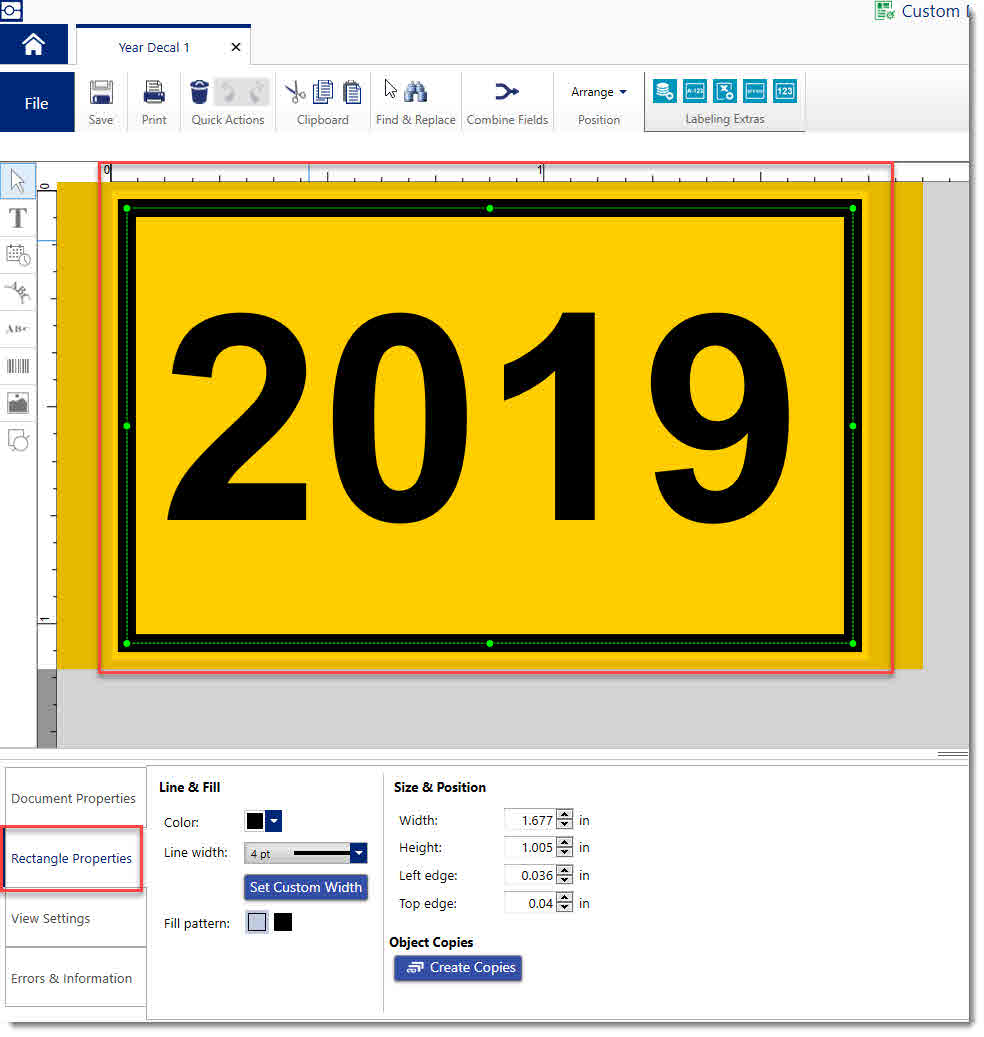
2. Modify the positioning until the object is positioned as desired.
 |
|
|---|


