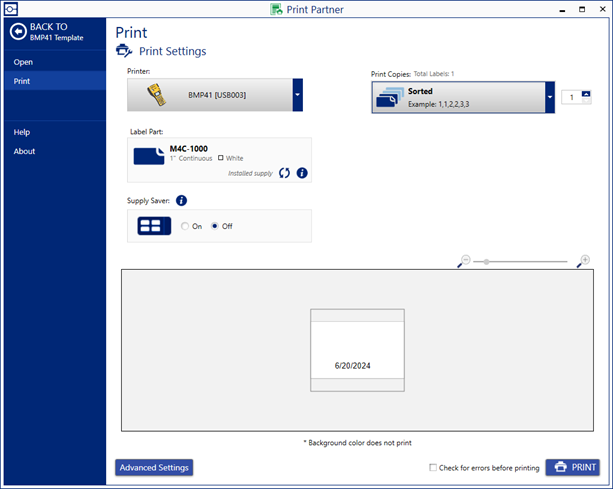
Print from Print Partner
Print labels after opening your template, entering information, or importing your data, Print Partner - Import Microsoft Excel data. Refer to Brady Workstation - Create a Template for information on creating the template.
- Press the Print icon.


- Confirm the correct printer is selected.
- Choose Supply Saver On or Off: Supply Saver in Brady Workstation.
- Designate copies of labels and how they will be grouped when printed.
- Confirm the preview screen represents the labels you expect to print
- Select Advanced Settings to adjust other settings, including the Cutting Options.
Note: Advanced Settings is only available when a printer is connected to the computer. The Advanced Settings option may appear different depending on the printer that is connected to the computer.
- Select Print.
Note: You can check for errors before printing if the checkbox is selected at the bottom of the software.
Related information


