Body | Printing Energy Source Labels from Link360 Cloud to the J2000How is the J2000 Different from other supported models?
The J2000 is an inkjet printer, this means specific labels and ribbons are not require to print certain colors. This printer is also not restricted to pre-printed media for printing labels with signal words (warning, danger, etc), and can also print multiple energy source labels at once. Reference this article for a full list of Brady printer models that support printing Energy Source Labels from Link360 Cloud: Link360 Cloud - Requirements for Printing Energy Source Labels
Printer Configuration1. Install the Driver: How to Install the J2000 Driver
2. Set the print density to 95 within the driver settings.
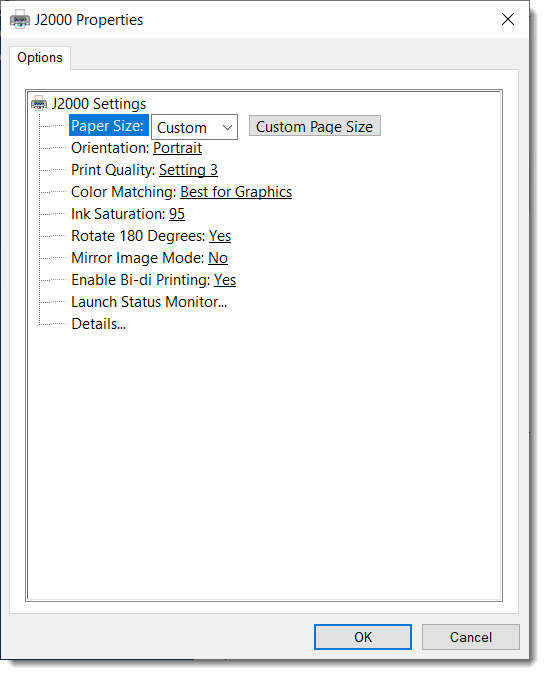
3. Set a cutter offset of -55 in the J2000 status monitor: J2000 - Adjusting Label Offsets
- Note: This setting will need to be modified if you swap between printing energy source labels and lockout tags.
Choosing Energy Source Labels for Printing in Link360 Cloud
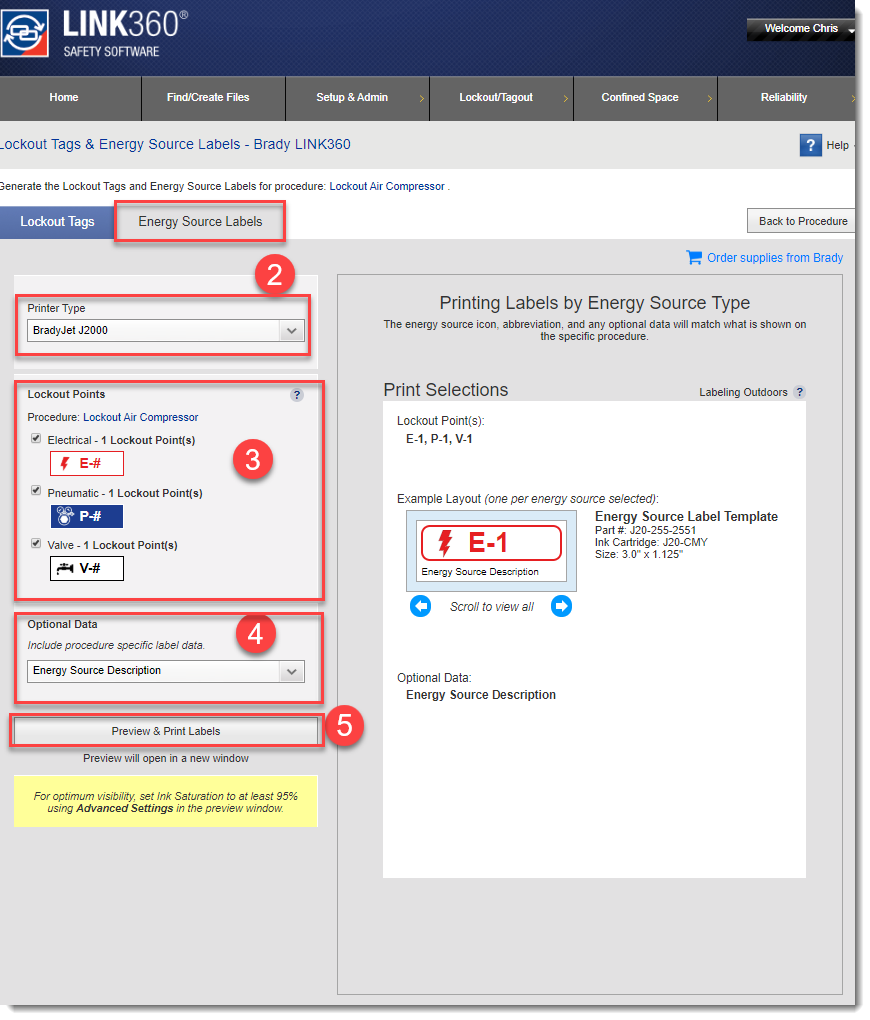
1. With your procedure open, select Print Tags and Labels from the right-side tool bar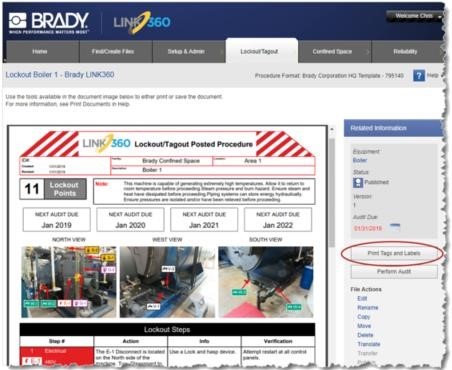 2. Select the Energy Source Labels tab and choose the J2000 model printer (if this option isn't displayed then make sure you installed the driver). 2. Select the Energy Source Labels tab and choose the J2000 model printer (if this option isn't displayed then make sure you installed the driver).
3. Choose labels to print for each lockout point.
4. Select Optional Data as needed. You are limited to selecting one option and it will appear on the label in the lower left corner.
5. Click Preview & Print Tags option in the lower section of the screen.
 Install the Brady Print Service (Only required on first use)The first time this feature is used, Brady Print Service must be installed and once installed this will not be required in the future: Install the Brady Print Service (Only required on first use)The first time this feature is used, Brady Print Service must be installed and once installed this will not be required in the future:
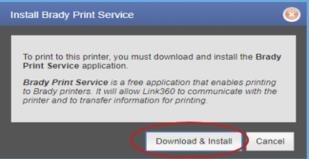
1. Select Download & Install (your local IT department may need to do this if you are blocked from downloading)
2. Run the downloaded file to install the software
3. Close the window that indicates the installation is complete
4. Return to the LINK360 browser tab: Lockout Tags & Energy Source Labels. You can now close the Brady Print Service tab.
5. Select Preview & Print Tags on the lower section of the screen
6. Open the Brady Print Service when prompted Printer Settings Options
1. A red exclamation will appear if you have not configured a -55 offset as shown in the first section of this article.
2. Preview and confirm labels to be printed
3. Click Print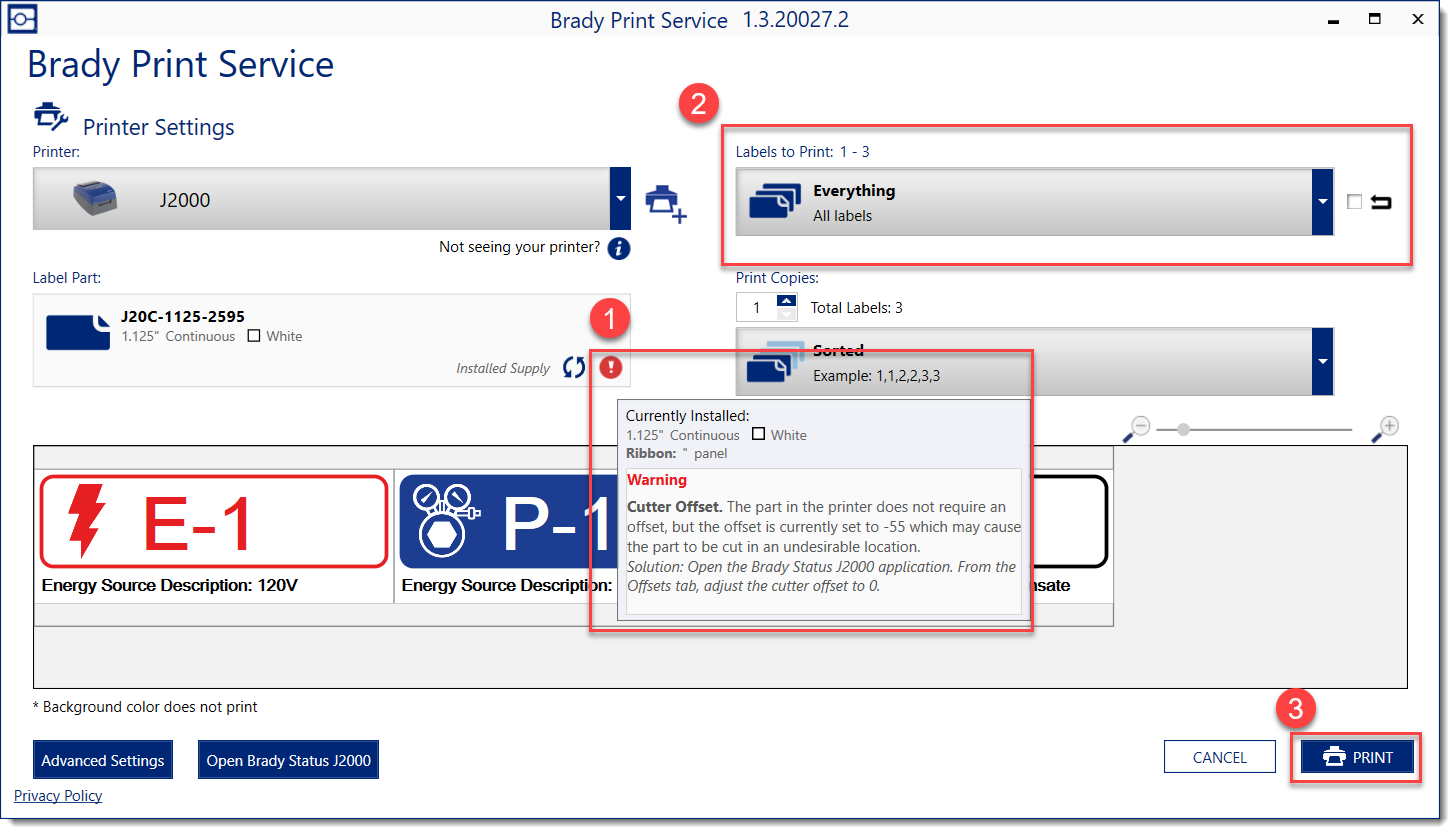 |
|
|---|
