Adjust Cut Settings for Printing Standalone
NOTE: This will only work with monochrome labels. Multi-colored / paneled ribbons will disable this feature: Why Is "Cut At End of Job" Unavailable for Color Multi Panel Ribbons?
Also, when printing from a PC, if the print quantity is just 1, this setting will not be enabled. Once you enter a number in Copies that is greater than one, Cut At End of Job is available for selection.
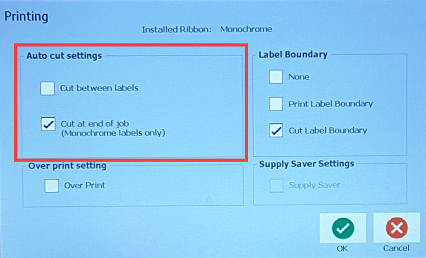
- Select Menu.
- Select Setup in the menu.
- Select Printing.
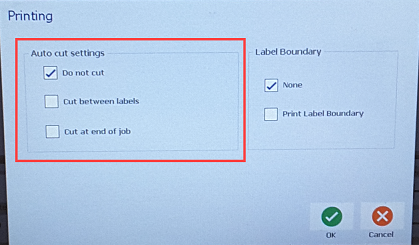
- Select Cut between labels to cut after each label prints or Cut at end of job to cut when all of the labels have printed under Auto cut settings.
 The BBP31 / S3100 will have an option of Do not cut under Auto Cut Settings.
- Select OK.
Set Cut Settings in the Driver (Not using Brady Workstation)
- Go to Control Panel.
- Select Devices and Printers.
- Right-click your printer and select Printer Properties.
- Select Preferences.
- Select Advanced.
- Select Custom Settings and Properties.
- Select your Cutter Option to cut at the end of the label or at the end of the job.
Note: End of Job is only available for monochrome labels.


