Issue
Error 92 - XY Cutter Jammed appears on the printer.
Resolution
Clean the XY Cutter following the instructions below.
Clean the XY Cutter Blade
- Remove power and media from the printer.
- Open the cover of the printer.
- Unscrew the thumbscrew of the XY cutter module.
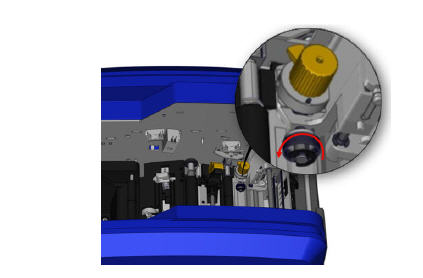
- Lift the cutter module from the carriage.
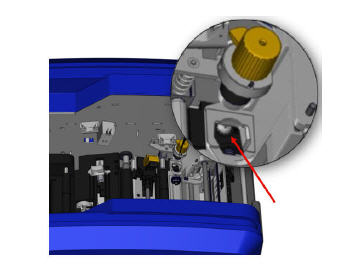
- Using a cotton swab moistened with the Isopropyl alcohol, clean off any dust from the area where the blade sticks out.
Cleaning Upper Guide and Cut Pad
- Using a magnetic screwdriver (so screws do not drop into the printer) remove the upper guide screw.
- To remove the upper guide, gently loosen the unscrewed end of the upper guide, then swing the guide out from under the XY cutter carriage.
- Use a moistened wipe from the cleaning kit to clean the upper guide.
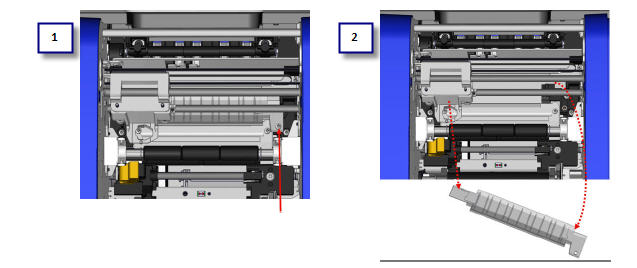
- Remove the cut pad screws.
- Gently pull up on the tab to loosen the cut pad, then swing the cut pad out from underneath the XY cutter carriage to remove it.
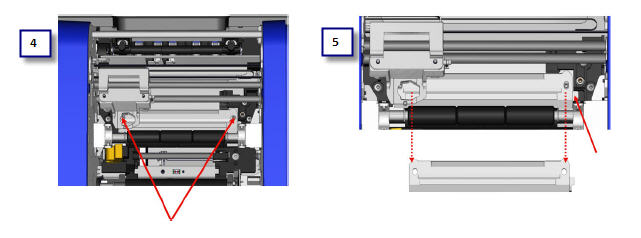
- Use a moistened wipe from the cleaning kit to clean the cut pad.
Re-install the Cut Pad and Upper Guide
- Tuck the left edge of the cut pad underneath the cutter module carriage, then swing the right edge back into place, lining up the holes for the screws.
- Re-insert the two screws into the aligned holes and tighten.
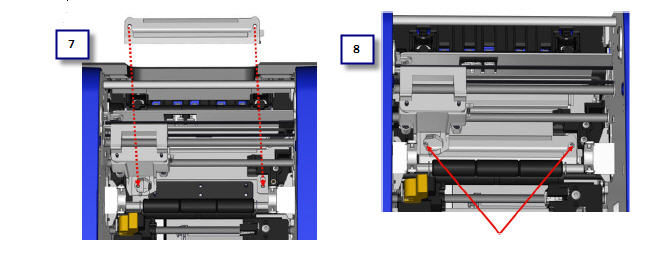
- Tuck the left edge of the upper guide underneath the cutter module carriage, on top of the cut pad, aligning the hole on the right side with the empty screw hole.
- Replace the upper guide screw into the screw hole and tighten.
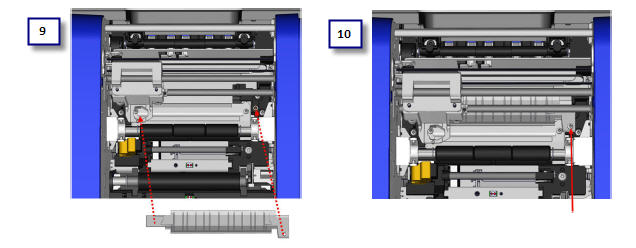
Re-install the Cutter Module
- Replace the cutter module by placing the flat surface of the collar against the carriage, then inserting the cutter module into the carriage.
- Insert the thumbscrew in the hole on the side of the cutter module carriage and tighten until it clicks.
If there is no jam, but you receive this error code, it could mean the media present sensor is dusty and cannot sense the movement of material.
Cleaning the Sensors
Some sensors on the printer are susceptible to dust that results from cutting or printing. These sensors located under two media guides. The media guides can be removed to display the
sensors.
- First, remove the media from the printer.
- Loosen the screw on the two left media guides, then carefully lift the media guide up to expose the sensors underneath.
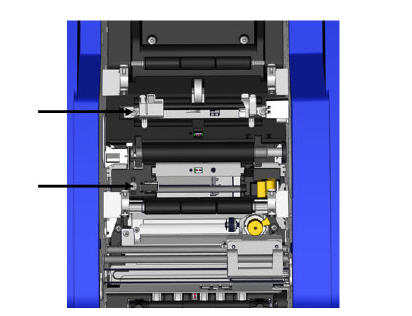
- Using a pre-moistened foam swab, gently insert the swab under the media guides and wipe the surface of the sensors. Do not allow the alcohol to drip from the swab.
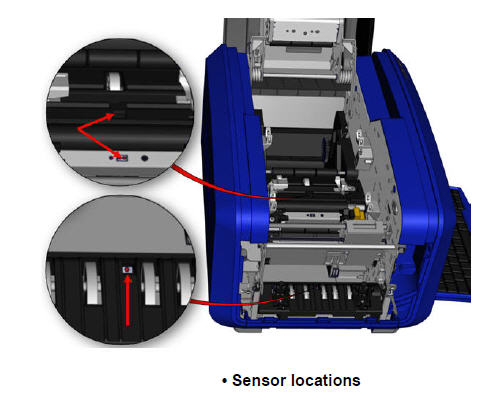
- Clean the other three sensors indicated in Figure above.
- After cleaning the sensors, carefully lower the media guide, then tighten the screw.
- Wipe the two other sensors in the media feed path. (Outlined in the figure above.)
- Also, wipe the sensor under the cutting mechanism in the media exit chute. (Outlined in the figure above.)
If the error persists, contact Brady Technical Support for further troubleshooting: Global Brady Technical Support Contact Information.
Related information


