What you will need:
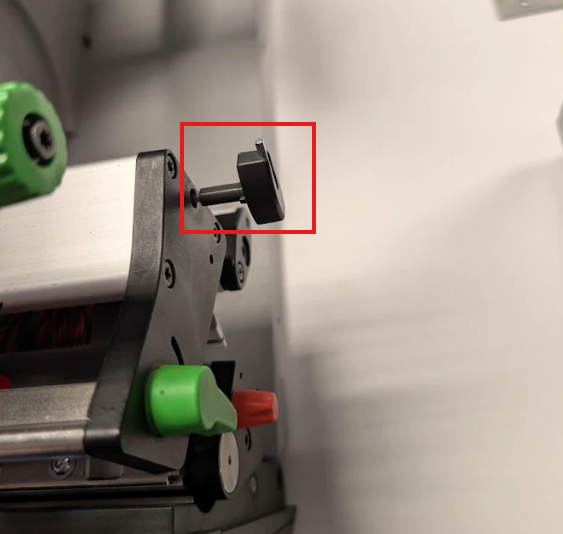
The only tool you will need to install the guillotine cutter is the Allen wrench provided on the interior of the printer:
Installing the Guillotine Cutter
- Power off the printer by flipping the power switch on the back.
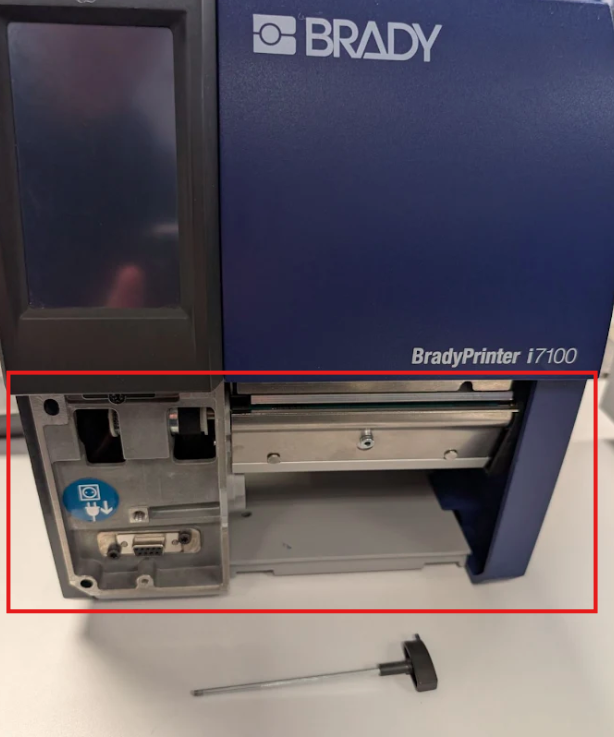
- Remove the printer's front cover, or any accessories such as the peel plate, auto-cutter, or perforation cutter. Most accessories can be removed by unscrewing the front panel screw.

The front of your printer should appear like so:
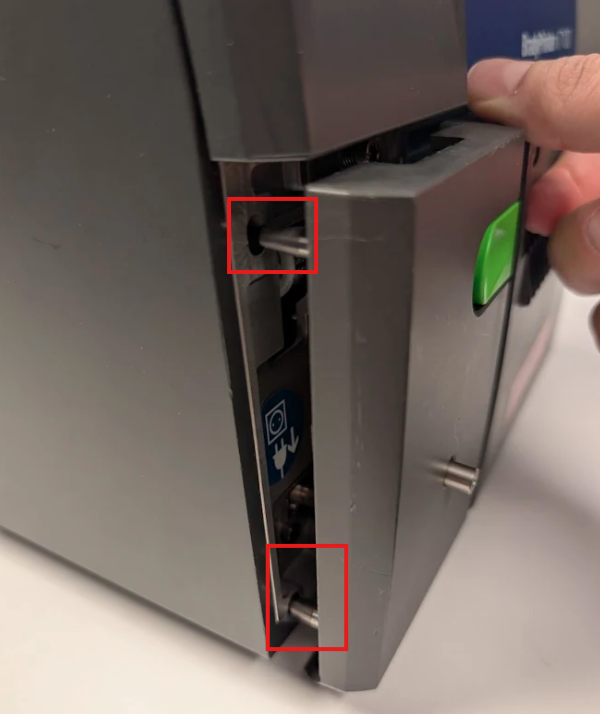
- To attach the guillotine cutter, line up the two insertion pins on the left side of the cutter with the slots shown below:
- To secure the cutter into place, use the Allen wrench to tighten the screw in the front of the cutter panel:

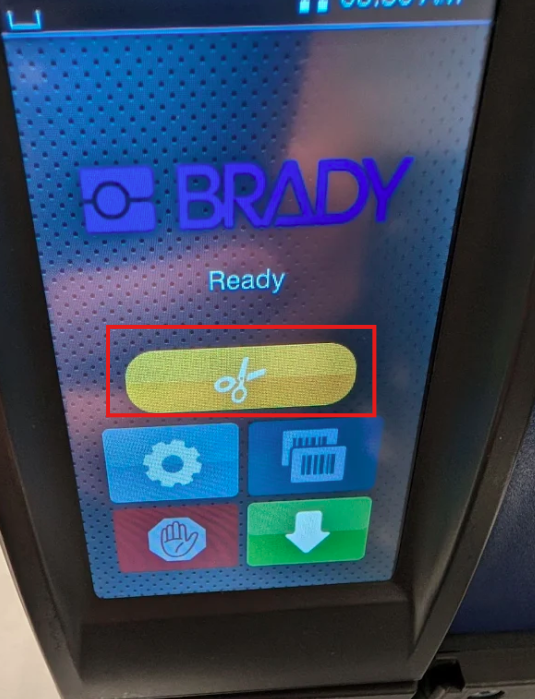
- To verify the cutter has been installed properly, power on the printer. You should notice a yellow button with a scissors icon on the front of the display:
Installing the Cutter Tray

- Hook the cutter tray box (3) with the fixing brackets into the recesses (1) on the mounted cutter.
- Slide the divider (4) according to the label height into the corresponding groove in the cutter tray box. This ensures a correct tacking of the cut labels.
Note: Unlike the standard cutter accessory, the heavy guillotine cutter requires printer firmware version 5.33 or higher. The peel/tear bar must also be installed while using this cutter, or the printer will throw an error.
The guillotine cutter also has it's own firmware that can be upgraded separately from the printer's firmware. To view the cutter's firmware version: i7100 - How to View and Upgrade the Firmware
See Also

