If there is an extra label at the end of the print job, download and install the most recent driver to fix this issue:
These instructions assume you are working with a completely unmodified driver. If you have made driver changes during previous troubleshooting, make sure you revert all of those changes before attempting these steps. You can also complete remove and reinstall the driver to be certain no settings have been modified: Printer Drivers - Full Driver Removal. Note: This setting may cause the printer to feed one extra blank label or sleeve before cutting at the end of the print job.
Configure Cut At End of Job
- On your PC, go to Control Panel.
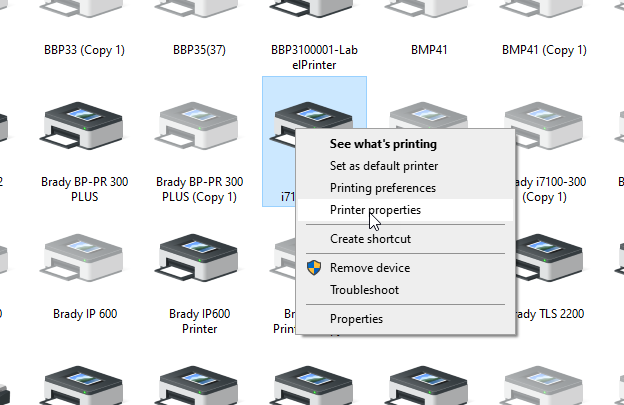
- Right click on the printer and Select Printer Properties.
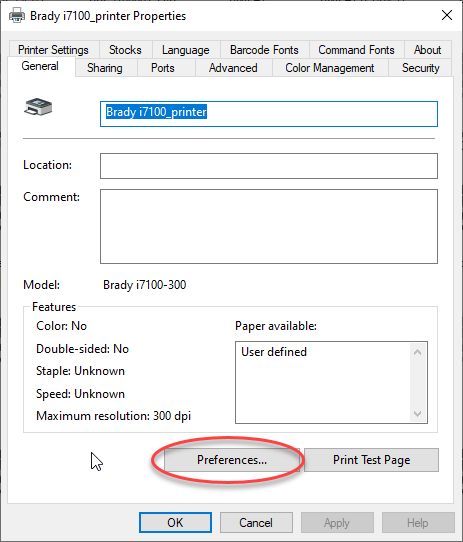
- From the General tab of the printer driver properties, click on " Printing Preferences... "
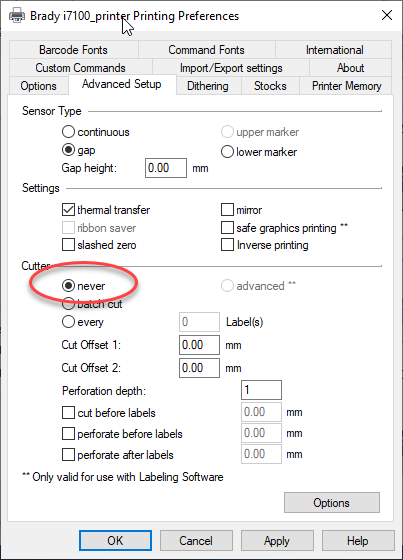
- Click on the " Advanced Setup " tab.
- Select the " Never " radio button under Cutter and click Apply.
- Click on the " Custom Commands " tab.
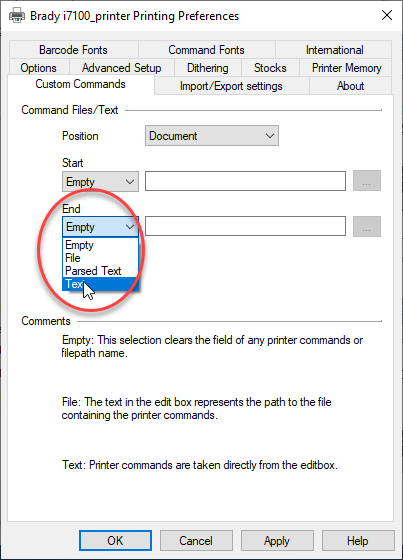
- Set the Position to Document.
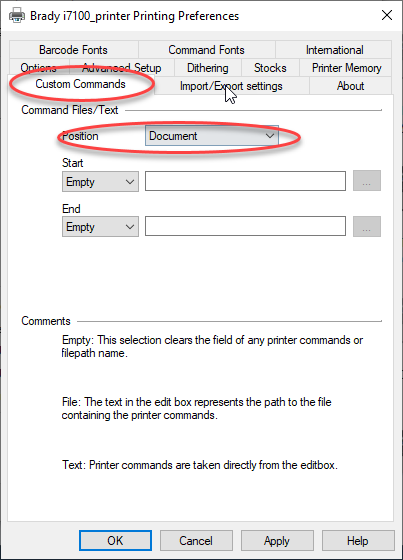
- Set the Start to Empty.
- Set the End to Text.
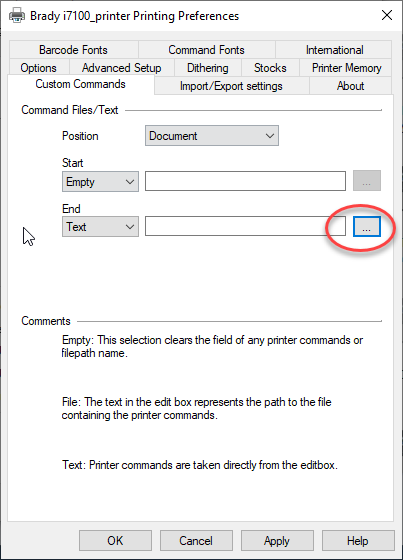
- Click on the ... button to the right of the End to reveal the Custom Command Text window.
- Type a lower case letter c and hit the enter key on your keyboard to bring the cursor below the c.
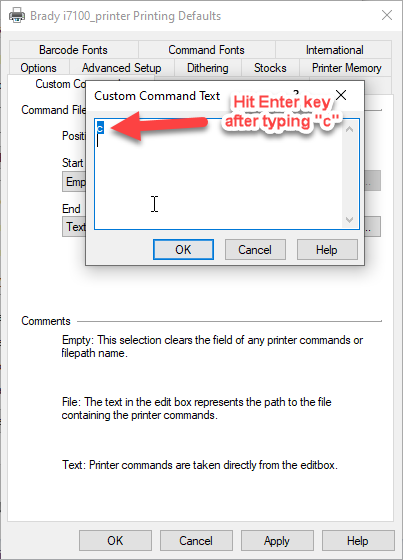
- Click OK. Restart the software and test printing.
Now the printer will cut at the end of each job instead of between every label.
Note: This setting may cause the printer to feed one extra blank label or sleeve before cutting at the end of the print job.
Related information


