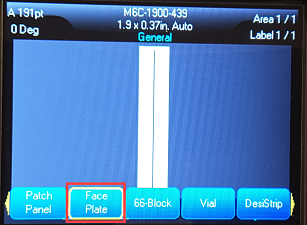
Create a Face Plate or Terminal Block, Patch Panel, and 66-Block LabelFace Plate labels are designed to be used with continuous label supply. The label type will not display in the menu if continuous labels are not installed. To maintain correct spacing or add to the label prior to cutting, you can choose to disable feeding to cut after printing.
- Press Label Type.
- Use the navigation arrows to Face Plate and press Enter
 .
.

- If you want a sequence, select Serialize to place a check mark in the option box. If you will manually enter data, leave the box empty.
- In the Distance (in.) Center to Center field for Face Plate or Terminal Repeat field for Terminal Block/Patch Panel/66-Block, indicate the size of the gap between each terminal (with a minimum of 0.2 inches).
- In the Number of Ports field for Face Plate or Number of Terminals for Terminal Block/Patch Panel/66-Block, enter the number of ports for which the label is intended. This field is not available if you selected Serialize. In that case the sequence values determine how many labels to create.
- When No Feed is selected, additional information can be added to the label after printing. Press the PRINT key to keep printing the same information, otherwise enter new text and press PRINT again. Press the FEED key to cut the label.
- In the Separator list, select None, Line or Tic to mark the division between labels.
- In the Orientation list, select either Vertical or Horizontal. See above.
- When finished, navigate to OK and press Enter.
- If the Serialize option box is checked, the settings screen for sequences displays.
The number of terminal blocks are created as labels with the serialization characters displayed on each label.
- If serialization was not used, the editor opens on label 1. Enter data for each label.
Note: Labels can be added or deleted if serialization was not used.
- Press FN + PREVIEW to view the labels before printing.


