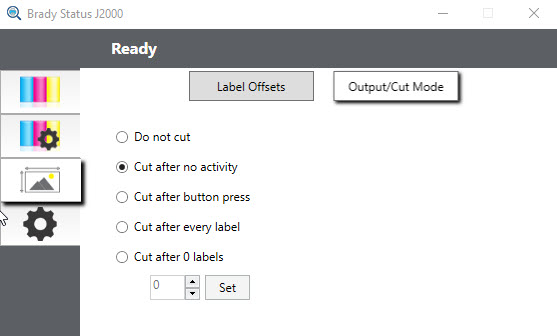
Change the Output/Cut ModeUse the output/cut mode to adjust how the printer presents labels after they are printed or if/when they are cut after printing.

- Connect the printer to the computer via USB and turn on the power.
The output/cut mode setting is stored on the printer main board so you will not be able to access it unless the printer is turned on and properly communicating with the computer.
- Open the Brady Status J2000 Status Monitor on your computer.
- Click on the Offsets Tab (third tab from top).
- Click on the Output/Cut Mode button.
- Select the radio button for one of the options to change your Cut Mode.
Do not cut
The label stays in the same position after printing.
Cut after no activity
This setting will cut at the end of a print job if the printer does not receive another print job within one second of the last print job in the queue. You can use this feature to cut at the end of a multi-copy job, multi-page job or multiple individual jobs in the queue.
This setting will be the most similar to 'Cut at End of Job' as seen on other Brady printers.
Cut after button press
This setting will cut after you press the load/feed button on the printer. This
can be used after one label or an entire job. This feature is useful if you will not be present at the end of the print to catch the cut label.
Cut every label
This setting will cut after every label.
Cut after specified number of labels
This option will cut after the number of labels specified in the "Cut After Labels" setting above. Change the value and then click "Set" to send it to the printer.
Related information


