This article provides instructions add the i3300 to a network using a hardline ethernet connection. See this article for adding the i3300 to a wireless network: How to Connect the i3300 to a Wireless Network.
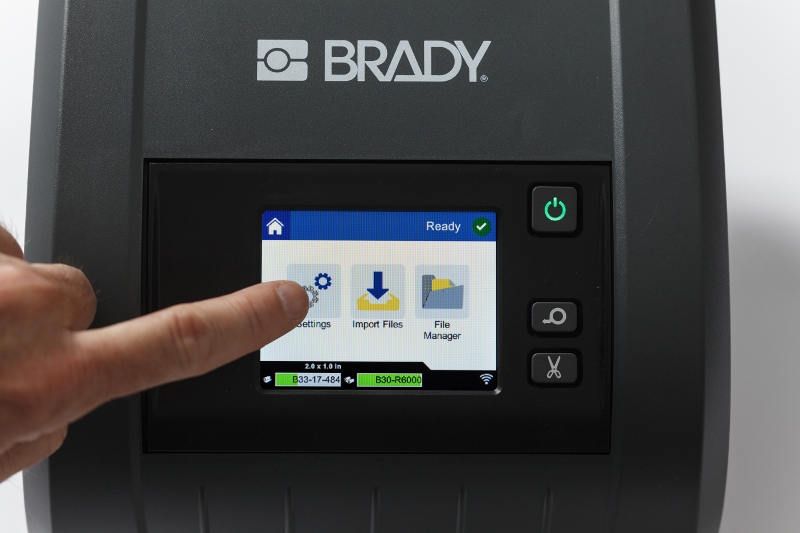
- On the Home screen, tap Settings.
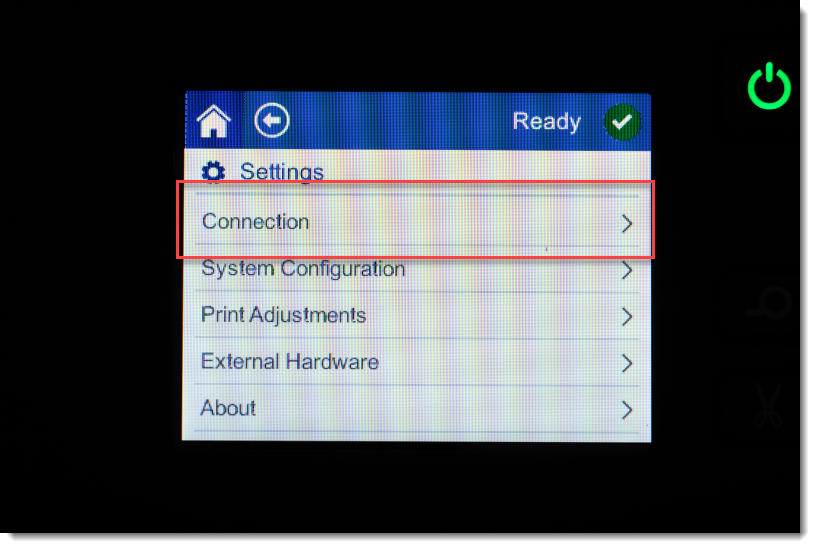
- On the Settings screen, select Connection.
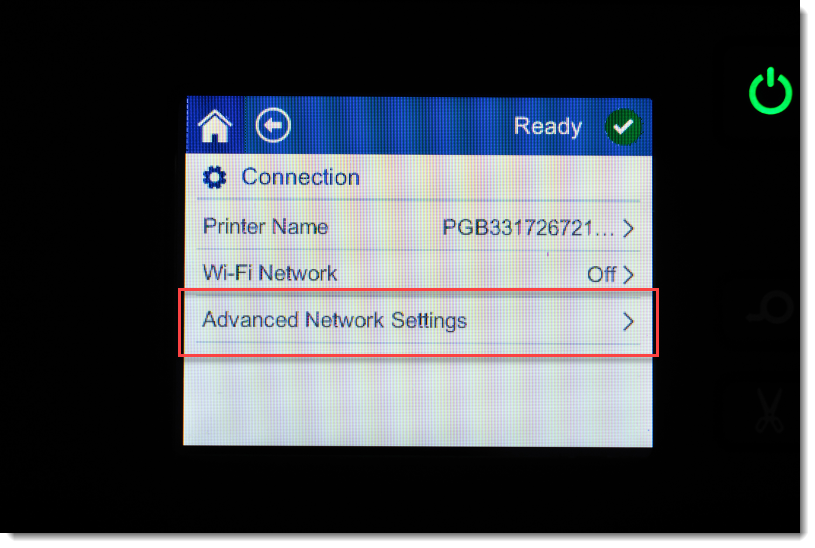
- Select Advanced Network Settings on the Connection screen.
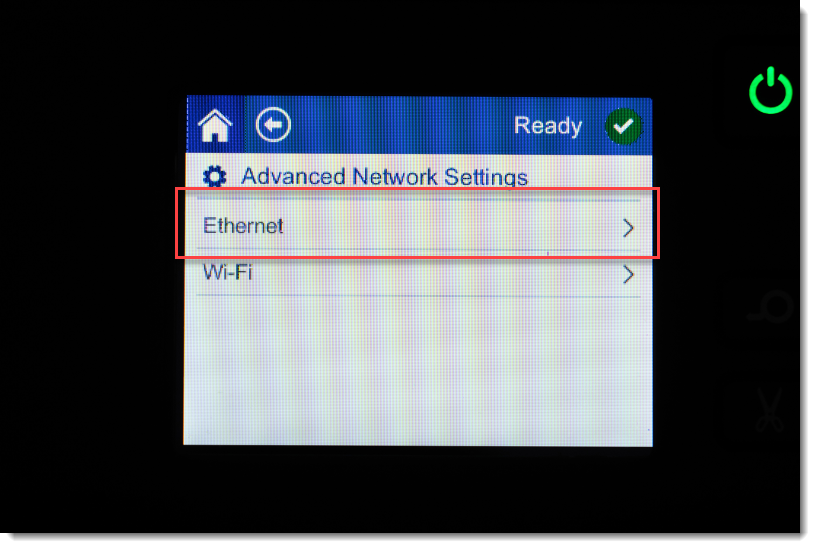
- Touch Ethernet.
Note: Select Wi-Fi to manually connect a wireless network using an IP address.
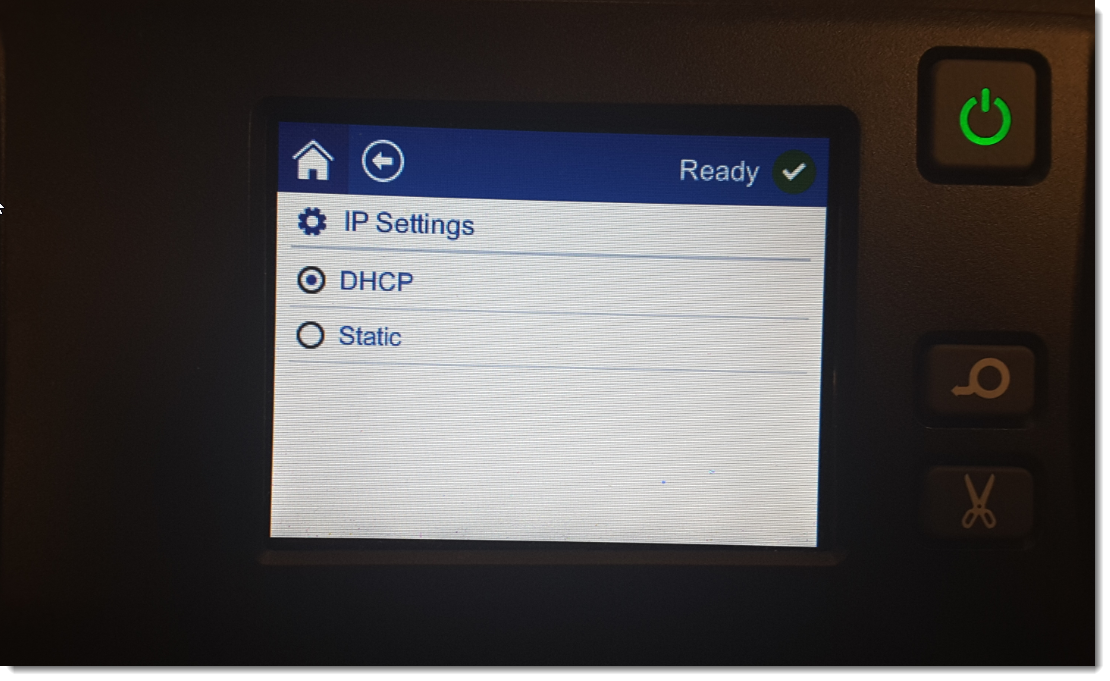
- Choose IP Settings.
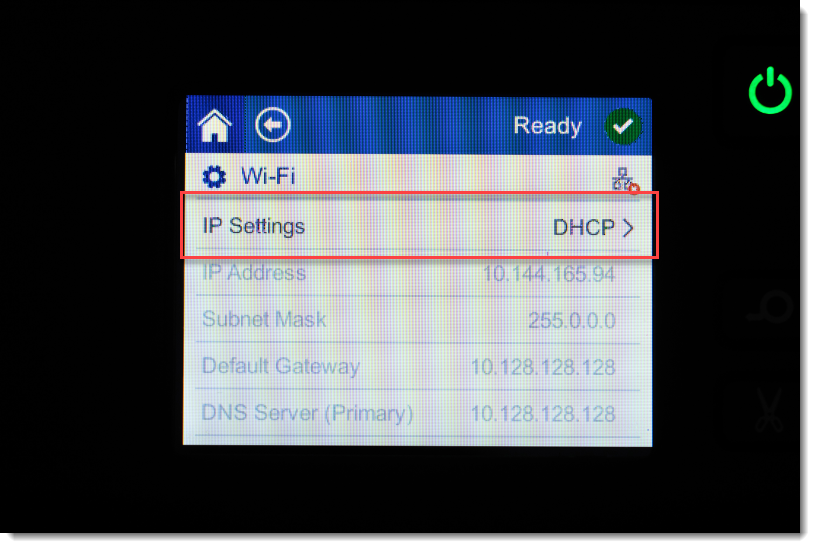
- For IP Settings, select either the DHCP or Static checkbox.
-
- DHCP: DHCP addressing is dynamic and the system uses a DNS server to obtain the printer IP address for you.
- Static: For static addressing, you must manually configure the printer's IP address.
- If Static was selected, fill in the following fields:
-
- IP Address: Enter the printer’s IP address.
- Subnet Mask: Enter a subnet mask if you are using one.
- Default Gateway: Enter the IP address of the default gateway.
- DNS Server (Primary): Enter the IP address of the primary DNS server.
- DNS Server (Secondary): Enter the IP address of the secondary DNS server.
IMPORTANT! If no DNS server is being used, enter 0.0.0.0

- Tap on the back button to get to the Advanced Network Settings screen in order for the fields entered to take effect.
Note: The LED lights on the ethernet port may flash orange and green, an orange light is not necessarily an indication of connection failure. See this article to troubleshoot printer-PC connectivity issues: Unable to Print from Software - Troubleshooting Driver Communication Issues.
Next Steps
Additional configuration may be required from the PC side.

