Networking the S3100 (Hardline)
This article covers networking the S3100 for a hardline connection. To connect the S3100 to Wifi see: How to Connect the S3100 to a Wireless Network
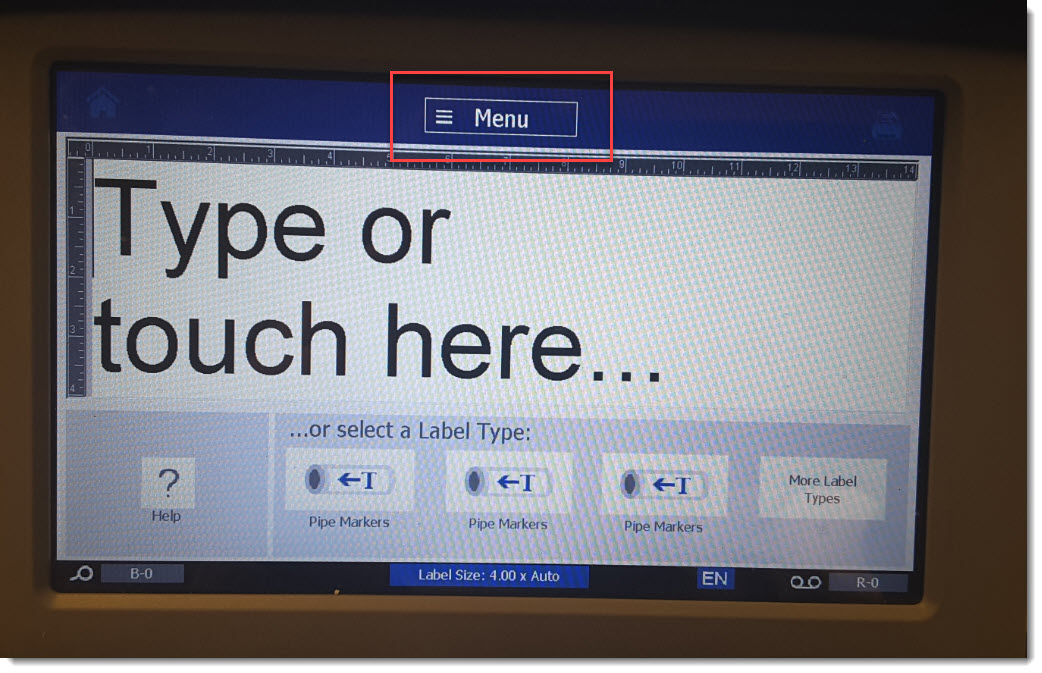
1. Touch Menu.
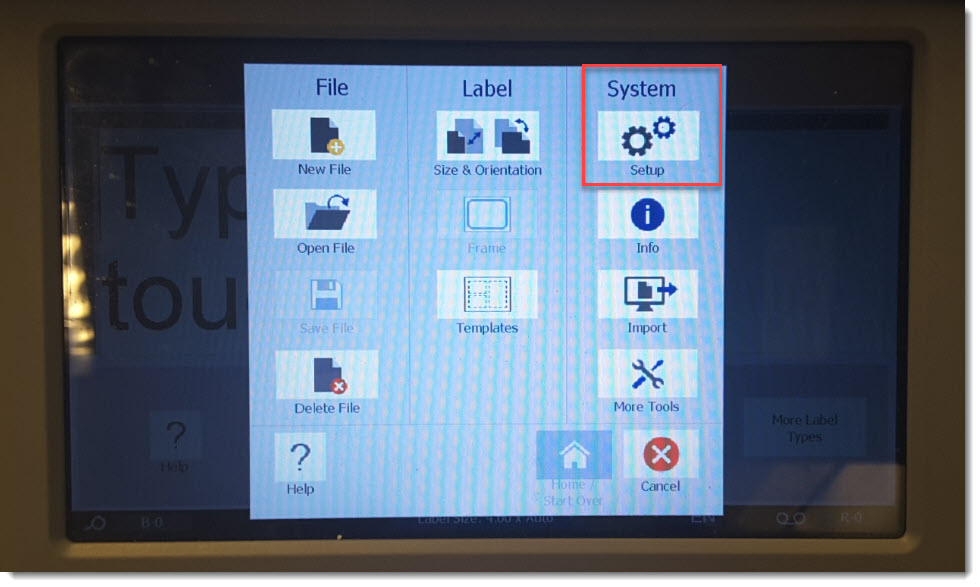
2. Select Setup.
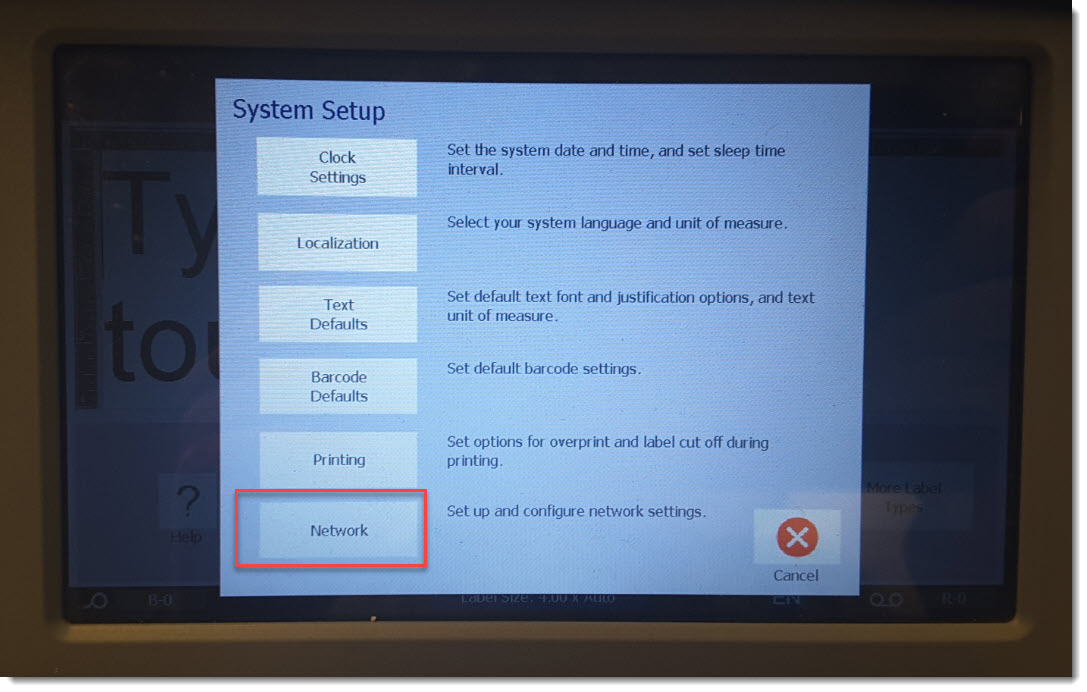
3. Select Network.
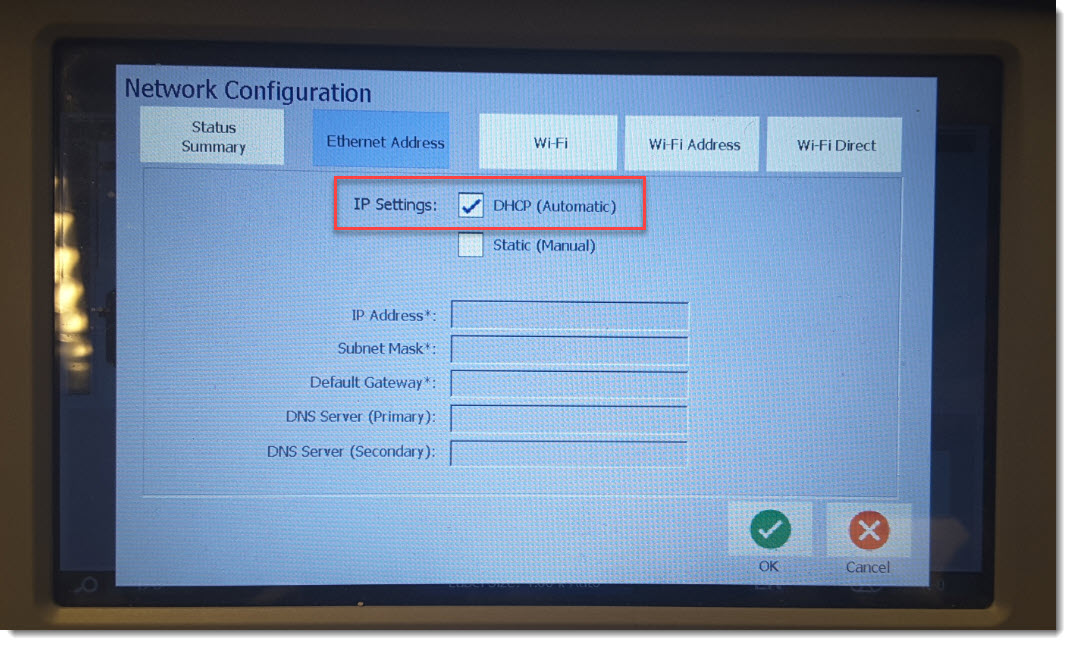
4. Select Ethernet Address.
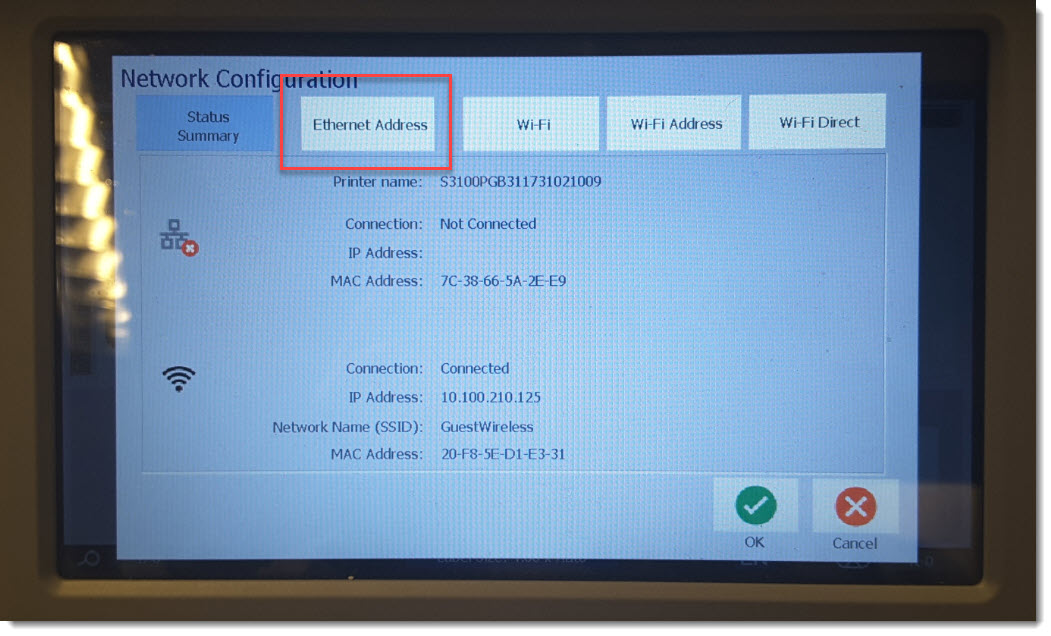
5. Select DHCP to have an IP address automatically assigned by your network.
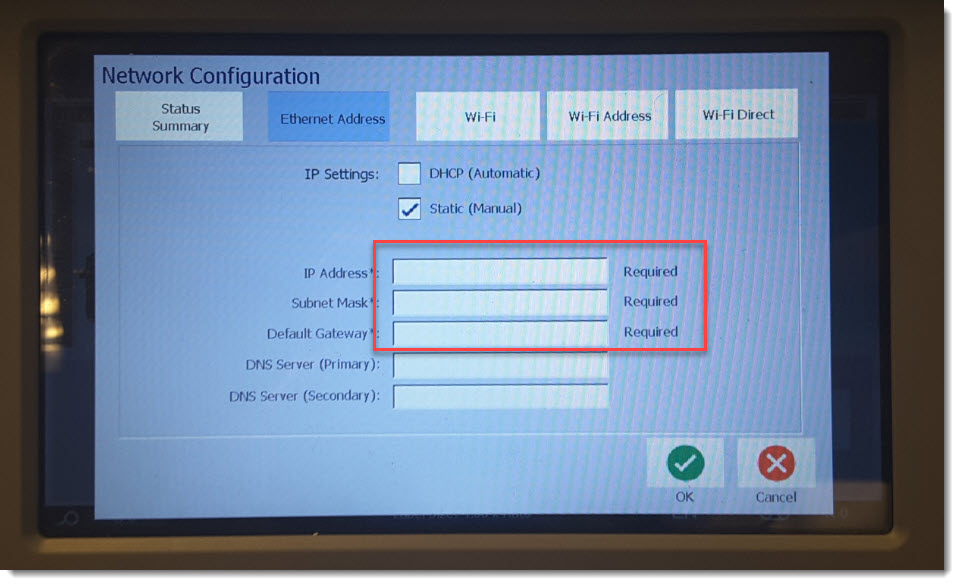
6. If static is selected, enter information as required by your network:
- IP Address: Enter the printer’s IP address
- Subnet Mask: Enter a subnet mask if you are using one
- Default Gateway: Enter the IP address of the default gateway
- DNS Server (Primary): Enter the IP address of the primary DNS server
- DNS Server (Secondary): Enter the IP address of the secondary DNS server
Next Steps
Additional configuration may be required from the PC side.

