Body | Choosing the Correct Sensor on the i5100The i5100 has 3 sensors for maintaining calibration with different types of media. These sensors will need to be manually adjusted depending on your media type. Jump To SectionSensor Settings for Gapped LabelsSensor Settings for Notched Labels
Sensor Settings for PermasleevesSensor Settings for Continuous MediaPrinter Settings Adjust Settings for SensorsNote: if the printer is in standard mode then material part number and sensor settings will not display on the LCD screen. In this case use the image references below to determine correct settings. For more information about standard mode, see: i5100 Standard Mode - Printer Displays an "S" on the LCD Screen.
Gapped labelsThe printer will use the gap sensor on position 2 for maintaining calibration with most die-cut material. If the material has an RFID tag, the dip switch setting will be shown on the printer’s display. 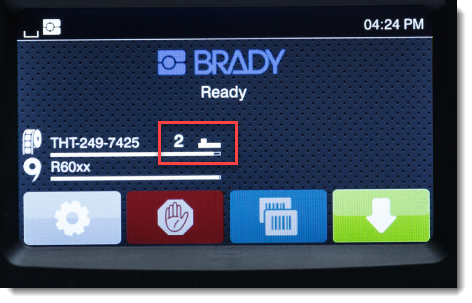
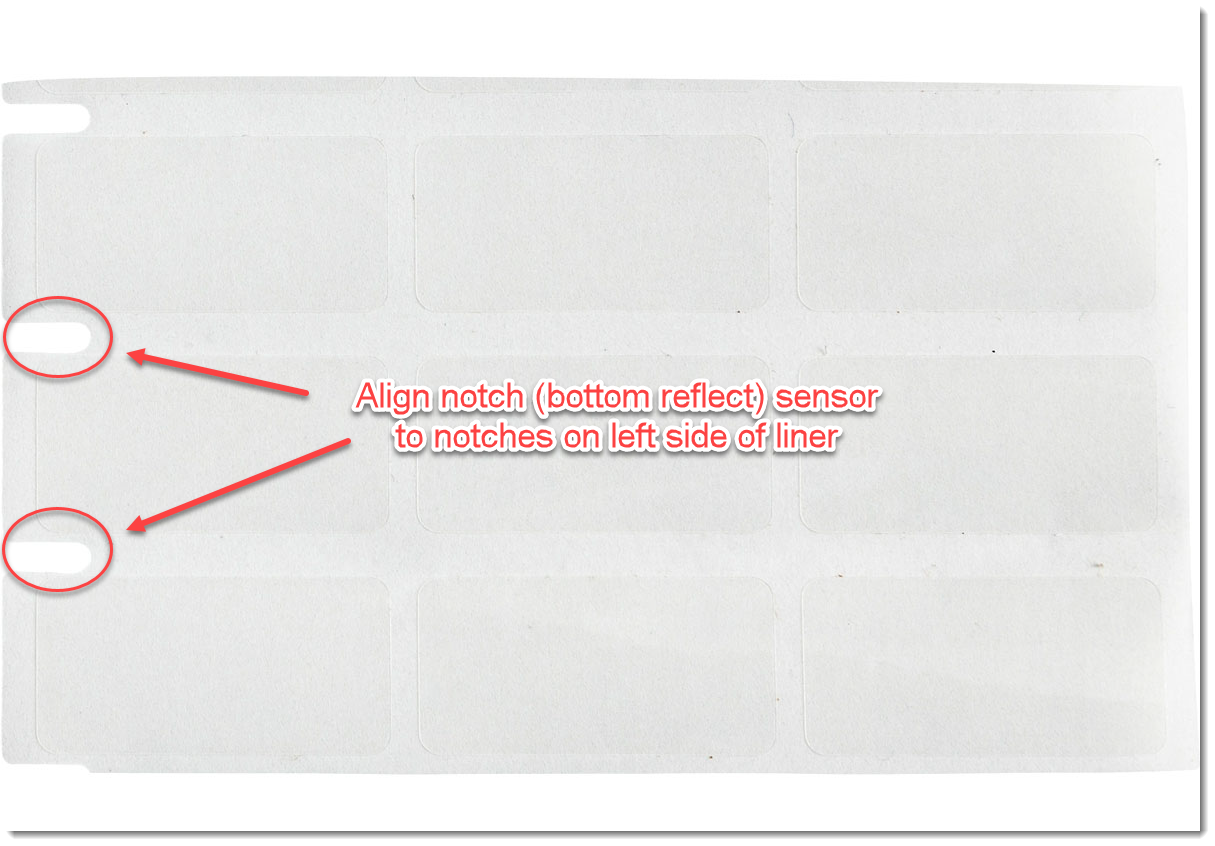
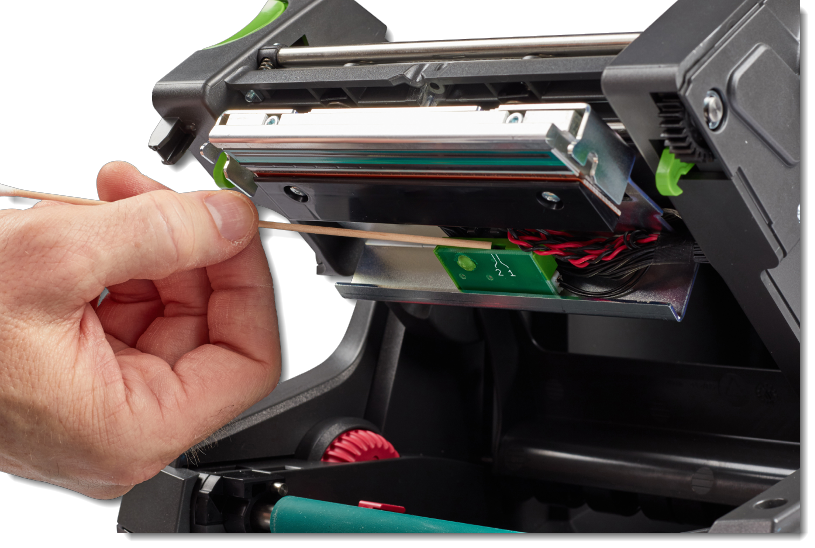  When you adjust the Gap Sensor (green box), it changes the position of the fixed Gap Sensor (black box). Sensor 2 is default. When you adjust the Gap Sensor (green box), it changes the position of the fixed Gap Sensor (black box). Sensor 2 is default.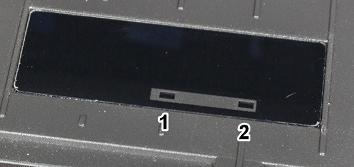 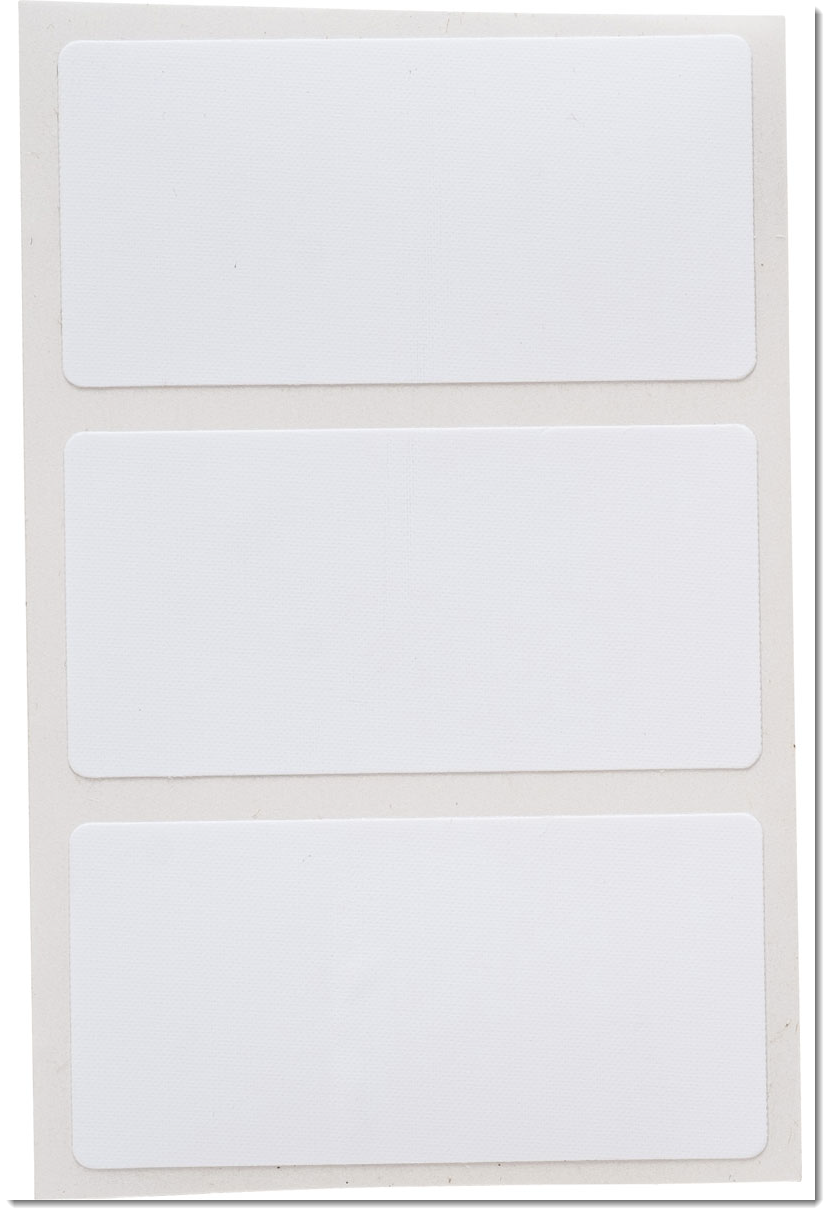 Example of gapped label media Example of gapped label media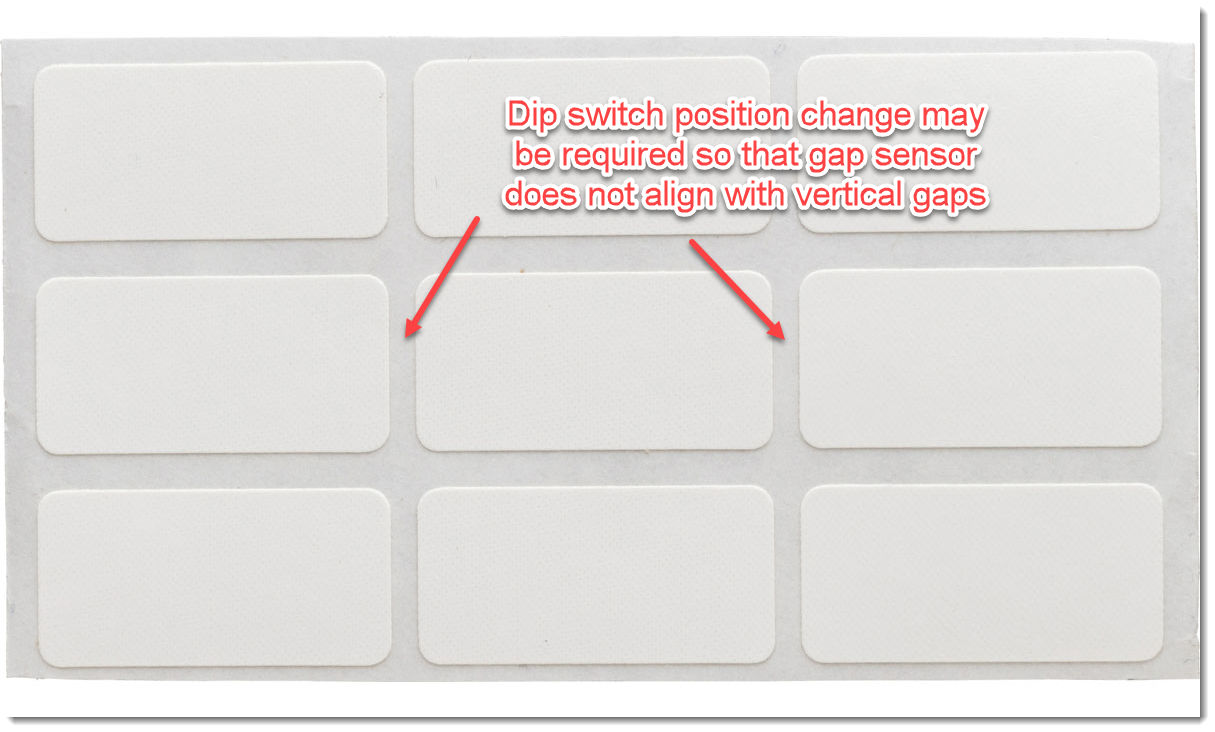 Example of gapped media with multiple columns (may require dip switch adjustment)Once you have adjusted sensors appropriately for your media, press the “feed” button several times. The printer should begin to feed 1 label at a time. Notched labelsSmaller labels may use notches cut into the left-hand side of the liner. Example of gapped media with multiple columns (may require dip switch adjustment)Once you have adjusted sensors appropriately for your media, press the “feed” button several times. The printer should begin to feed 1 label at a time. Notched labelsSmaller labels may use notches cut into the left-hand side of the liner.
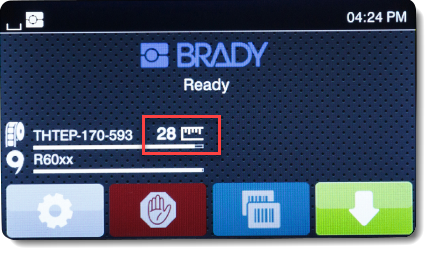
If the label roll has an RFID tag, the appropriate notch sensor position will be shown on the printer’s display with a ruler icon.
The notch (also called “bottom reflect”) sensor is manually adjusted using the green slider below the platen roller.
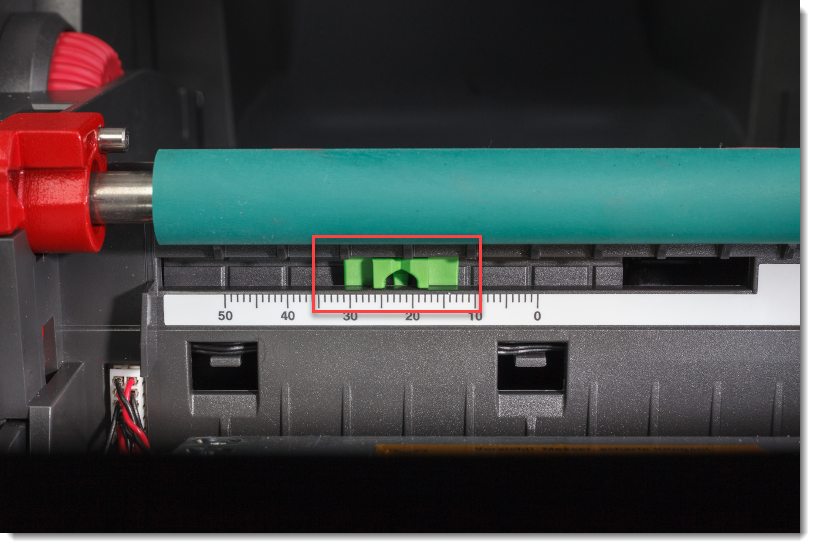
If there is no value shown (standard mode), you can use the clear window to visually adjust the sensor so that it fits between the notches on the left-hand side of your label material.
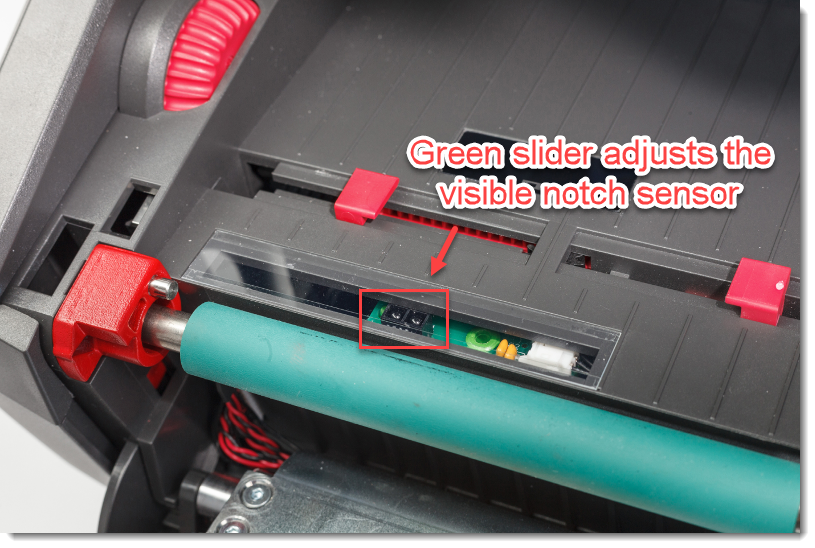 Once you have adjusted sensors appropriately for your media, press the “feed” button several times. The printer should begin to feed 1 label at a time. PermasleevesPermasleeve labels have a square hole in the liner. These square holes pass over the notch sensor to maintain calibration with the media. The notch sensor should be positioned to the holes on the left side of the liner. Once you have adjusted sensors appropriately for your media, press the “feed” button several times. The printer should begin to feed 1 label at a time. PermasleevesPermasleeve labels have a square hole in the liner. These square holes pass over the notch sensor to maintain calibration with the media. The notch sensor should be positioned to the holes on the left side of the liner.
If there is no value shown on the LCD screen (standard mode), you can use the clear window to visually adjust the sensor so that it fits he notches on the sensor is positioned in the square holes on the left side of the liner.
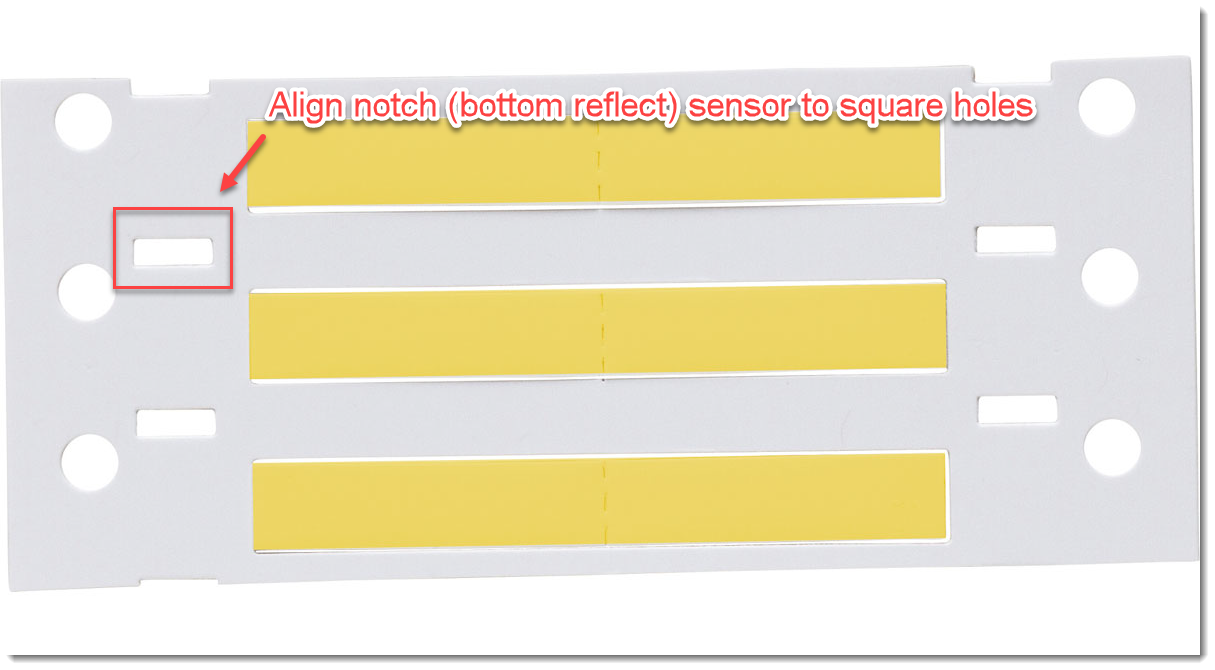
Once you have adjusted sensors appropriately for your media, press the “feed” button several times. The printer should begin to feed 1 label at a time. Continuous MediaContinuous labels do not use sensors, the page size is determined by user defined settings in the software. Choosing the continuous option essentially disables the label sensor. See this article for steps to configure the i5100 for continuous labels: How to Setup the i5100 to Use Continuous Label Materials. How to View and Change the Sensor Settings on the Printer
- On the main menu, select the gear icon.
- Select the Setup icon.
- Select Labels.
- The labels menu displays.
Related information
|
|
|---|


