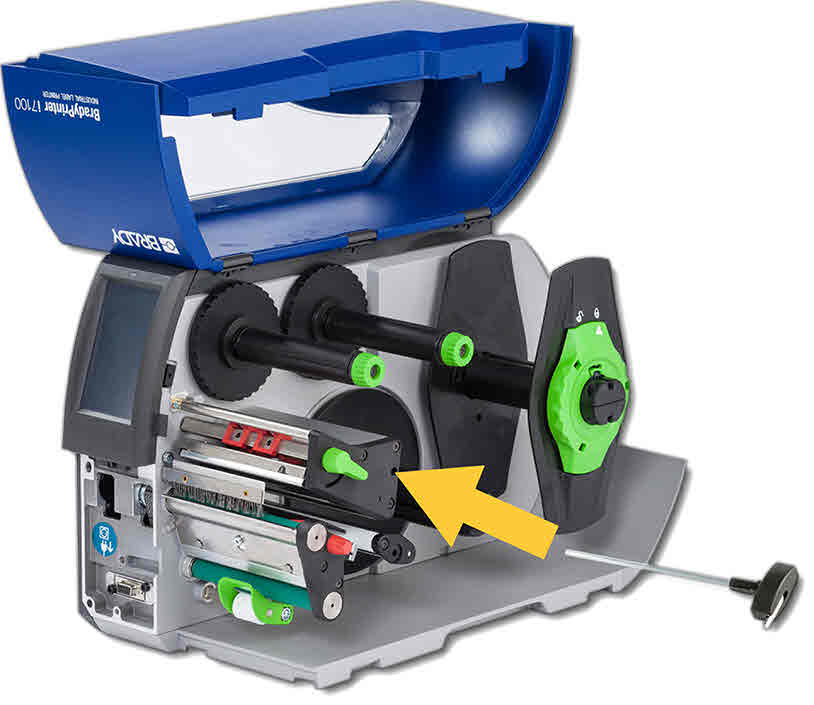
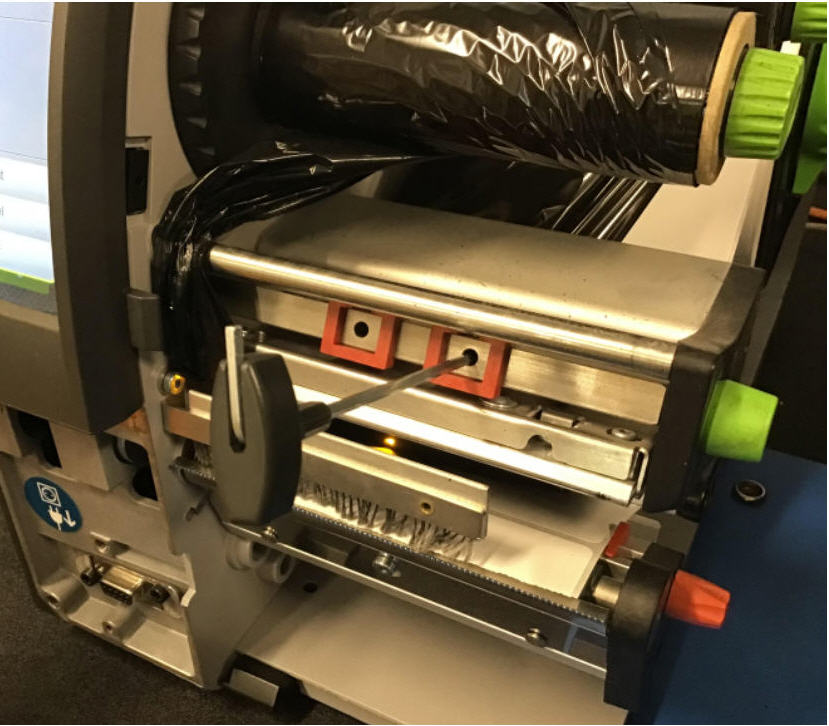
Adjust Print Head PressureMechanical adjustments can be performed with the included hex wrench. Print Head Pressure can help resolve issues with light print. Important: Do not attempt to adjust print head pressure or alignment as a first troubleshooting step. Over-tightening can easily damage the print head. Once alignment has been modified, it can be very difficult to revert to original settings in the event something goes wrong.Adjust the print energy and speed before adjusting the print head pressure: How to Adjust Print Head Heat from the i7100 Display and How to Adjust Print Speed from the i7100 Display.
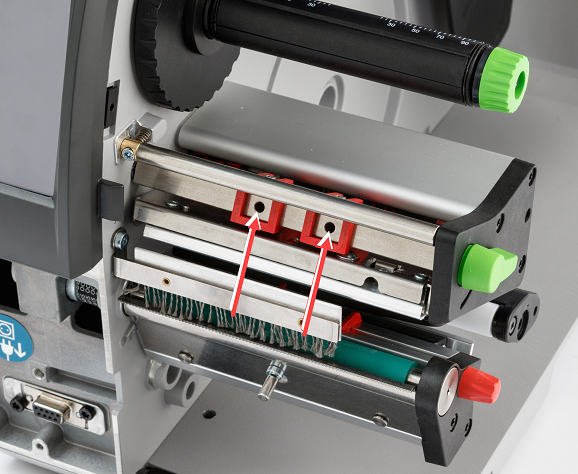
Adjust Pressure PlungersPosition the two red/black tension plungers evenly over the printhead - about 3/4" over the label on both the left and right sides so pressure is applied evenly across your labels.
Note: This positioning is slightly different compared to the i7100's predecessor, the PR Plus series. This is because the i7100 is center justified vs the left justified label orientation of the PR Plus series printers.
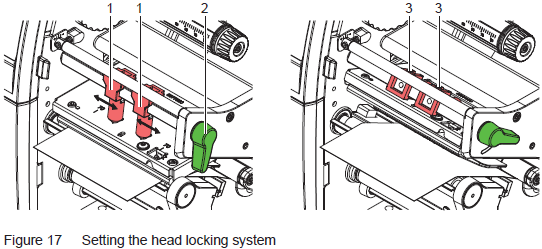
Set the Head Locking System
The printhead is pushed on via two plungers (1). In the basic setting the plungers are set in the middle of the printhead retainer. This setting can be used for most applications.
 If the print density decreases in the outer areas when using very large media, the plungers can be displaced:
- Loosen the threaded pins (3) at the plungers (1) with the Allen key.
- Turn the lever (2) clockwise to lock the printhead.
- Displace plungers to the scale value 70.
- Tighten the threaded pins (3).


