These instructions are for adding page size entries to the drvdata.ini file. This file is only used by Brady printers (most models but not all) and is installed when the print driver is installed on the PC. This would be needed if using Brady Data Automation or a Non-Brady software package. If using Brady Workstation software, with most Brady printer you need to use the software's internal driver and should not install the Windows print driver. Brady Workstation - Direct Print Compatibility.
Note: This process is not necessary for the i7100. The i7100 driver offers settings to create custom page sizing within the driver: How to Define Label Stocks in the i7100 Driver.
Driver Page Setup Does Not List All Label Part Numbers
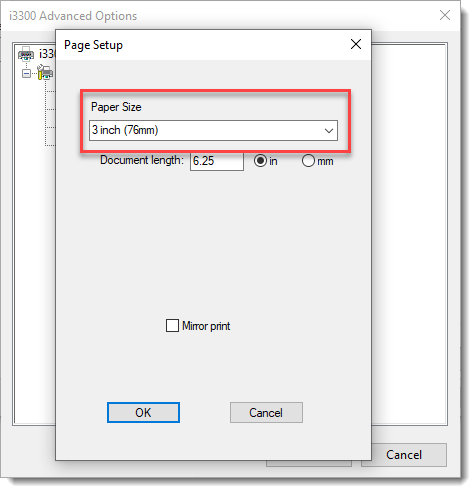
Users that need to use the Brady printer for use with third party software may find that certain parts are not included in the page size option in the menu drop down list (Printing Preferences > Advanced > Page Size Properties).
Workaround
Users can add entries to the configuration file that specifies page sizing options in the driver. Note that this workaround assumes the driver is currently installed. Reinstalling the driver will wipe out these changes. We recommend keeping a backup of the modified .ini, this will be needed every time the driver is installed or reinstalled on a new PC.
- Find and backup drvdata.ini.
- Open the file and locate your printer.
- Determine the format and sizing for your new entry.
- Add your new entry, increase the PageSizeCount as appropriate.
Find and Backup the drvdata.ini File
- Navigate to C:\Windows\System32. You may see multiple results when searching "drvdata", however you should only select the one that displays the path "C:\Windows\System32" below the filename.
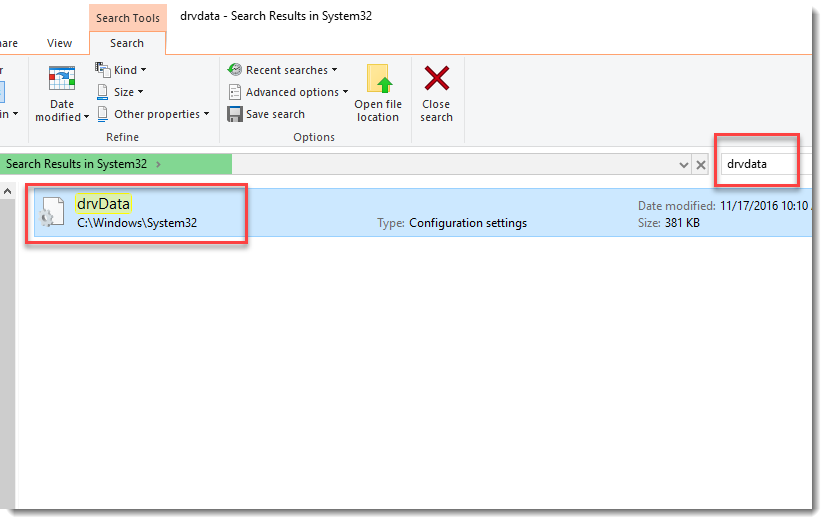
- Copy and paste the file to a different location as a backup.
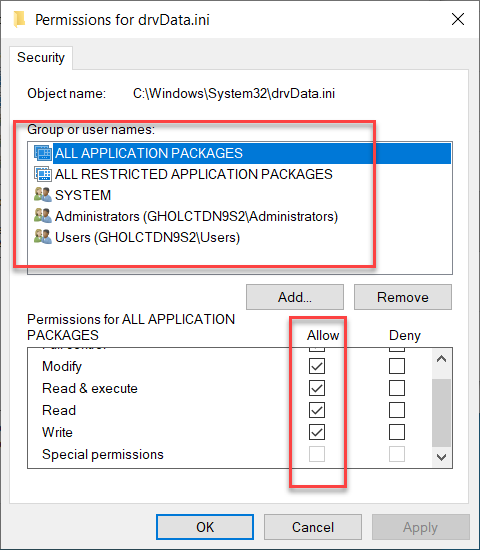
- Change access permissions so that you can modify and save the original drvData.ini file. Reach out to your IT Administrator if you cannot perform these steps.
- Right click and choose Properties.
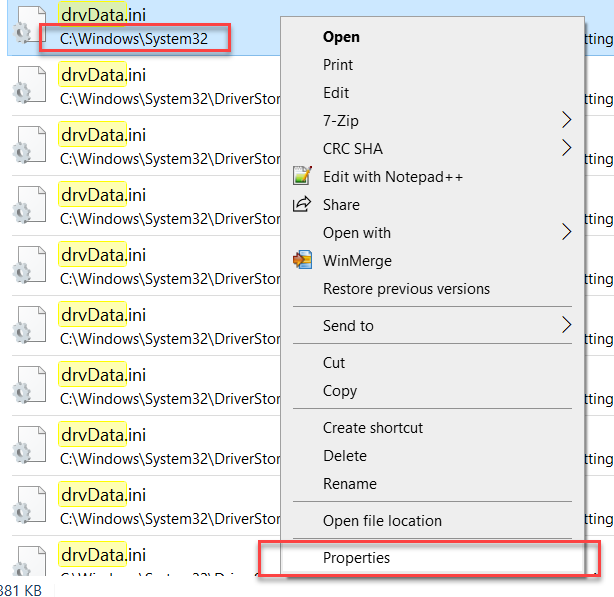
- Select the Security tab, then click Edit.
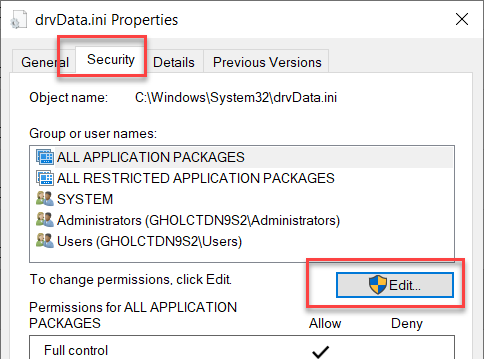
- Select each group or user and select all check boxes under "Allow", then click Apply.
Open the File and Locate Your Printer
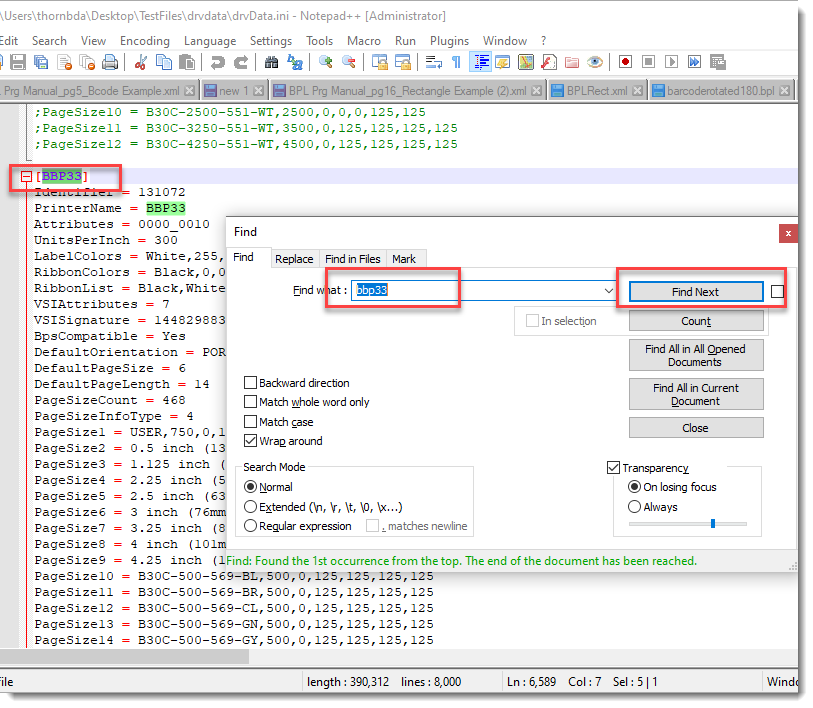
- Open the drvdata.ini file in Notepad or other text editor, use ctrl + F to search for your printer model entry.
Determine Page Sizing and Entry Format
- Use BradyID to search for parts with similar dimensions to your required label part. For example, B33-7 is not listed in the driver. If you know the dimensions of B33-7 (1.25x2.75”), you can use BradyID’s search filtering to find a similar part.
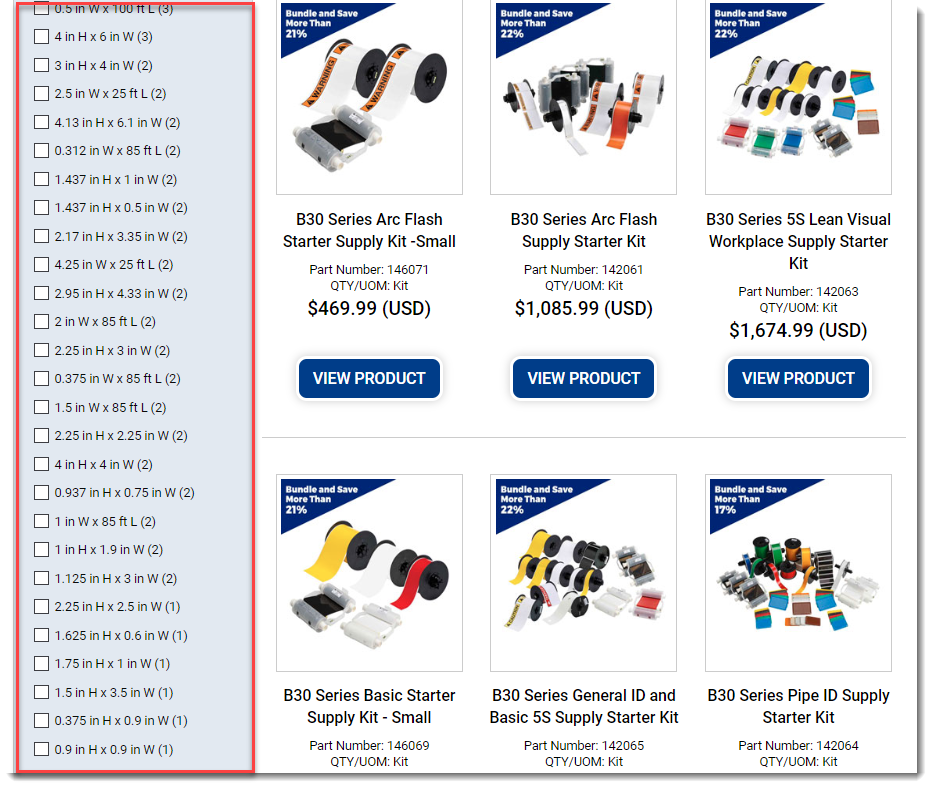
- B30-17-438 is a similar size die-cut at 2x1”, it’s also listed in the driver page size options. This means it can be copied and modified to create a B33-7 page size option.
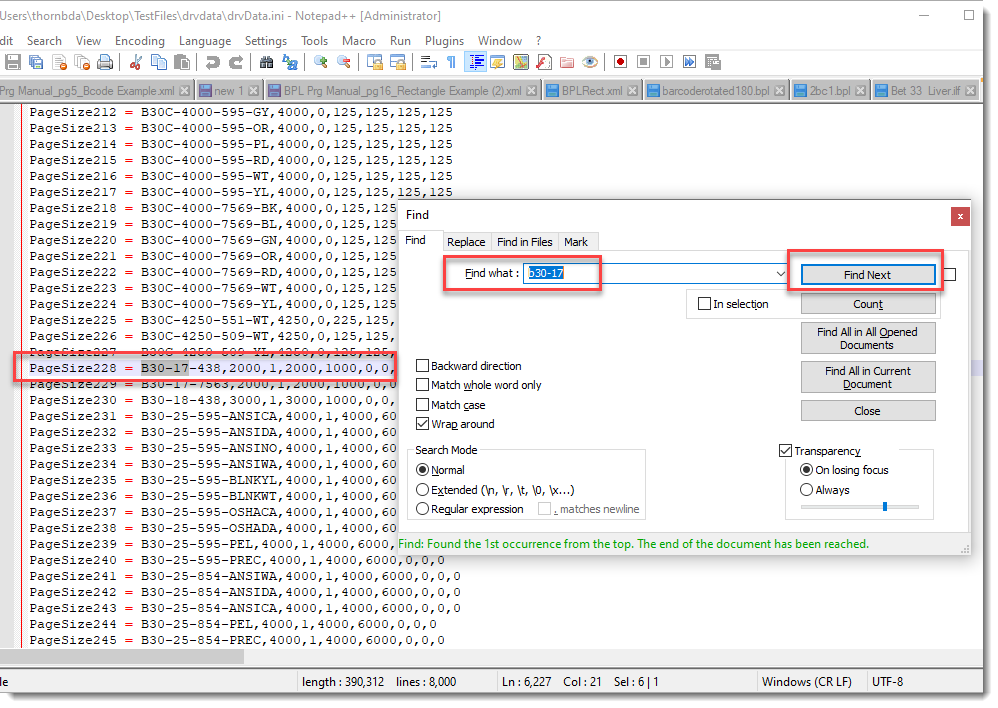
- Find the similar part (B30-17 in this example) in the drvData file.
Note: In Notepad or Notepad++, you can press “ctrl + F” and search for the part name.
Add The New Page Size Entry
- Copy the Entry (Ctrl + C).
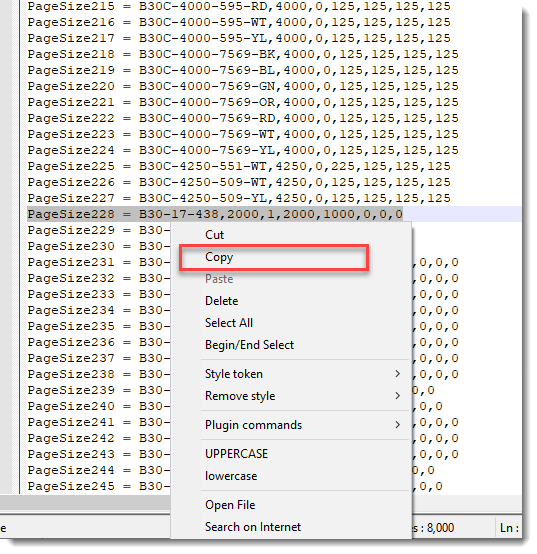
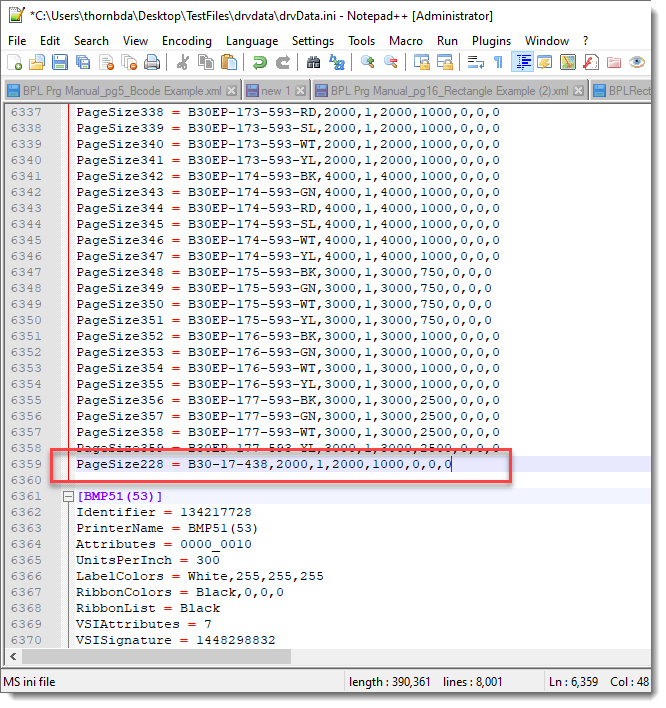
- Scroll to the end of the entries for your printer (BBP33 in this example), paste the entry.
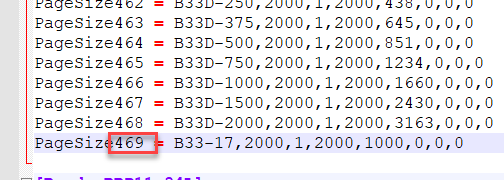
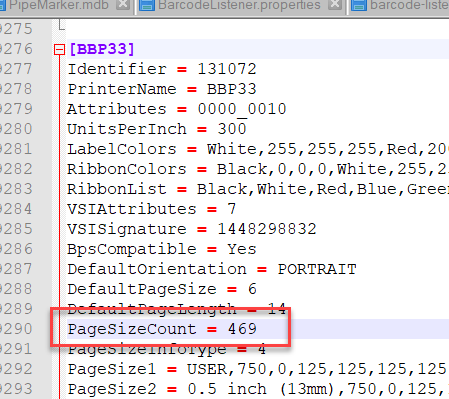
- Modify the PageSize number to the next higher number based on the preceding entry. In this example the preceding PageSize number is 468, so the next number will be 469.
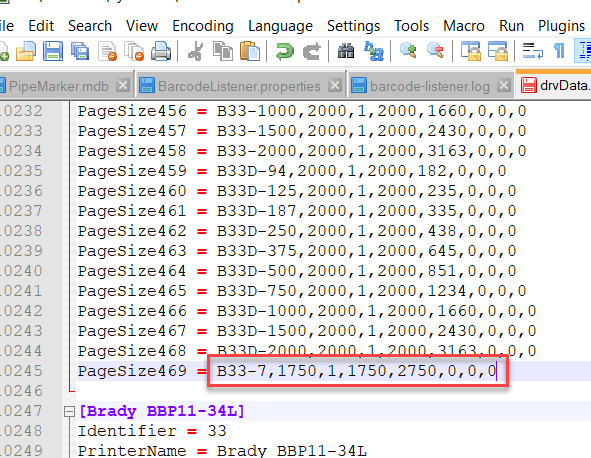
- Modify the name and values to match the dimensions of your part (1.75"x2.75” in this example). If you're not sure how to enter these values for your part, see the reference guide at the bottom of this article.
- Go to the top of the BBP33 section and change PageSizeCount to match the new highest value.
- Save the drvdata file (Ctrl + S).
Note: If you get an error that you do not have permissions to save the file, this means you did not successfully perform the 3rd step in section "Find and Backup the drvdata.ini File":
-
- Do a Save As and save the file to the Desktop.
- Then in File Explorer, go to c:\windows\system32 and delete the drvdata.ini file. You will get a message that you need admin privileges to delete or modify the file, click OK and it should still delete.
- Now copy the drvdata.ini file from Desktop to c:\windows\system32. Again it will pop up a message stating you need admin privileges, click okay and it should then copy the file.
- Shut down the computer. Turn the computer back on.
Important: The computer must be shut down. Restart will not update the settings that were just made.
Entry Formatting Reference
This reference guide is also found at the top of the drvdata.ini file. This can be used to create additional parts from scratch. Most labels use the type 3 syntax listed below, however the Wraptor uses type 2 exclusively.
Type 0
display size in inches
display size in millimeters
carrierWidth (in device units)
yBottom (in device units)
leader (in device units)
yTop (in device units)
trailer (in device units)
Type 1
partName
page width (in thousands of inch)
page length (in thousands of inch)
Type 2
PageSize1 = WRAP-1-427,500,373,500,373,0,0
Breakdown:
PartName: WRAP-1-427
Page width: 500
Page length: 373
Printable width: 500
Printable length: 373
Leader: 0
yBottom: 0
Type 3
partName
page width (printable area) (in thousands of inch)
diecut count (0 = continuous tape, 1 = single diecut, # = multi-up diecut).
if diecut count = 0
yBottom (in thousands of inch)
ytop (in thousands of inch)
else
diecut width (in thousands of inch)
diecut height (in thousands of inch)
horizontal space between diecuts (in thousands of inch)
vertical space between diecuts (in thousands of inch)
Sensor type (0 = Reflective, 1 = See-Through).
Type 3 Example: THT-1-426
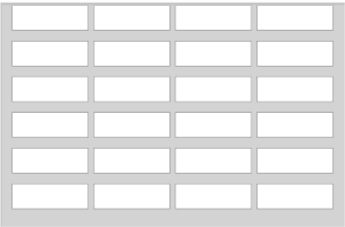
This is a 4 column die-cut part that uses a gap sensor for calibration. The prefix “THT” tells us this is for a 3” core thermal transfer printer.
PageSize11 = THT-1-426,3150,4,750,250,50,100,1
Breakdown:
PartName: THT-1-426
Page width: 3150
Diecut count: 4
Diecut width: 750
Diecut height: 250
Horizontal space between diecuts: 50
Vertical space between diecuts: 100
Sensor type: 1
Type 3 Continuous
PageSize374 = THT-21-424,3000,0,40,40
PartName: THT-21-424
Page width: 3000
Diecut count: 0
yBottom: 40
yTop: 40
Type 4
Is the same as type 3 except added leader and trailer for continuous tape.
partName
page width (printable area) (in thousands of inch)
diecut count (0 = continuous tape, 1 = single diecut, # = multi-up diecut).
if diecut count = 0
yBottom (in thousands of inch)
ytop (in thousands of inch)
leader (in thousands of inch)
trailer (in thousands of inch)
else
diecut width (in thousands of inch)
diecut height (in thousands of inch)
horizontal space between diecuts (in thousands of inch)
vertical space between diecuts (in thousands of inch)
Sensor type (0 = Reflective, 1 = See-Through).
Related information
Now see the new page size option in Printing Preferences > Advanced > Page Size Properties > Paper Size (a reboot may be required).


