Purchase the BradyPrinter A5500 Replacement Flagging Block on BradyID.
- On the touch screen, tap Settings.
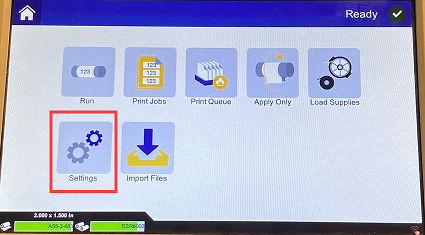
- Select Maintenance.
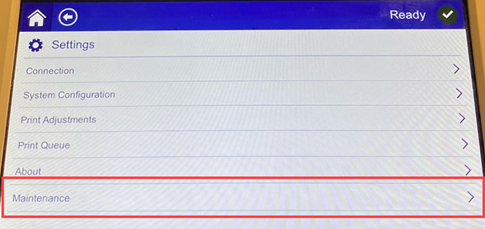
- Tap Replace Tarp.


- Power off and unplug the printer.
- Open the front (clear) cover on the printer.

- Open the side cover.

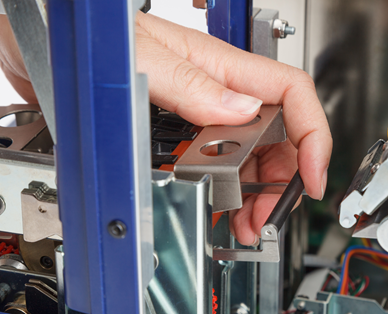
- On the back of the flagger assembly, push the black bar (spring-loaded slide) forward to expose the (yellow) head of the retaining post.
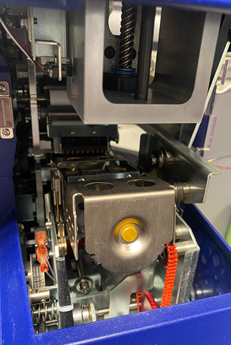
- Unscrew and remove the retaining post that keeps the flagger in place.
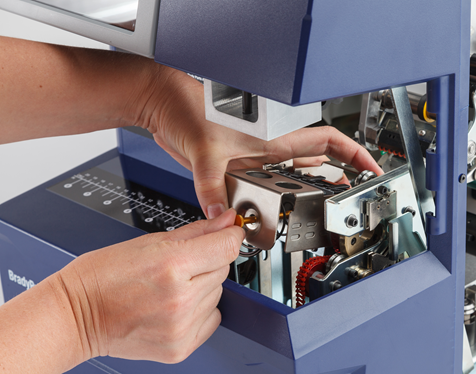
- Reach underneath the assembly to remove the flagging block.
- Discard the old flagging block.
- Insert the flagging block assembly so the black nubs and threaded stud line up with the holes on the mating surface. Hold the flagging block in place against the mounting surface.
- Compress the black bar (spring-loaded slide) about one inch while holding the new flagging block in place.
- Replace the retaining post, making sure that the end of the post goes inside the smallest coil of the spring and that the new flagging block is held tightly against the mounting surface.
- Close the front cover.
Related information

