If there is any dust and debris in the printer, clean the dust and label debris with compressed air, safety glasses, pre-moistened cleaning swabs (PCK-6). These swabs are lint free and contain the correct percentage of alcohol.
Clean debris from within the printer
- Remove power and supplies from the printer.
- With safety glasses on, spray compressed air on all visible areas inside the printer to remove accumulated dust and debris.
- Use pre-moistened cleaning swabs (PCK-6) to clean dust and debris from inside the printer.
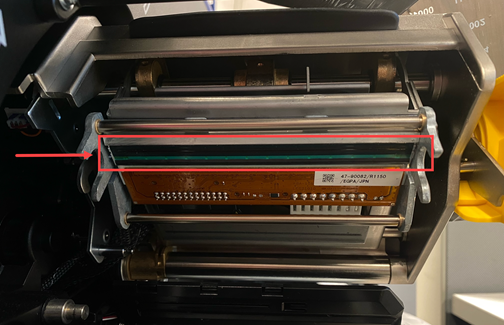
Printhead
CAUTION! If the printhead is hot, allow it time to cool before proceeding. Handling a hot printhead could result in burns.
CAUTION! Use only the alcohol swabs from part number PCK-6. Using other materials may permanently damage the printhead.
- Remove power and supplies from the printer.
- Disengage the printhead locking lever.
- Gently rub a new pre-moistened foam swab (PCK-6) across the green and black area of the printhead. Use as many swabs as necessary to thoroughly clean the surface.
CAUTION! Do not rub the swab over the bronze-colored area of the printhead. This may short the circuit.
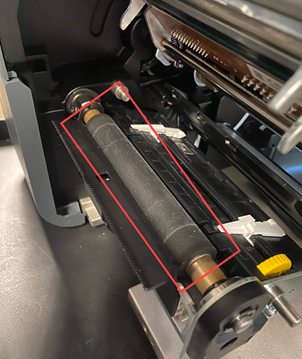
Platen Roller
Clean the platen roller frequently, especially if you see ink or adhesive buildup on the roller. If there is visible damage to the roller or small beads of rubber on the roller, then replace the roller.
Purchase additional platen rollers on BradyID:
- Remove power and supplies from the printer.
- Disengage the printhead locking lever.
- Open a new pre-moistened foam swab (PCK-6) and use it to clean the rubber roller. Use as many swabs as necessary to thoroughly clean the surface.
Turn the roller to access the entire surface. Push the top of the roller firmly toward the back of the printer, which will offer some resistance.
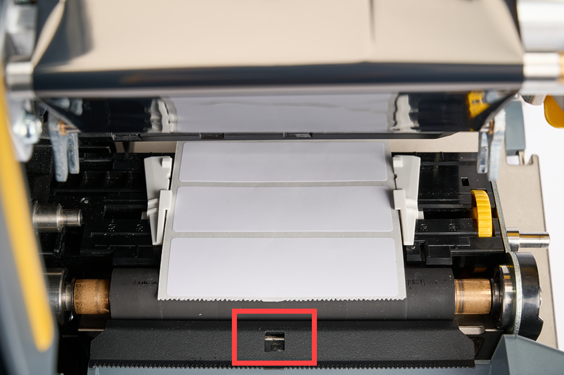
Sensors
The optical sensor is located inside the printer and may be covered with dust that results from cutting the labels.
- Remove power and supplies from the printer.
- Disengage the printhead locking lever.
- Roll the label guides adjuster to fully open the label guides to access the sensor.
- With a clean pre-moistened foam swab (PCK-6), gently wipe the surface of the Optical sensor.
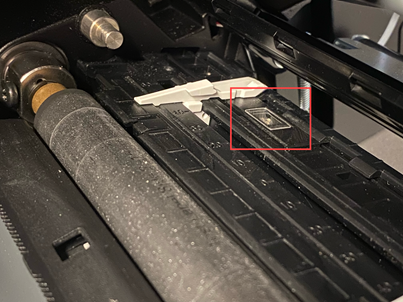
- Use the swab to clean the Leading Edge sensor.
Cutter Blade
Use the pre-moistened cleaning swab (PCK-6) and the Cutter Cleaning Tool (B31-CCT).
- Insert the swab up and into the label exit area.
- Swab all around the area.
- Unlatch the cutter, push away from the roller and clean adhesive residue from the blade with a flat edge tool.
- Use a swab dipped in Isopropyl alcohol on the blade.
- Allow any excess alcohol to evaporate before printing.
Touchscreen
CAUTION! Normal cleaners with ammonia, soaps, or any acids can damage the screen. Use only a lint-free cloth dampened with isopropyl alcohol (PCK-6).
- Gently rub the damp cloth across the screen until all of the residue is removed.
- Allow touchscreen to dry completely before resuming use.

