Printer settings are setup the first time the printer is turned on. The instructions on the LCD screen walk the user through each setting. The settings can be changed at any time under the Settings menu:
Language
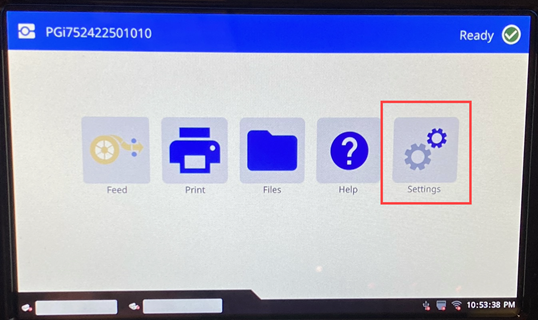
- Tap Settings.
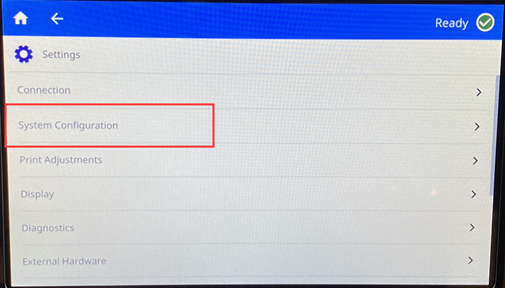
- Tap System Configuration.
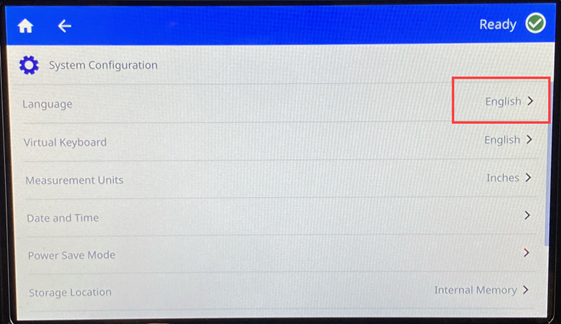
- Tap Language.
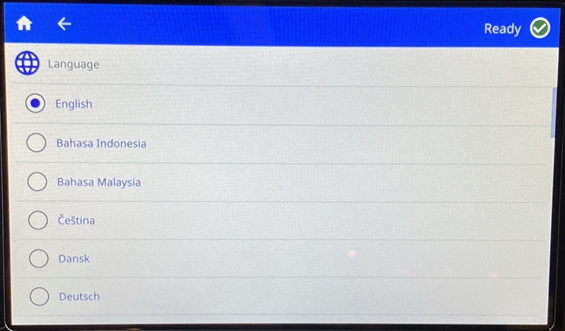
- Scroll through the list and select the language for the printer.
- Tap the home icon to go back to the main screen.
Keyboards
The printer displays a keyboard on the screen when you have to type data, such as when you name the printer. Because different languages use different sets of characters, you may need keyboards with different character sets. By default the printer uses the appropriate keyboard for the language setting.
- Tap Settings.
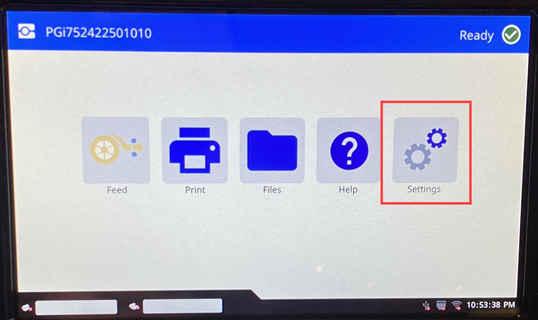
- Tap System Configuration.
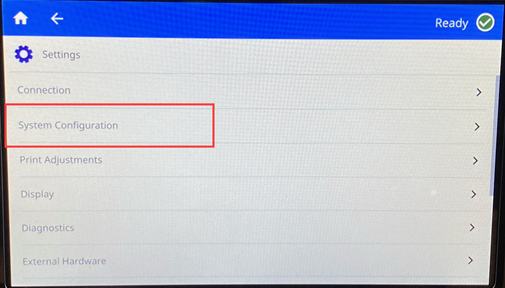
- Tap Virtual Keyboard.
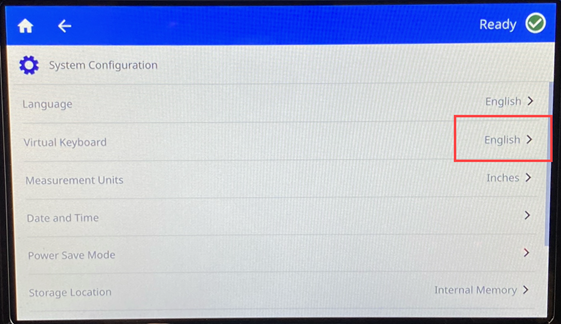
- Tap the check box for each keyboard that should be available. Multiple keyboards can be selected. The default keyboard is shown at the top of the list and cannot be deselected.
To switch keyboards while typing, tap the globe icon. Each time the globe icon is selected, the display switches to another enabled keyboard.
Connect to an external keyboard:
- Plug in the USB cable for the keyboard into the USB port on the printer.
- Tap Settings.
- Tap External Hardware.
- Tap USB Keyboard and then choose the corresponding keyboard from the list.
Unit of Measure
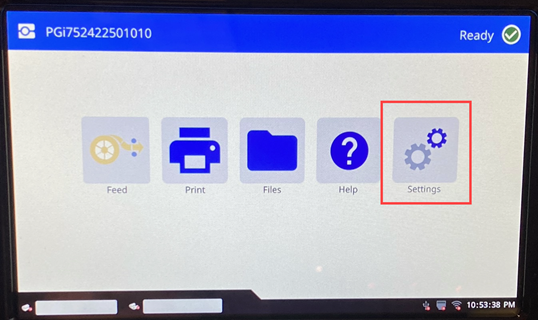
- Tap Settings.
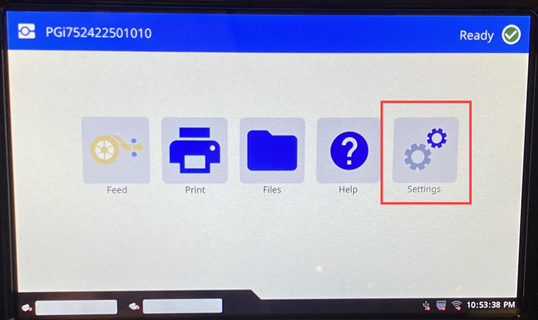
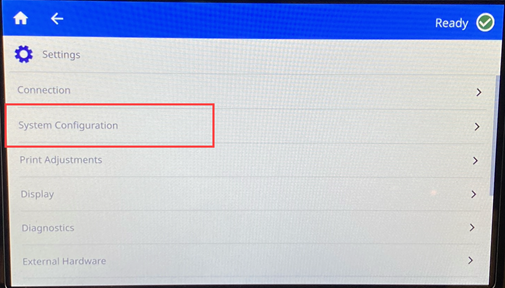
- Tap System Configuration.
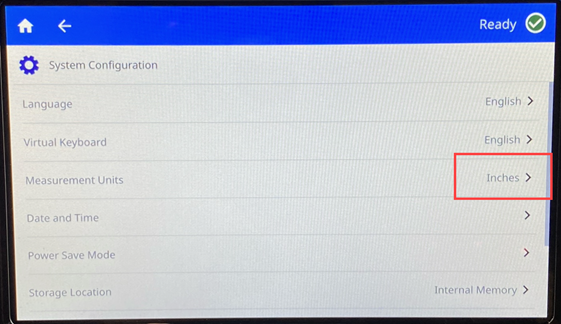
- Tap Measurement Units.
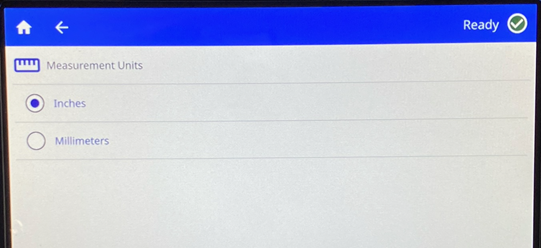
- Tap Inches or Millimeters.
- Tap the home icon to go back to the main screen.
Date and Time
- Tap Settings.
- Tap System Configuration.
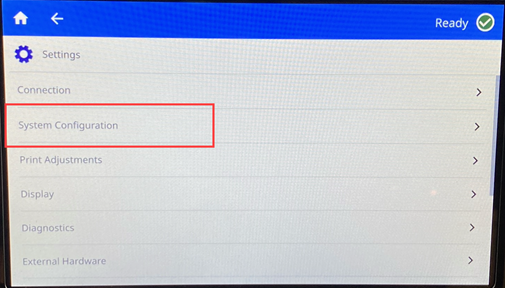
- Tap Date and Time.
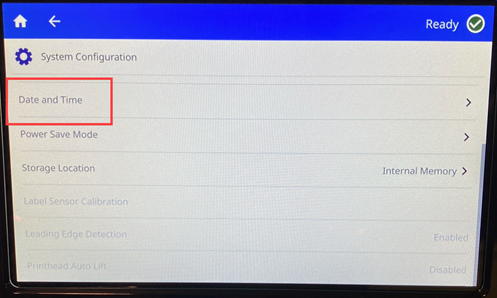
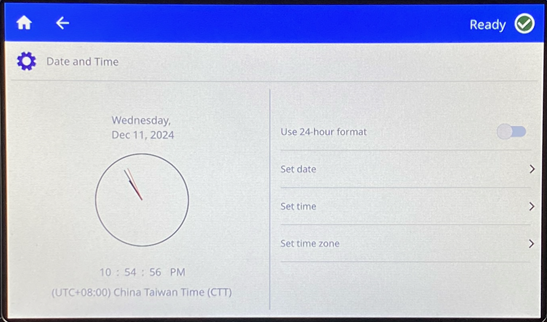
- To change the settings, tap the controls on the right.
-
- Use 24-hour format: Tap the switch to change between 24-hour format and 12-hour format with AM and PM. When the switch is gray, the printer uses 12-hour format. When the switch is blue, the printer uses 24-hour format.
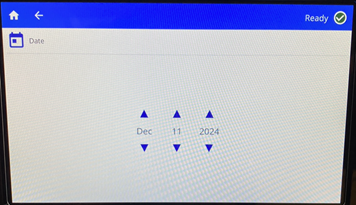
- Set Date: Tap to display the date controls. To change the date, either tap on an element and select a new value, or tap the arrows above or below an element.
-
- Set Time: Tap to display the time controls. To change the time, either tap on an element and select a new value, or tap the arrows above or below an element.
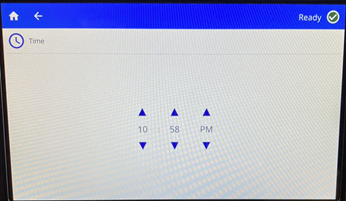
-
- Set time zone: Tap to display the different time zones available. Pat the time zone desired.
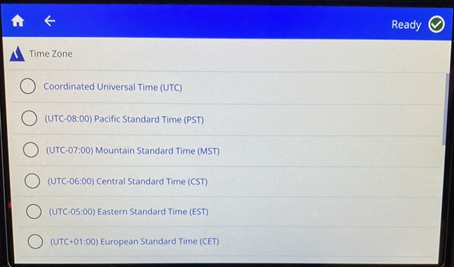
- Tap the home icon in the left corner to return to the main screen.

Storage Location
- Tap Settings.
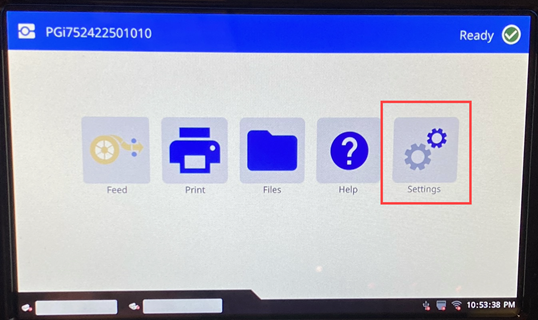
- Tap System Configuration.
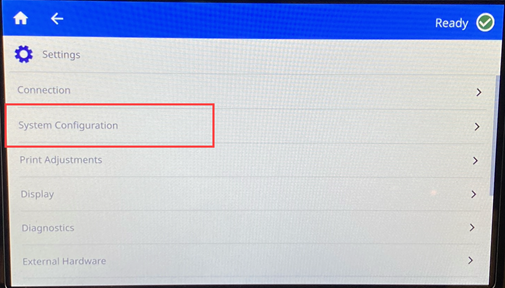
- Tap Storage Location.
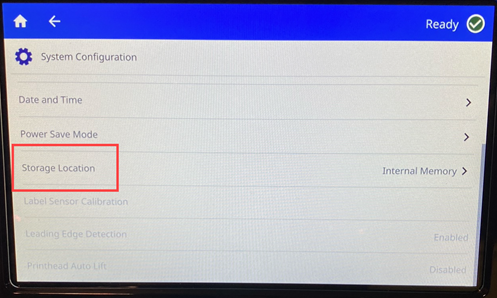
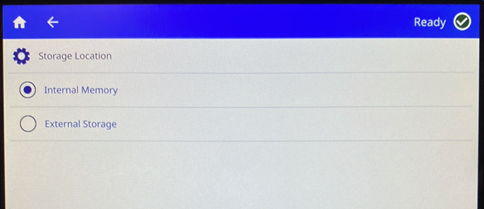
- Tap the desired value:
-
- Internal Memory: Choose this option if the printer is directly connected to the computer with a USB cable or on a network. When you print a label from Brady Workstation software and choose the Store option, the print file is sent to the printer’s internal memory. When you tap Files on the home screen, the printer accesses the list of files from internal memory.
-
- External Storage: Choose this option when transferring files from one i7500 Label Printer to another. Insert a USB drive into the USB port on the printer. When you print a label from Brady Workstation software, the print file is sent to the USB drive. When you tap Files on the home screen, the printer accesses the list of files from the USB drive.
- Tap the home icon to return to the main screen.


