Load the Labels
- Open the printer cover.
- Open the printhead by pushing up on the yellow lever.
- Open the label keeper by pulling it towards the end of the Label Holder. Pull the Label Keeper down.
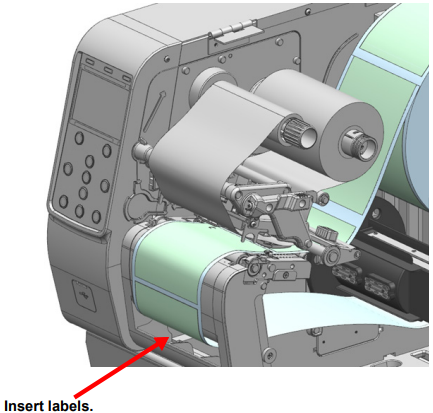
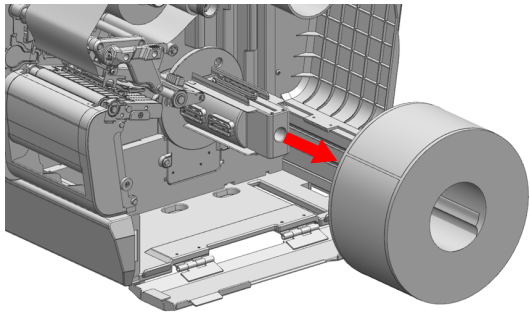
- Install the labels onto the label keeper.
The labels will come from the top of the label roll except for permasleeve materials.
- Close the label keeper so it is snug against the label roll.
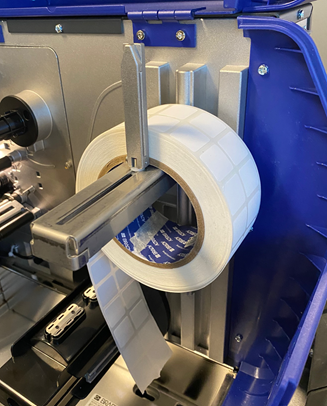
- Push the front label media guide and rear label media guide to the right if facing the front of the printer or towards you if facing the side of the printer.
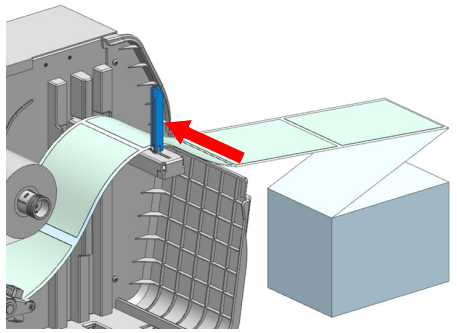
- Pull the labels under the rollers.
- Pull the labels under the black tab which is under the printhead.
- Adjust the rear media guides to the width of the labels by pushing the yellow tab.
There read media guide is a silver bar that should be against the label edge.
- Push the front label media guide yellow tab towards the labels so the media guide is against the label liner.

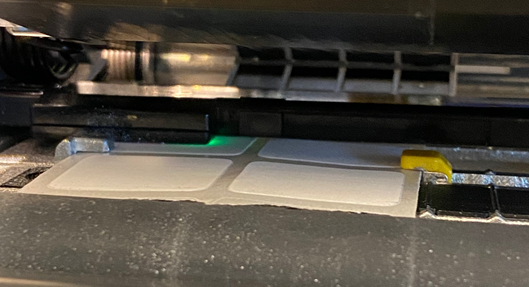
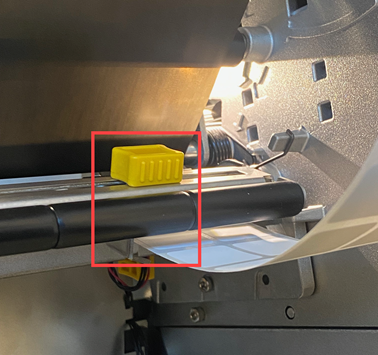
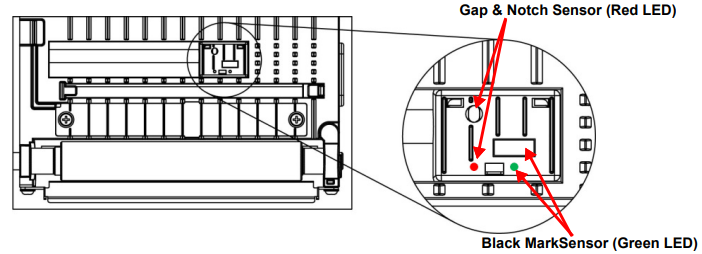
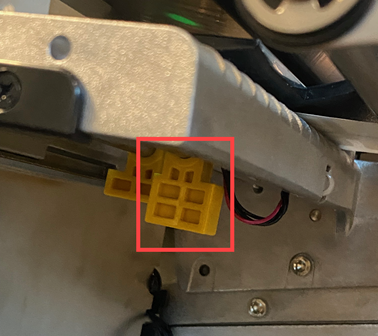
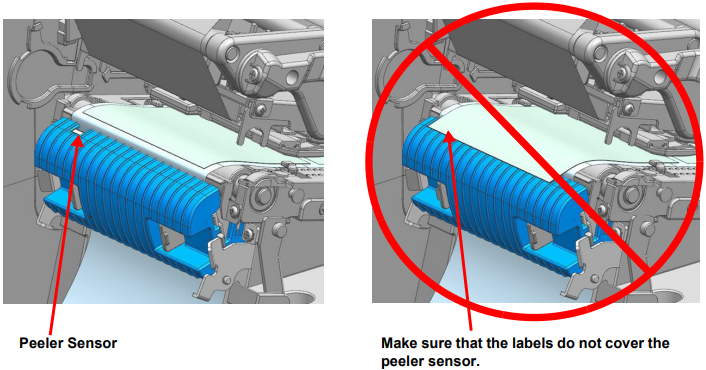
- Make sure the sensors are positioned so that the gap or black mark on the labels can be detected when they pass by the sensors.
Line up the gap or black mark on the label supply with the associated LED. (The LEDs light up when the printhead level is open). Use the sensor lever (located below the sensors) to move the sensors as needed.
- Feed the labels to the middle of the platen roller.
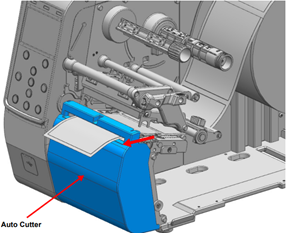
If using the Auto Cutter, click to expand the instructions.
Feed the materials through the cutter.
If using the Peeler Accessory, click to expand the instructions.
When the peeler is switched on, the next label will not be printed unless the previously printed label is removed from the peeler. When the peeler is switched off, the peeler does not work.
Important: Not all label sizes and types work with the peeler.
-
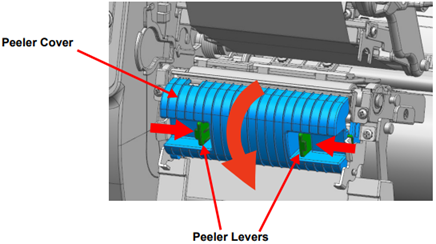
- Press the left and right peeler levers to open the peeler cover.
- Move the peeler switch right to the ON position. Make sure that the LED has turned on.
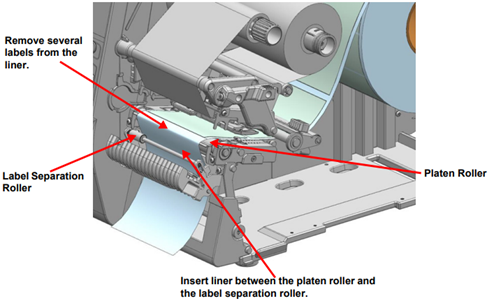
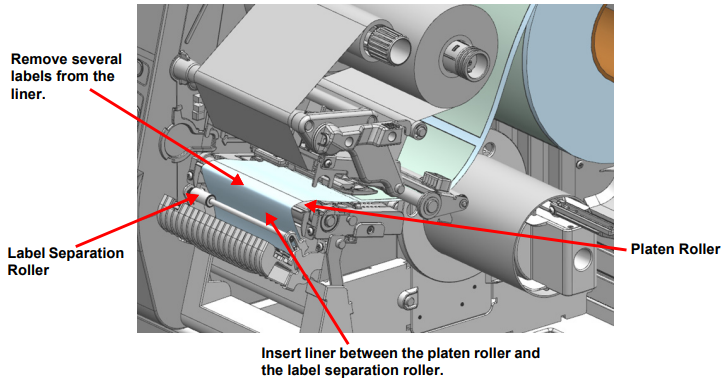
- Remove several labels from the liner and insert the liner as shown.
-
- Close the peeler cover until it clicks.
If using the Rewinder Model, click to expand the instructions.
Use the peeler and rewinder to automatically separate the printed media from the liner and rewind the printed media. When shipped from the factory, the peeler is attached.
When the peeler is switched on, the next label will not be printed unless the previously printed label is removed from the peeler. When the peeler is switched off, the peeler does not work.
Important: Not all label sizes and types work with the peeler.
There are two sets of instructions:
Install Labels in the Rewinder Mode: Peeler Off, Rewinding Labels Onto Core or Guide
- Refer to the instructions above and adjust the label guides and sensor position.
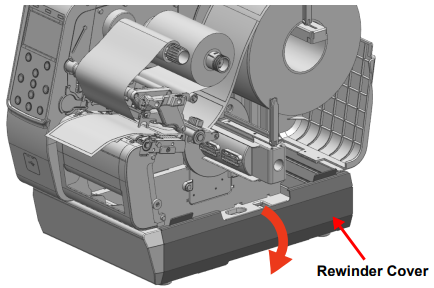
- Open the rewinder cover.
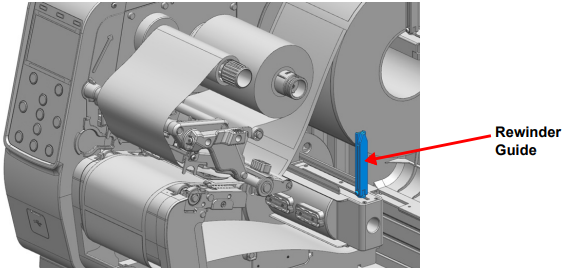
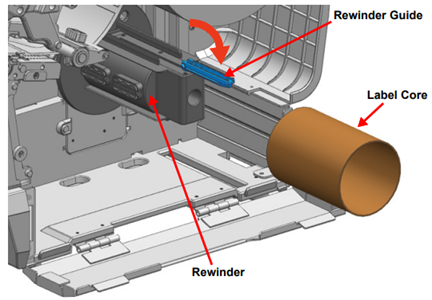
- Flip down the rewinder guide, and, if using a core, install a 3-inch label core onto the rewinder holder.

- Press the left and right peeler levers to open the peeler cover.
- Move the peeler switch left to the OFF position. Make sure that the LED is off.
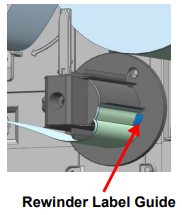
- Close the peeler cover until it clicks. Route labels through the front of the printer as shown.
- After installing the labels as shown, secure the labels on the rewinder label guide or on the label core.

- Flip up the rewinder guide and adjust it to the label width.
Installing Labels in the Rewinder Model: Peeler On, No Core, Rewinding Liner Only
- Refer to the instructions above and adjust the label guides and sensor position.
- Open the rewinder cover.

- Flip down the rewinder guide, and, if using a core, install a 3-inch label core onto the rewinder holder.
- Press the left and right peeler levers to open the peeler cover.

- Move the peeler switch left to the OFF position. Make sure that the LED is off.

- Remove several labels from the liner and insert the liner as shown.
- After installing the labels as shown, secure the labels on the rewinder label guide.
- Adjust the rewinder guide to the label width.

- Close the peeler cover until it clicks.
- Close the printhead lever, the rewinder cover, and the label cover.
Remove Labels or line from the Rewinder
- Open the peeler cover, the label cover, the rewinder cover and the printhead lever.
- Rotate the rewinder label holder counter-clockwise to collect the labels or liner.
- Flip down the rewinder guide, and then push it inside.

- Remove the labels or liner being careful to avoid damaging surrounding parts.
- Close the printhead lever.
Label Damper (Standard Mode)
- Push the label damper button down to raise the media damper.
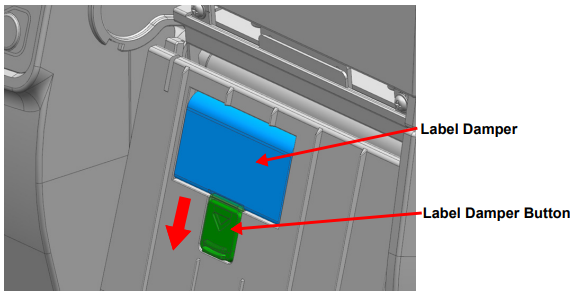
- Use the printer with the media damper up as in the picture.
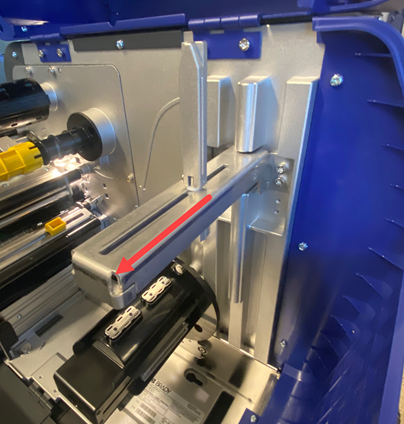
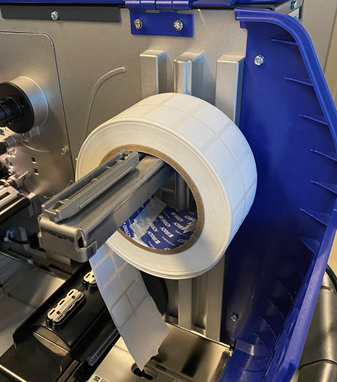
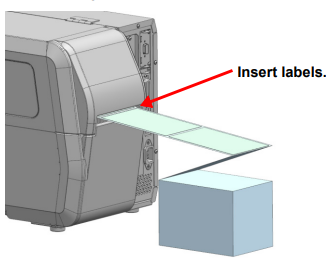
Install External Label Supplies
- Insert labels through the access slot on the back of the printer.
- Open the label cover.
- Adjust the label keeper to the label width.
- Finish installing the labels according to the instructions for your model and accessories.
- Close the printhead lever and label cover.
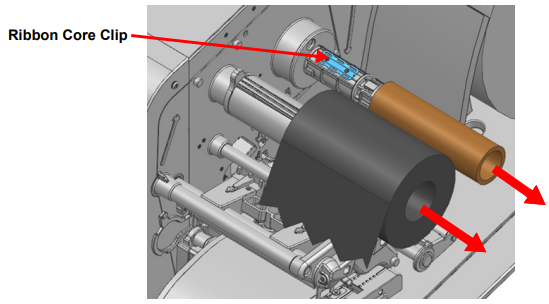
Load the Ribbon
The printer can only use 1 inch ribbon cores.
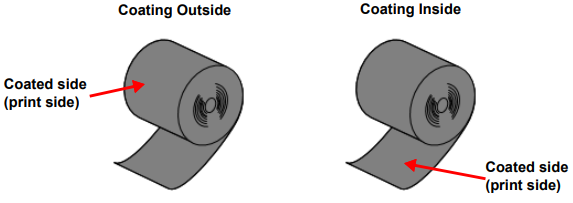
The ribbon can be coated on the inside or outside with the ink. The best way to determine which way the ink ribbon is coated is to take a label or piece of tape to the ribbon. If the black ribbon ink appears on the label or tape, this is the coated size.
By default, the printer comes set for four-inch wide ribbon. Adjust the printer is using narrower ribbon: KB 14279.
Install the Ribbon
- Insert the ribbon into the ribbon supply spindle.

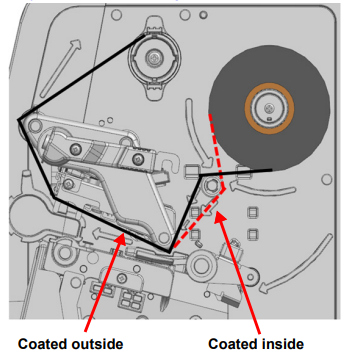
- Open the printhead lever and install the ribbon as shown below, depending on the type of ribbon, as shown above.
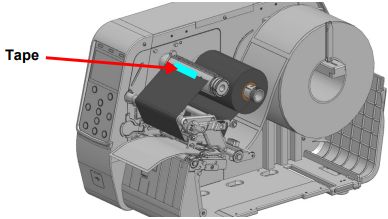
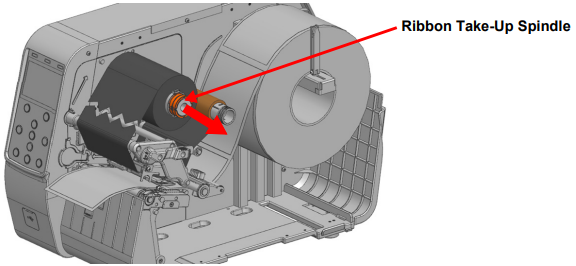
- Attach the ribbon to the ribbon take-up spindle using tape.
- Close the printhead lever and the label cover.
Remove the Ribbon
Caution: Do not remove the ribbon and ribbon core while the printer is printing. The printer may be damaged.
-
- When removing ribbon and ribbon core, be careful of the sharp end of the ribbon core clip.
- The hot printhead can cause serious burns.
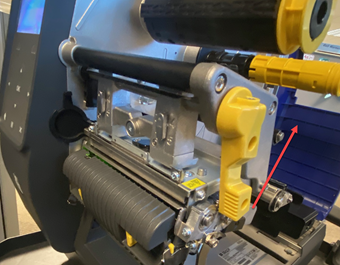
- Open the printhead lever.
- Cut the ribbon and pull the ribbon take-up spindle.
- Remove the ribbon and ribbon core.