For some label supplies, such as thick labels, you may need to fine tune the printhead position to improve print quality.
Caution: Do not adjust the printhead position while the printer is printing. The printer could be damaged.
Fine tuning the printhead position significantly affects the printing quality. Perform this process only when necessary.
- Turn off the printer.
- Unplug the power cord from the printer.
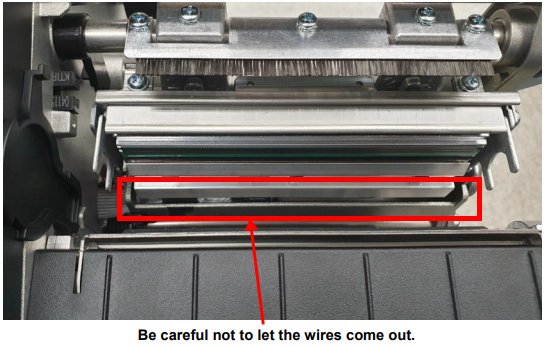
- Open the printhead lever.
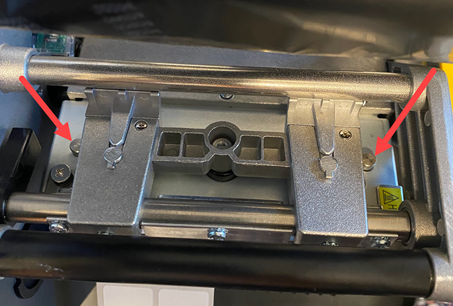
- Push the shafts down to remove the printhead assembly which is magnetically attached.
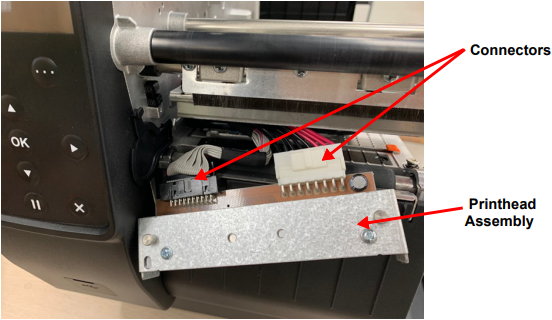
- Remove the connectors attached to the printhead assembly.
- After loosening the screws using a Phillips screwdriver, adjust the printhead position.
If using a thick label supply (0.26-0.3 mm), move the printhead toward the front of the printer, in the direction indicated below.
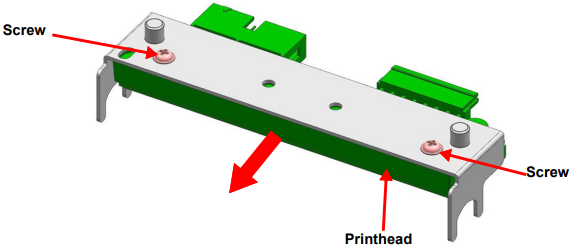
The factory default position of the printhead (green area) is 0.6 mm from the reed guide in direction indicated below.

- After fine tuning the position, re-assemble in reverse order of disassembly.