Body | From page 29 of the i5100 user manual. Issue
Adhesive builds up on the i5100 Cutter Blade (Autocut model only). If operating in backfeed mode adhesive may be deposited on the drive roller as well. Clean the drive roller and the cutter blades often.
Accessing the i5100 Cutter Blade


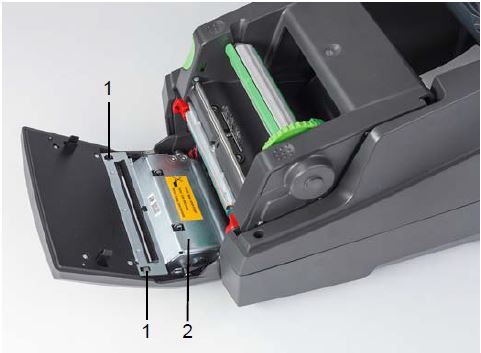
1. Latches
2. Cut Module
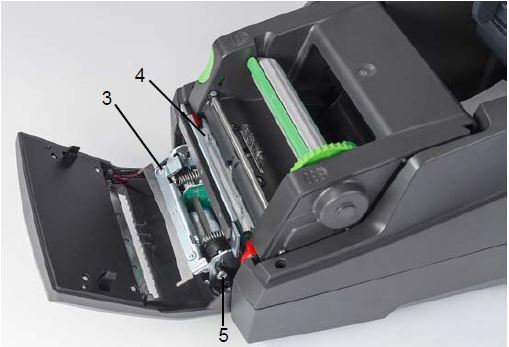
3. Lower Blade
4. Upper Blade
5. Screw
Cleaning the i5100 Cutter Blade
- Turn off the printer
- Open the cover, unlock and lower the control panel
- Release the cut module (2) by pressing the plastic latches (1) and lifting it up then rotating up and to the right.
- Turn the screw (5) counterclockwise using a 2.5 mm Allen Wrench and swivel the clamp with the lower blade (3) away from the
- upper blade (4). The arc motion of the blade separating is spring-loaded.
- Remove particles of dust and paper with a soft brush or a vacuum
- Remove remains of adhesive with swab dipped in isopropyl alcohol (use Brady part number PCK-6)
- Remount the cut module in reverse order.
|
|
|---|


