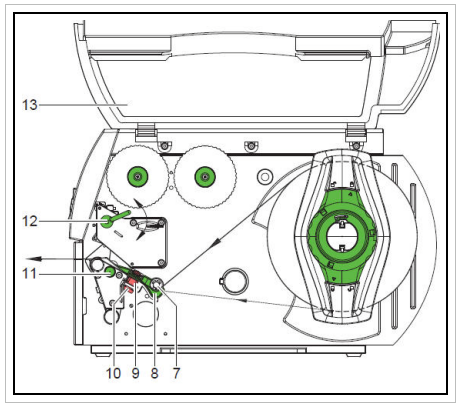
How to Position Sensors on the PR Series PrintersPR Plus Correct sensor positioning will resolve issues where the PR printer feeds continuous, or gives "no label found" errors.
- Load your labels: PR Plus Series - How To Load Label Material.
- With the printhead open, look in from front and your labels will be coming out from under a piece of red plastic. About an inch and a half to the left of the right edge is the sensor. It looks like a clear glass bead embedded in the front of the red plastic. You want to slide the red plastic until the sensor is in the correct position:
If you have notched material (there is a notch cut out on the liner between each label, on the left side), place the sensor over the notch.
If you have heat-shrink sleeves, place the sensor over the rectangular cut out between each sleeve, on the left side.
If you have normal die-cut or gapped material, place the sensor completely over the label (avoid riding the edge of the label). If there are multiple across labels, make sure the sensor is completely over one label and not between labels.
- Now press Feed until one label feeds out each time and stops in the same place each time.
PR Plus CS SeriesThese instructions, including loading the printer, are on page 15 of the BP-PR300+CS (Continuous Sleeve Printer) User Manual.
- Load the PR300+CS printer.
- Loosen the knurled knob (10) and position the label sensor by moving the knob so the sensor can detect the label gap or a reflex or cut-out mark.
If the labels deviate from a rectangular shape:
- Align the label sensor with the front edge of the label in the direction of the paper flow.
- Re-tighten the knurled knob.
- Turn the lever (12) clockwise to lock the printhead.
Related information


