While it looks like a serial port, it is actually a connection for external peripheral devices such as the cutter, an applicator, or PLC unit connection.
How to Install the Auto-Cutter for the BP-PR+ Printer Series
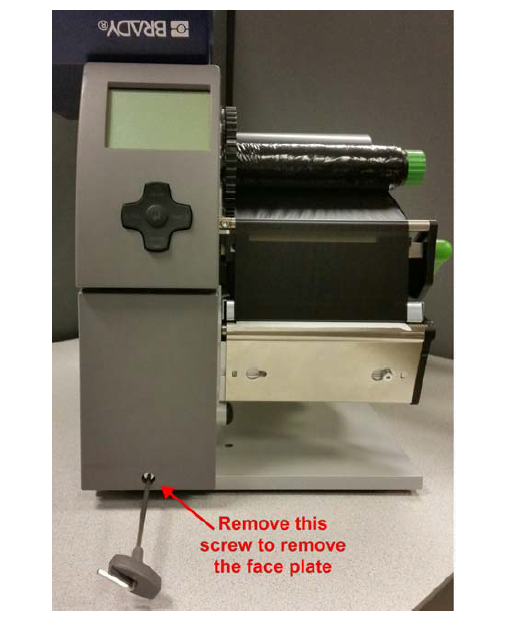
1.) First remove the face plate below the LCD screen on your printer.
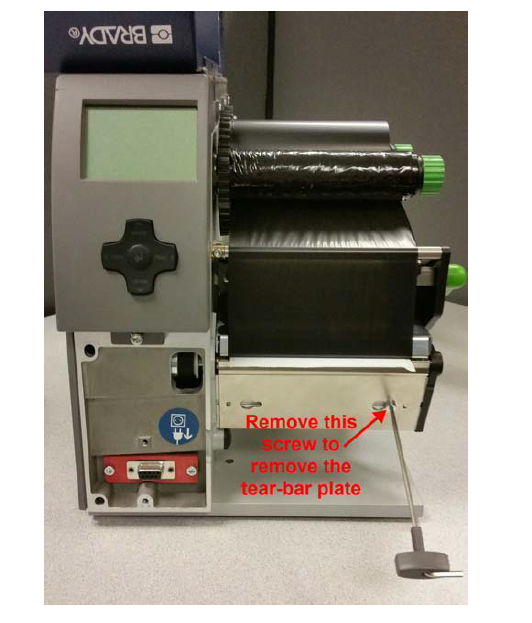
2.) Next, remove the tear-bar place below the mouth/roller of your printer.
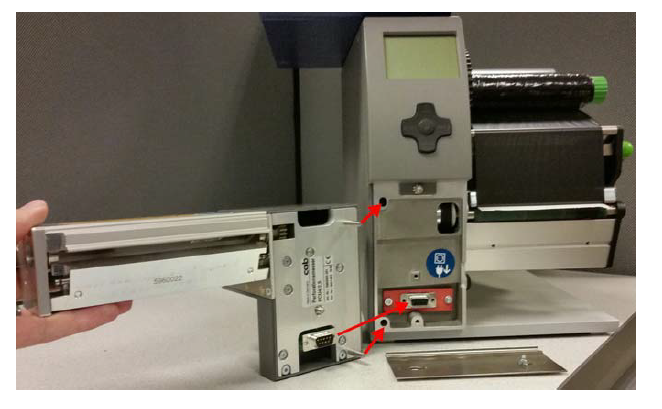
3.) Align the cutter up with the connector on the printer and press the cutter firmly into place.
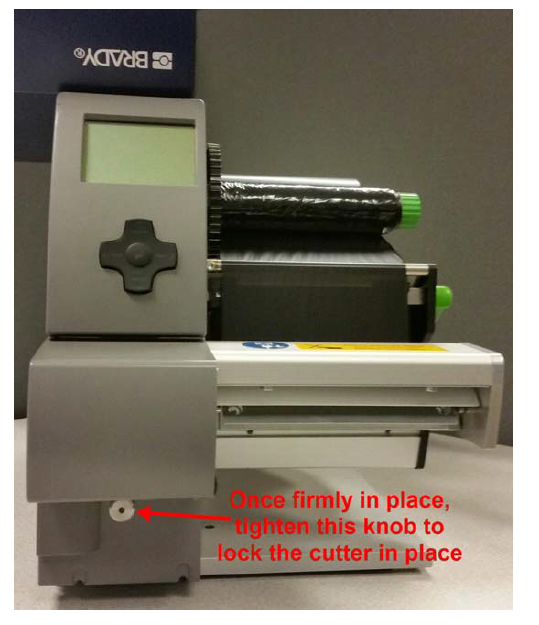
4.) Tighten the knob on the lower left corner of the cutter to secure into place. Now power on your printer and your cutter should be ready to use.
Please see the attached document for same instructions and download.

