Network the J7300You are able to connect the printer over Wi-Fi or via an Ethernet connection.Wi-Fi
Note: Wi-Fi capability is not available on all printers or in all countries.
Important: Before you configure the Wi-Fi connection on an enterprise network, be sure the printer is set to the current date and time. The printer may not be able to establish the connection if the date and time is not current.
Search to Connect
- Tap Settings.
- Tap Connection.
- Tap Wi-Fi Network to turn on Wi-Fi.
The printer searches for Wi-Fi networks and displays a list of networks found.
- Touch and drag to scroll through the list.
If you need to identify the network by static IP address or DHCP, refer to Manually Enter Settings.
- Tap the network that you want to use.
- If the network is not locked, simply tap it and the printer connects to it.
- If the network is locked, as indicated by a lock symbol, tap the network and a key pad opens. Enter the password and tap
 .
.
Note: If your network uses WEP authentication, a menu displays instead so that you can enter both the password and the WEP index (key).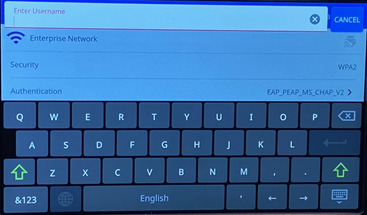
- If the network you need is not in the list, it may not be discoverable. Scroll to the bottom of the list and tap Other. Choose either Personal Network or Enterprise Network. The system displays settings appropriate to your selection. You may need information from your IT department to complete the settings.
EthernetIf using a Windows driver, it is best to configure the Ethernet (TCP/IP) connection before you install the driver. If the driver is already installed before you network the printer, you may need to edit the port settings for the printer in Windows to update the IP address.
- Turn the printer on.
- Connect the Ethernet cable to the back of the printer and the other end to the Ethernet port on the computer or Local Area Network (LAN).
- If you want to add a name for the printer, navigate to Settings > Connection > Printer Name. The default name is J7300.
Printer installations using a host name perform best with a dynamically assigned IP address.
- For IP Settings, select either DHCP or Static checkbox.
DHCP addressing uses a DNS server to dynamically assign an IP address without user configuration.
For static addressing, you must supply the printer's IP address.
- If you are selecting static, connect the printer using the USB cable and fill in the following fields:
- IP Address: Enter the printer's IP address.
- Subnet Mask: Enter a subnet mask if you are using one.
- Default Gateway: Enter the IP address of the default gateway.
- DNS Server (Primary): Enter the IP address of the primary DNS server.
- DNS Server (Secondary): Enter the IP address of the secondary DNS server.
Your changes automatically save after the values are set. Click the Home icon or navigate to another page when finished. Manually Enter SettingsFollow steps to manually enter settings if the network is hidden.Connect to a Wi-Fi network
- Tap Settings.
- Select Connection on the Settings screen.
- Tap Advanced Network Settings.
- Select Wi-Fi from the list.
- Tap IP Settings and then tap one of the following.
- DHCP: DHCP addressing is dynamic and the system uses a DNS server to obtain the printer IP address for you.
- Static: Select static addressing to manually enter the printer's IP address.
- Tap the back button to return to the Wi-Fi screen.
- Fill in the remaining available settings with help from your network administrator.
- Return to the home screen.
Connect with Ethernet
- Tap Settings.
- Select Connection on the Settings screen.
- Tap Advanced Network Settings.
- Select Ethernet from the list.
- Choose IP Settings and then tap one of the following:
- If your network uses DHCP to automatically assign IP addresses, tap DHCP.
- If your network requires manually providing IP addresses, tap Static. Get assistance from your network administrator to fill in the IP address and other settings on the Network screen.
- If Static was selected, fill in the following fields:
- IP Address: Enter the printer's IP address.
- Subnet Mask: Enter a subnet mask if you are using one.
- Default Gateway: Enter the IP address of the default gateway.
- DNS Server (Primary): Enter the IP address of the primary DNS server.
- DNS Server (Secondary): Enter the IP address of the secondary DNS server.
Important: If no DNS server is being used, enter 0.0.0.0.
- Tap on the back button to get to the Advanced Network Settings screen in order for the fields entered to take effect.
- If DHCP was selected, no additional fields need to be entered.

