Body | This information can be found on page 11 of the J4000 user manual: J4000 User Manual and Quick Start GuideInstalling Label SupplyBrady labels come equipped with smart-cell technology that enables the printer and Brady labeling software to recognize the type of label and automatically set many label formatting details. Use only genuine Brady J4000 series labels.
1. Turn on the printer.
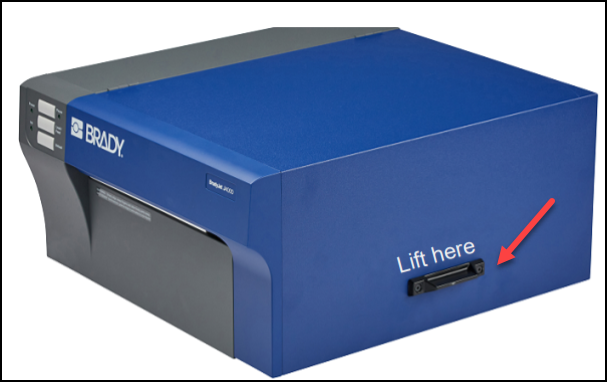
2. Open the cover using the handle on the side.
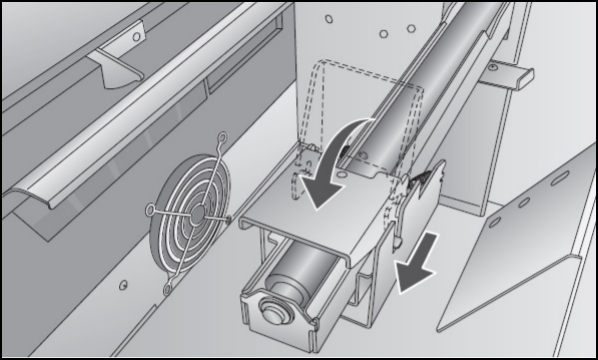
3. Lower the Roll Guide and pull it outward.
4. Remove any shipping tape from your label stock roll to ensure that it can unroll freely, making certain that no adhesive portion is exposed.
IMPORTANT! Any exposed adhesive surface can attach itself to the inner workings of the print mechanism and cause a media jam.
5. Place the supply on the roll arm and push it inward until it touches the roll stop.
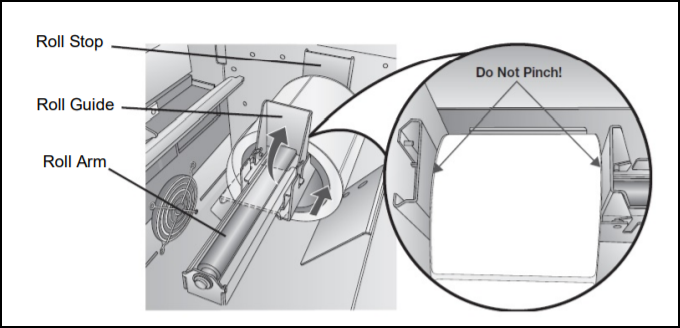
6. Flip the roll guide up and slide it inward until it touches the label supply. The roll guide will automatically pull back slightly to the correct position. There should be approximately a 1mm gap between the roll guide and the roll.
7. Pull the movable throat guide outward to make room for the label supply.
8. Place the leading edge of the supply under the “label supply” symbols on the throat guides. The supply should be placed far enough into the throat of the printer to correctly position the movable throat guide but not yet into the printer itself.
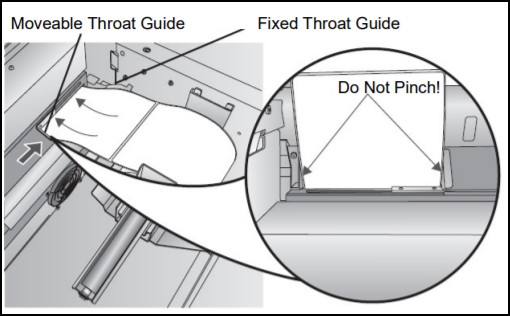
9. Slide the movable throat guide inward until it almost touches the supply.
10. Feed the supply further into the printer until it senses the label and automatically feeds it through the printer.
If the printer fails to feed the label stock, press the load/feed button on the front panel while continuing to guide the label into the printer. If the printer does not automatically grab and feed the supply or continues to feed the labels without stopping check the gap sensor position or mode. See:
Installing Ink CartridgesIMPORTANT! The low ink warning light illuminates when there is 5% ink left in the cartridge. Pressing the load/feed button will allow you to continue printing but will turn off the low ink light.
1. Open the cover using the handle on the side.
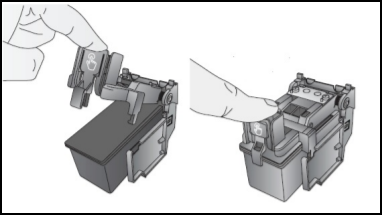
2. Press the tab on the front of the cartridge carrier to release the ink cartridge.
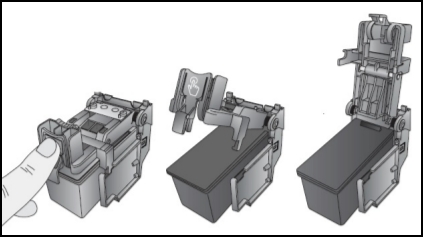
3. Remove the cartridge from the carrier.
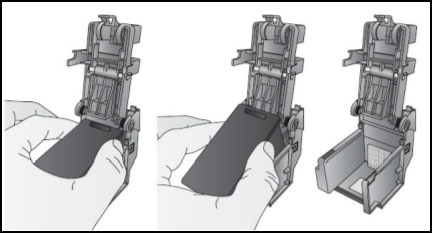
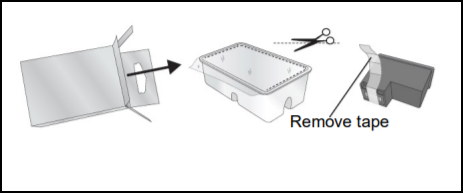
4. Remove the new ink cartridge from its packaging and pull off the tape covering the nozzles.
5. Place the new cartridge into the carrier by tilting the cartridge at a slight backward angle of approximately 30 degrees.
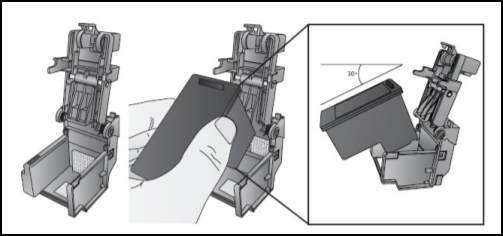
6. Close the lid on the carrier by pressing down until you hear a click.
 |
|
|---|


