Body | Networking the BBP12Network settings on the BBP12 can be configured from the printer display or diagnostic utility. If configuring for a static IP, it is recommended to use the diagnostic utility. Configure Networking from the DisplayPress the "Menu" button, then navigate to Interface > Ethernet

Select DHCP to have an IP address automatically assigned to the printer
Select Static IP to assign a static IP to the printer, then enter the static IP informationConfigure Networking using the Diagnostic Utility (recommended for assigning a static IP)Download the diagnostic utility attached to this article: BBP11/12 - Diagnostic Tool for the BBP11/12 printer
Connect the printer to your PC via USB
Extract and Launch the diagnostic utility
Choose the "Network Configuration" tab
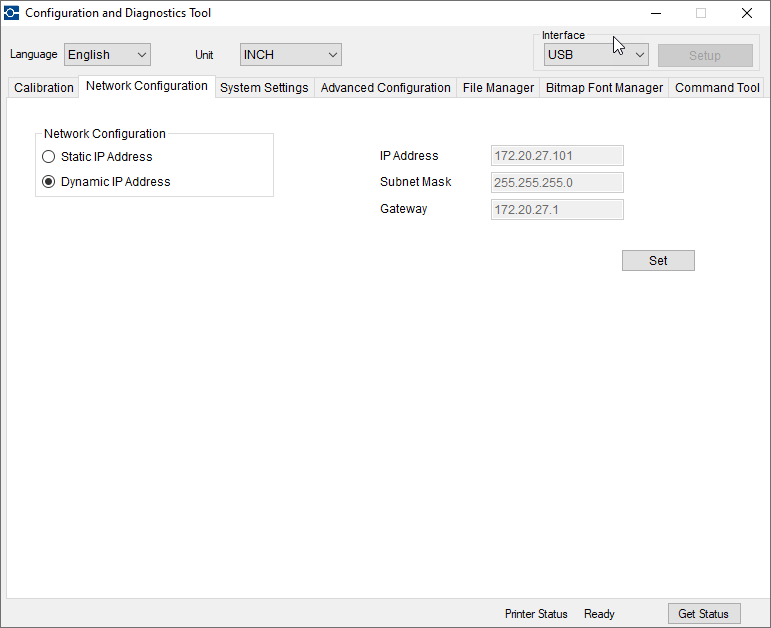
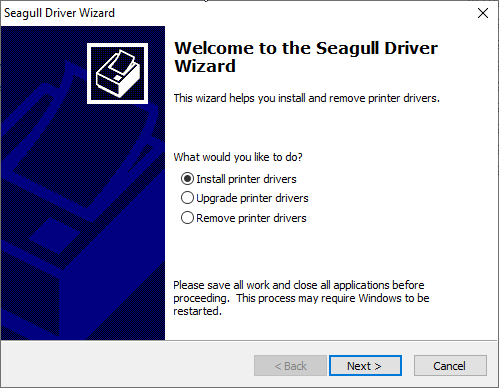
Choose Dynamic or Static IP configuration, enter static IP information if necessaryDownload and install the the driver from BradyIDNote: If the BBP12 driver has already been installed, you can add the network port: How to Add a Network Port to a Windows DriverLaunch the driver executable, choose "install printer drivers" and click Next
Choose the Network option, connect the printer as instructed

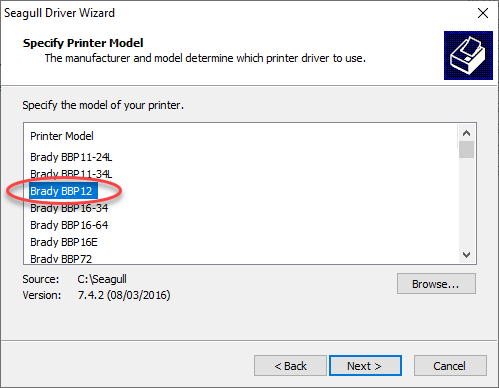
Select the BBP12 printer model
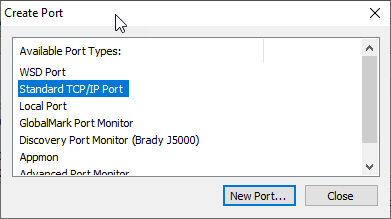
Choose "Create port"
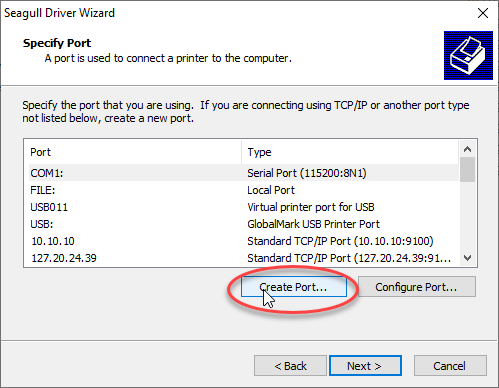
Select "Standard TCP/IP Port"
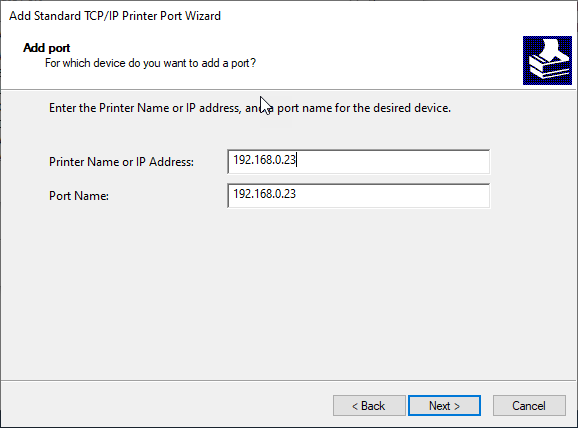
Click Next, then enter your printer's configured IP address
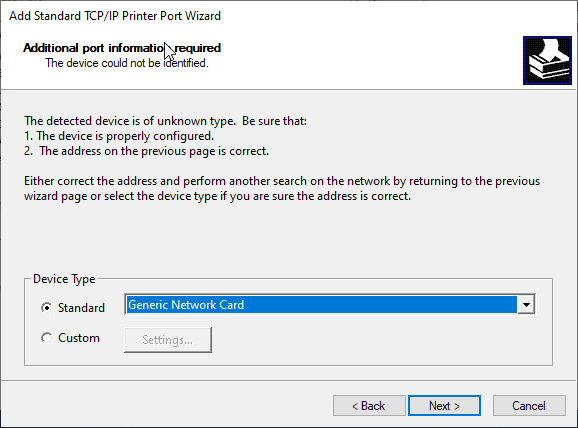
Choose the radio button for Standard, and leave the selection "Generic Network Card"
Click Finish to complete the installation |
|
|---|
