Brady IP and i5100 printers read information from RFID tags on Brady Labels. These are the only printer models that take label calibration type (gap, notch, continuous or marked below used for notched, black mark or sleeves) from the Label Page Setup information in Codesoft instead of the print driver. If the custom labels have an RFID Tag (are "IP Enabled"), Codesoft will read the RFID information and create the correct label part as long as you install the print driver for these Brady printer models using these instructions:
Setup the Brady IP or i5100 printer for Printing from CodeSoftIf the labels are not IP Enabled, the printer's LCD will display a large S for standard, and will require you to create a custom label part one time. It too requires the Setup for Brady IP or i5100 for Printing from Codesoft.
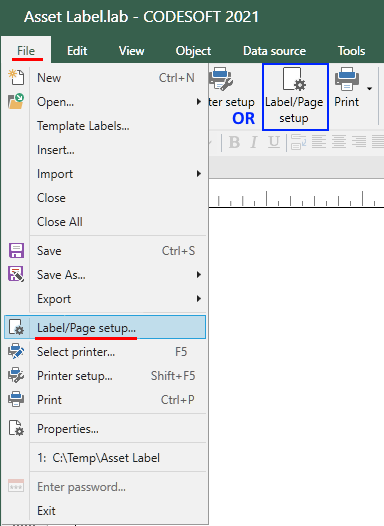
1. In Codesoft, click File > choose Label/Page Setup.
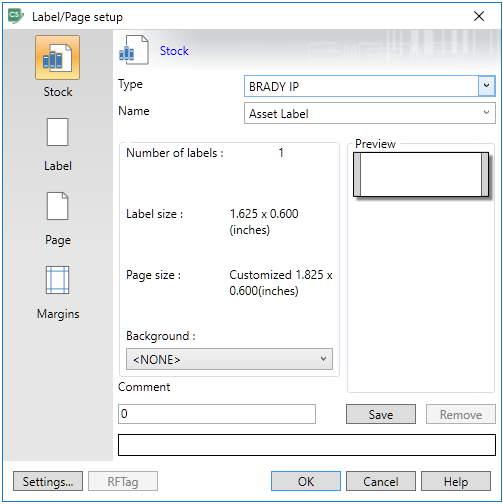
2. On the Stock tab, for Type, select Brady IP. In Name, you can enter whatever name you want for the labels.
3. Click the Label tab on the left.
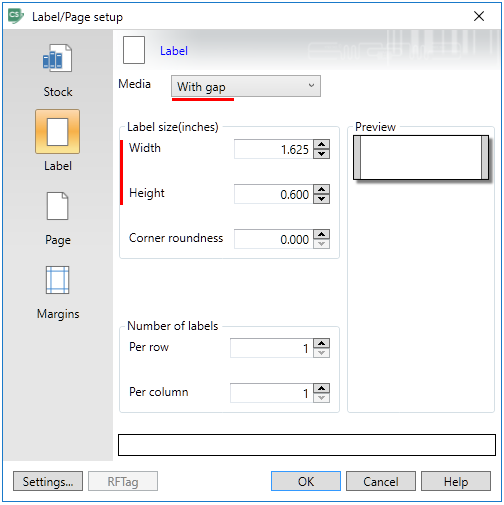
4. Enter the individual label dimensions. If the label is a self-laminating label with white printable area and clear laminate to cover the printed area after the label is printed and when it is applied, only enter the printable area.
5. In Media field, be sure to select calibration method for the labels (With Gap, Continuous or Marked Below)
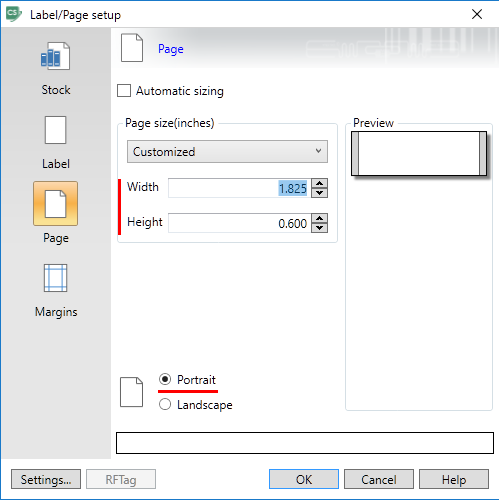
6. Click on the Page tab. Here you enter the width of the liner on which the labels sit, and the height of the complete label itself. Do not add the gap between labels. Calibration sets the top of the page. If the label has a printable area on top or bottom and a clear area (self-lam), for the page enter the height of the complete label - both printable area and clear self lam.
7. Always use Portrait - regardless of the orientation you use to create the label. This is because the label comes out of the front of the printer. As far as the printer is concerned, the page starts at the top of the label or row of labels and ends at the bottom edge of the label or labels.
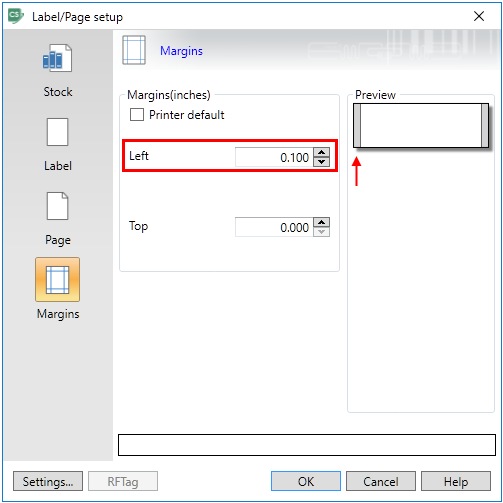
8. Click on the Margins tab. The only margin you should enter is the left - the distance from the edge of the liner to the edge of the label, to indicate the start of the label horizontally. You never want to enter Margins on the label itself because you have the whole label to place objects (text, barcodes, images, shapes, etc) on. If you enter a margin and send your label to print, it will take what you see on the label and move it down or right the amount of the margins you enter.
9. Then click OK then Save.


