Image to Text, previously OCR, is available with the 3.0.13 release in Express Labels. Image to Text will copy the barcode from an existing image or file and create a QR code on a label.
The following files can be uploaded in the Express Labels app for the Image to Text option:
Multiple barcodes can be selected, but separate labels will be created from selection. Only one page of a file can be looked at during each scan.
- Open Express Labels.

- Select Blank.
Image to Text is available in Blank, Breaker Box, Flag, Patch Panel, Sleeve, Slide, Terminal Block, Tube, Vial and Wrap. The instructions are in the Blank app but will be similar for the other apps.

There are two different ways to complete the Image to Text scan: Insert or through a Textbox. Textbox will only add the information as text where Insert will add the information as text or a barcode.
- If Insert is chosen, up to 25 items can be selected.
- If textbox is selected and then Image to Text, only 1 item can be selected. Proceed to step 15.
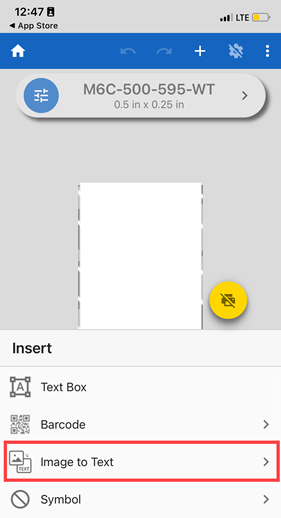
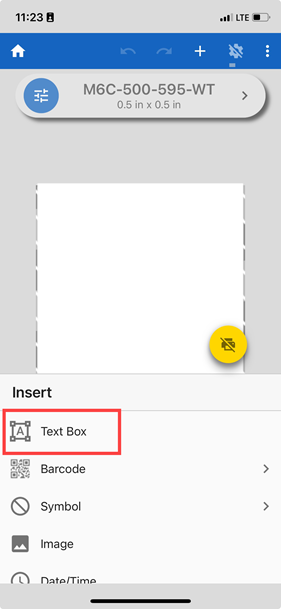
Insert
- Under Insert, select Image to Text.

- Select how to insert the Image to Text Data as: text or barcode.
- Tap Camera to display the camera and take an image of something currently or tap Open to open a file or image.
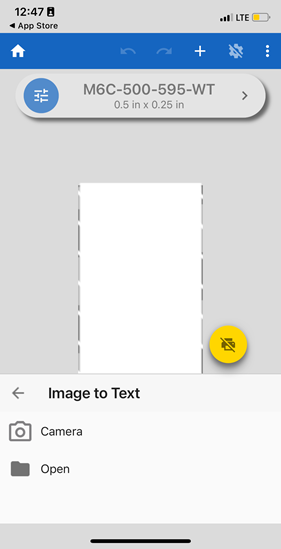
- If using Camera, proceed to step 9. If using Open, proceed to the steps below.
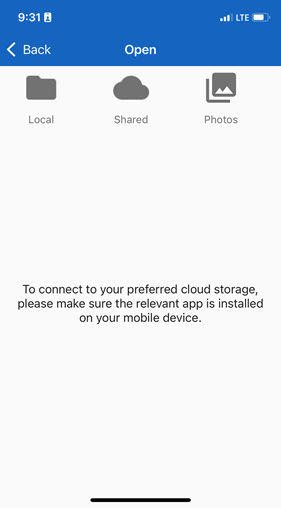
- Tap the location of the file: Local, Shared or Photos.
- Find the file or photo and select it. Proceed to step 11.
Note: If the file has multiple pages, click to select the page. Only one page can be selected at a time.
Camera
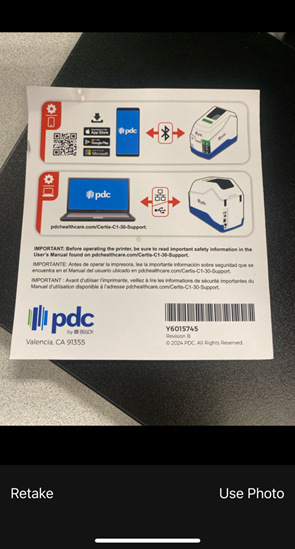
- Take a picture of a document or item with text or barcodes.
- Tap Use Photo to continue to the next step or tap Retake to take another photo.
File and Camera
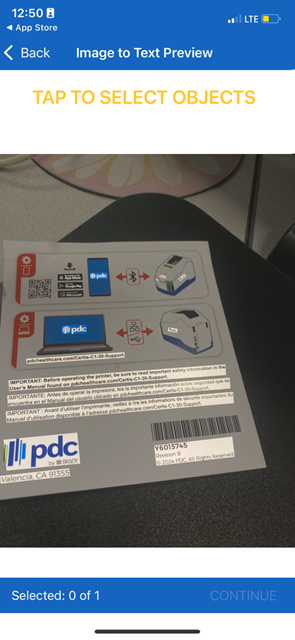
- Tap up to 25 items on the file or image to create a label.
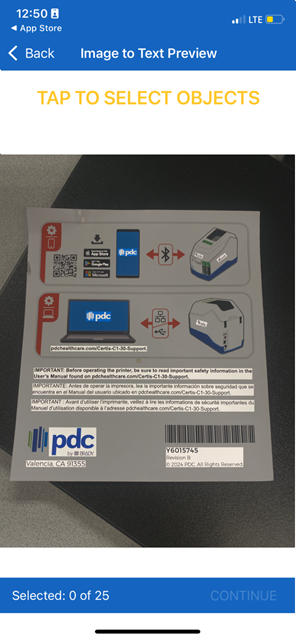
- Tap Continue.
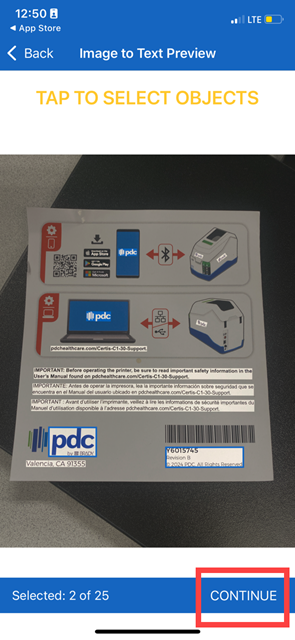
- Each selected item creates a new label.
- Tap the Printer icon to print the labels.
Textbox
- Tap Text Box under Insert.
- Tap the Keyboard icon.
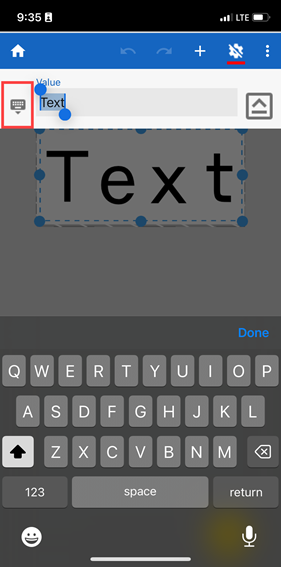
- Tap the Image to Text icon.
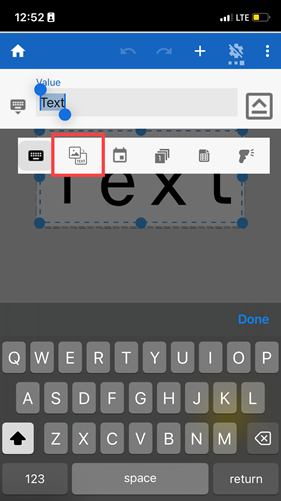
- Tap Camera or Open.
Camera displays the camera to take an image where Open will open a file or image.
Open
-
- Tap the location of the file: Local, Shared or Photos.
- Tap the item to create a label.
Only one item can be selected at once while using Image to Text through the Text Box.
-
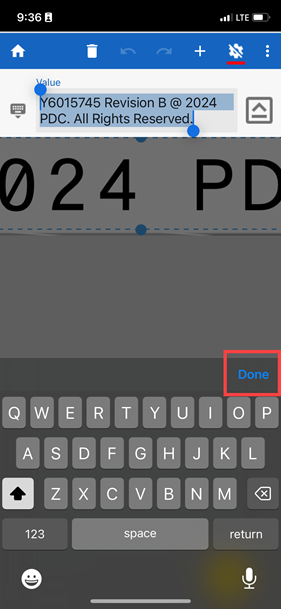
- Tap Continue.
- The label is created with the information selected in the prior step. Adjust the label as needed and tap Done.
Camera
-
- Take a picture of a document or item with text or barcodes.
- Tap Use Photo to continue to the next step or tap Retake to take another photo.

-
- Tap the item to add to the label.
Only one item can be selected at once while using Image to Text through the Text Box.
-
- Tap Continue.
- The label is created with the information selected in the prior step. Adjust the label as needed and tap Done.

