Body | Note: The steps included in this article could affect the integrity of your system if performed incorrectly and may damage your system. Please contact your IT department if there you are uncertain of the steps provided.
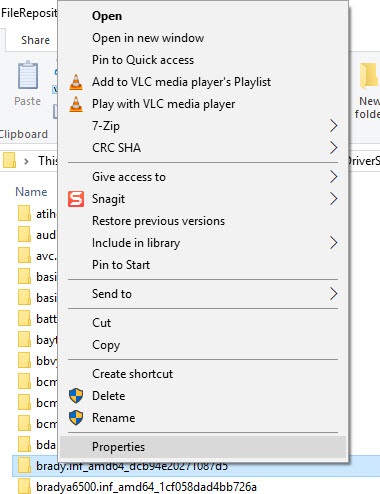
Changing ownership of a Windows Driver folder may be necessary when attempting to permanently remove a driver.Changing Ownership of a System Driver Folder1. Right-click the folder and select Properties.
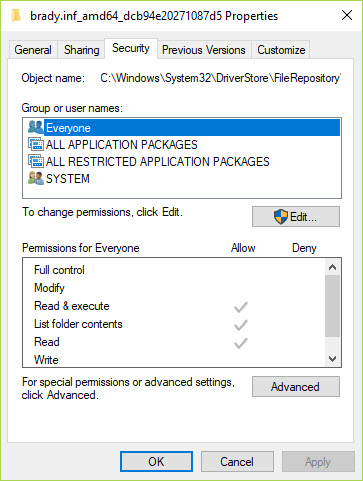
2. Select the Security tab and click the Advanced button in the bottom right.
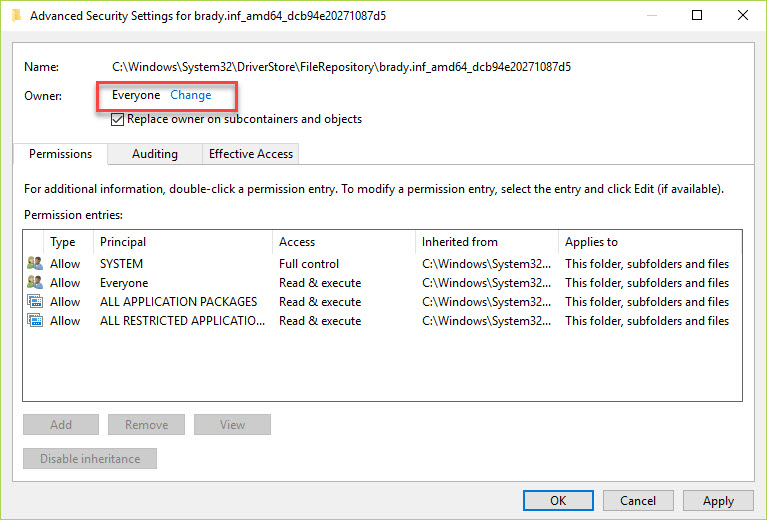
3. Near the top of the Window select Change next to the Owner listed.
4. Type Everyone in the text box and click Check Names.
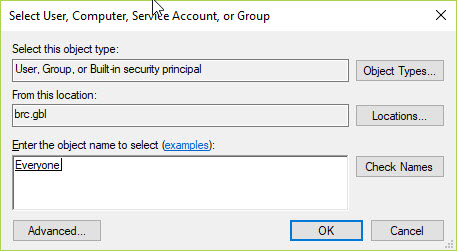
5. Then select OK.
6. Check the box that says' Replace owner on subcontainers and objects'.
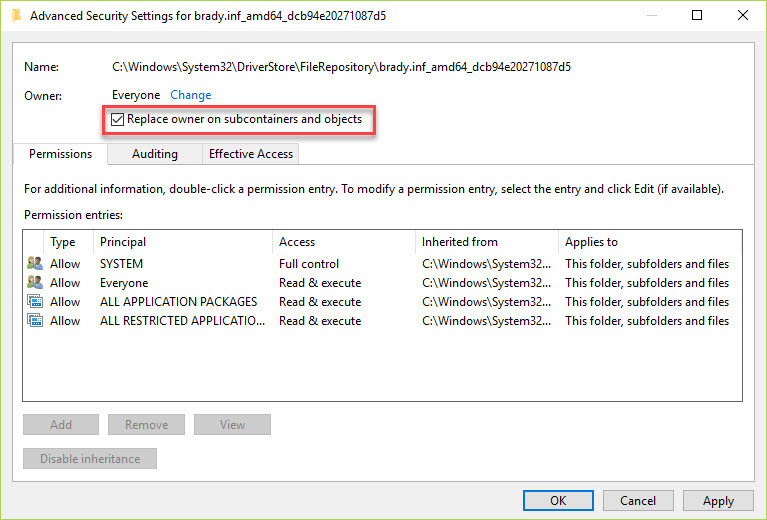
7. Click Apply and OK. That will take us back to the Folder properties window.
8. Click Edit.
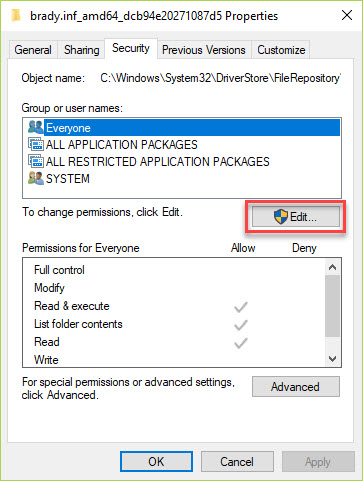
9. Select Everyone in the top Window and check Full Control in the permission list.
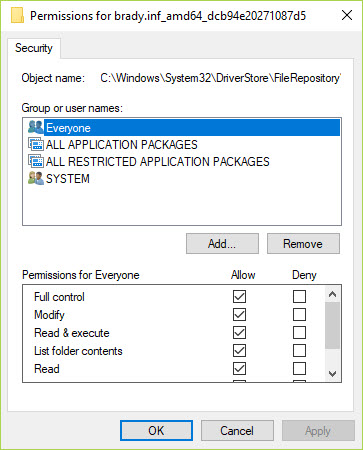
10. Click Apply and OK to close the window.
11. Once these settings have been changed return to the Windows folder.
12. Right-click the folder and select Delete.
The folder should now be removed from the system.
Before moving on to any next steps please restart the computer to ensure all files have been removed. |
|
|---|


