Body | Installing Ribbon and Labels in the BBP72
Loading the Media Roll
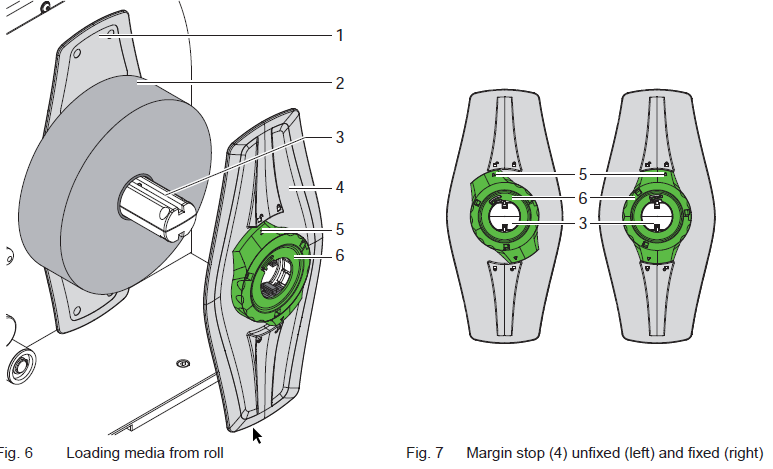
1. Open cover.
2. Turn ring (6) counterclockwise, so that the arrow (5) points to the symbol , and thus release the margin stop (4).
3. Remove the margin stop (4) from the roll retainer (3).
4. Load label roll (2) on the roll retainer (3).
5. Re-mount the margin stop (4) onto the roll retainer (3). Push the margin stop (4) until both margin stops (1,4) touch the label roll (2) and a clear resistance is encountered.
6. Turn ring (6) clockwise, so that the arrow (5) points to the symbol , and thus fix the margin stop (4) on the roll retainer.
Feeding Media Through the Label Path
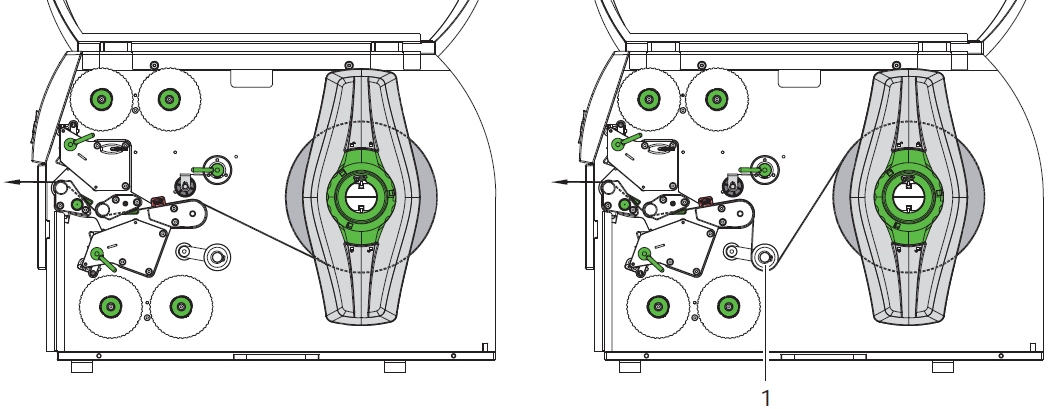
1. Unroll a longer material strip of approx. 50 cm. Guide the media strip to the print mechanics as shown in figure 8.
2. If the media is coming from above (figure 8 right side) guide it around the pivot arm (1).
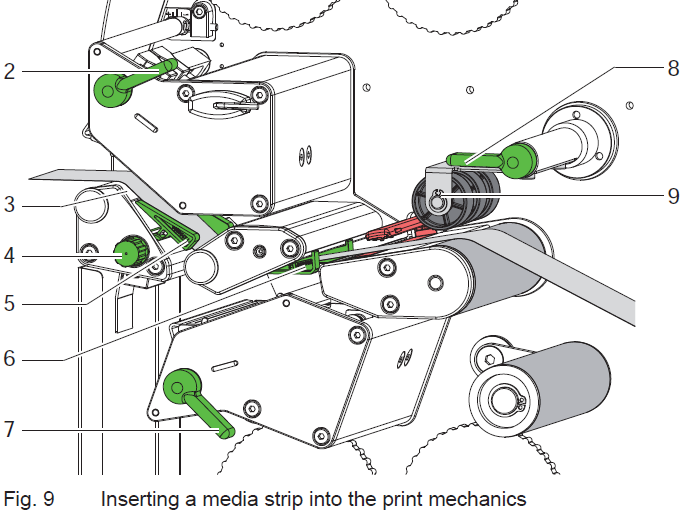
3. Turn lever (2) counterclockwise and levers (7,8) clockwise to lift both printheads and the hold-down (9).
4. Move guides (5,6) apart with the knob (4) until the media can pass between them.
5. Guide media strip through the print mechanics as shown in figure 9 to the upper print roller (3) and place the strip between the guides (5,6).
6. Move guides against the edges of the material by turning the knob (4).
7. Fix the media by closing the upper printhead.
8. Turn the media roll against the feed direction to tighten the media.
9. Close the lower printhead.
10. Close the hold-down.
Adjust the Media Sensor
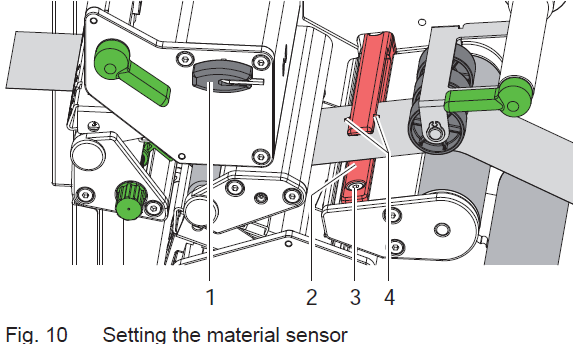
The material sensor (2) can be shifted perpendicular to the direction of media flow for adaptation to the media. The sensor unit is marked with indentation (4) on the label sensor retainer.
1. Slightly loosen the screw (3) with Allen key (1).
2. Position sensor by moving it in such a way that the sensor can detect a reflex or cut-out mark.
3. Tighten the screw (3).
Loading Thermal Transfer Ribbon
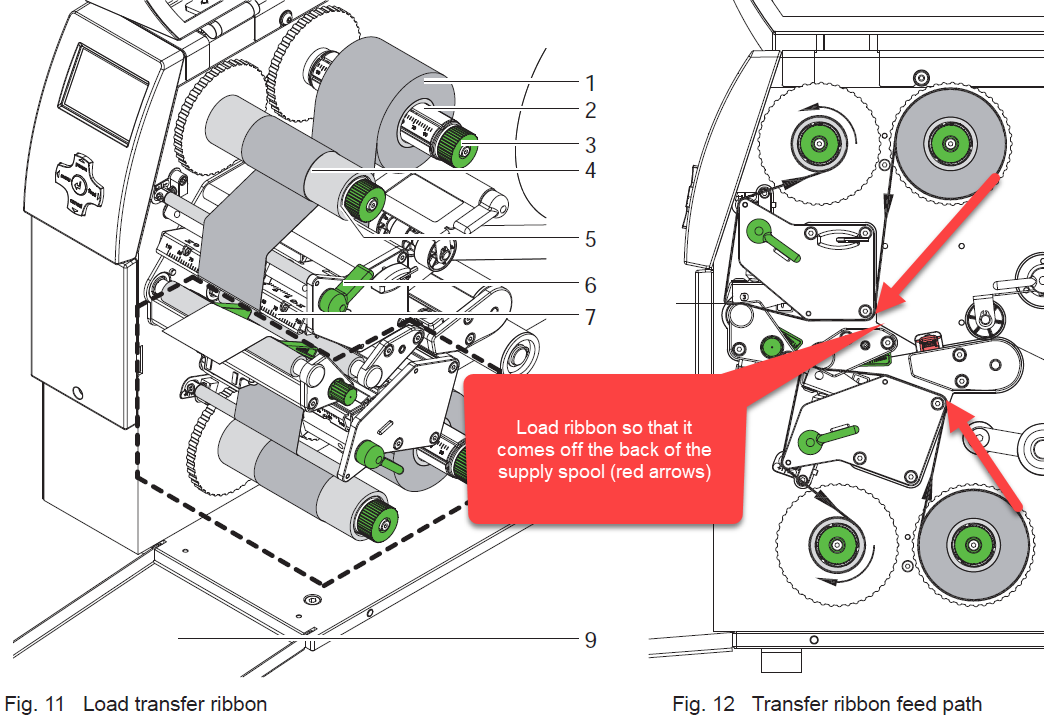
1. Clean printheads before loading the transfer ribbon
2. Turn lever (6) counterclockwise to lift the upper printhead.
3. Slide transfer ribbon roll (1) onto the ribbon supply hub (3) so that the color coating of the ribbon faces downward when being unwound.
4. Position the ribbon roll (1) in such a way that both ends of the roll show identical scale values.
5. Hold transfer ribbon roll (1) firmly and turn knob (3) on ribbon supply hub counterclockwise until the transfer ribbon roll is secured.
Note: To rewind the transfer ribbon use a core with a width between the width of the supply roll and 115 mm.
1. Slide suitable transfer ribbon core (4) onto the transfer ribbon take-up hub (5). Position and secure it in the same way like the supply roll.
2. Guide transfer ribbon through the print unit as shown in Fig. 12.
3. Secure starting end of transfer ribbon to middle of the transfer ribbon core (4) with adhesive tape. When using cores which are wider than the transfer ribbon use the scale (7) at the printhead retainer to adjust the path of the ribbon. Ensure counterclockwise rotation direction of the transfer ribbon take-up hub.
4. Turn transfer ribbon take-up hub (5) counterclockwise to smooth out the feed path of the transfer ribbon.
5. Turn lever (6) clockwise to lock the printhead.
6. Open the flap (9) and load transfer ribbon to the lower print unit (8) in a similar way. All previous statements of direction apply contrariwise excepting the turning of the knobs. |
|
|---|
