The print queue is available from the print screen when files are being printed. Use it to add more files to the queue, delete files from the queue, or change the print order.
Only one job can be in the print queue at a time unless the Print Queue setting is enabled in the settings menu.
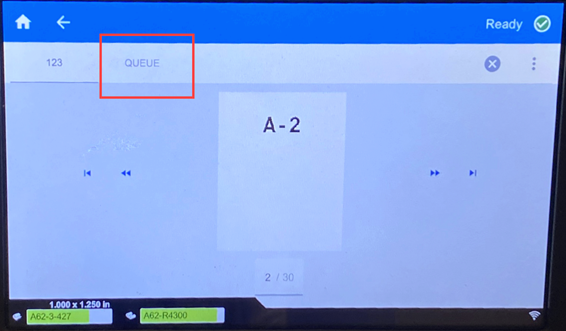
See the Print Queue
- Start printing a file or files.
- Tap the Queue tab to see the queue.

Adding Files to the Queue
- While printing, tap Queue on the print screen.
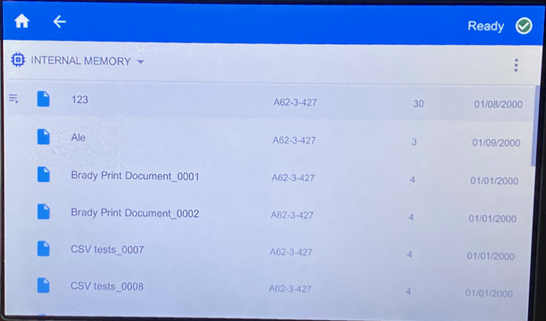
- Tap + to open the file list.

- Find the file to add.
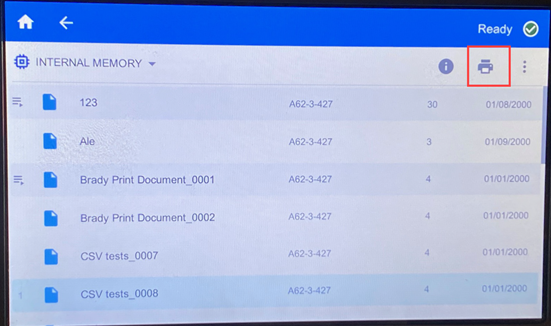
- Tap the file.
- Tap the Printer icon.
Removing Files from the Queue
- While printing, tap the Queue tab on the print screen.

- If running in Print only mode, tap the Pause button to pause printing.
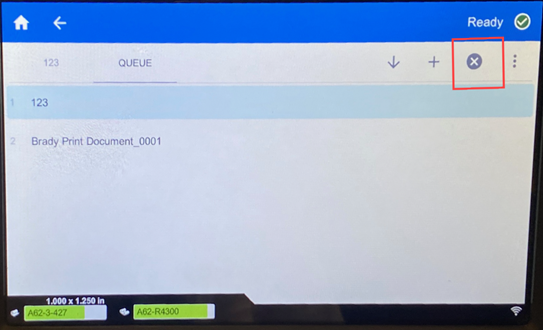
- Tap the file that you want to remove from the queue.
- Tap X and Cancel Job.
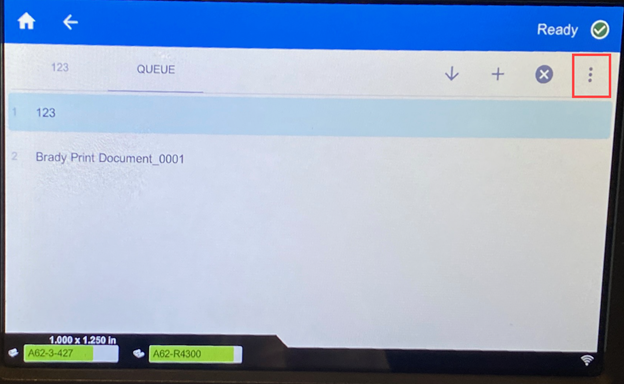
Remove All Files from the Queue
- While printing, tap the Queue tab on the print screen.
- If running in Print only mode, tap the pause button to pause printing.
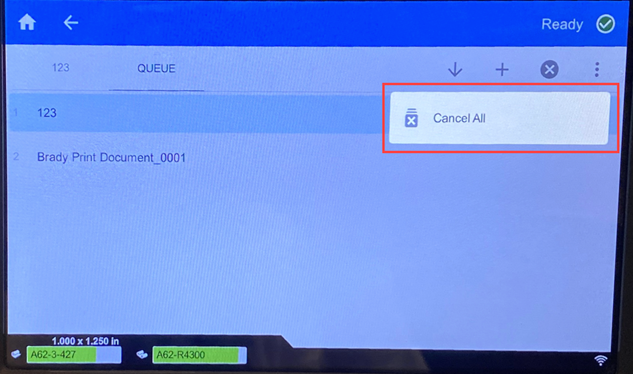
- Tap the three dots.
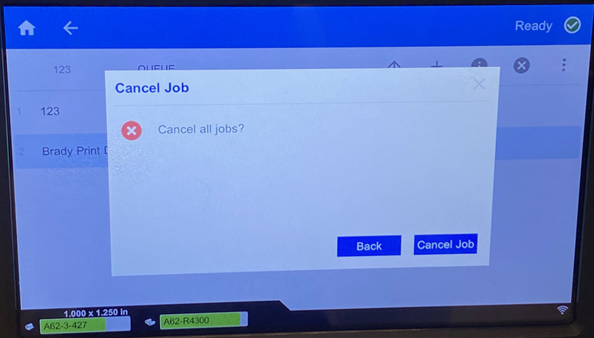
- Tap Cancel All.
- Tap Cancel Job.
Note: If you turn on Auto Queue Job in Settings > Print Queue, then you don't have to manually add jobs to the queue.
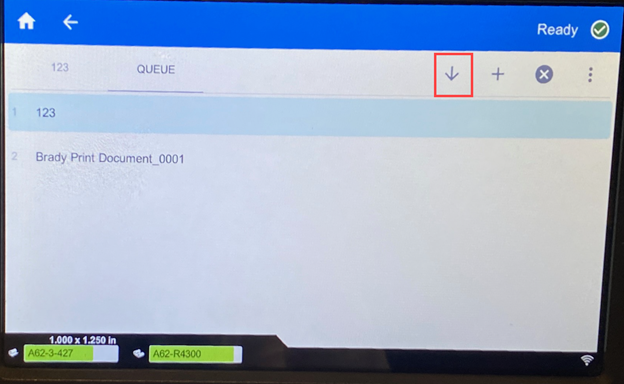
Change the Print Order
- While printing, tap the Queue on the print screen.

- Tap the file that you want to move up or down in the queue. You cannot move the file first in the list.
- Tap the up or down arrow to move the file.
Change options for the Print Queue in the Settings menu.
- Enable Print Queue: If this setting is off, only one job at a time can be added to the print queue.
- Remove Print Job from Queue when Closed: Removes the print job from the queue when the job is closed. Job files are closed either when you tap the Close Job button on the Printing screen, or if the job is set to automatically close when completed. When removed from the queue, the job is still available from the Files screen.
- Delete Print Job when Closed: Delete the current print job when it is closed. Job files are closed either when you tap the Close Job button on the Printing screen, or if the job is set to automatically close when completed. Jobs are not deleted when you cancel them from the print queue.
- Prompt for Delete Confirmation: This is only visible when Delete Print Job when Closed is turned on. Turn this on to see a confirmation message before the printer automatically deletes a print job when it closes.
- Load Last Job: If this setting is on, the last job that was running at the time the printer was turned off remains in the print queue so that you can continue printing.
- Resume Print Job at Last Label Number: When opening a print job that contains multiple labels, the printer can start at label one, or it can start where you left off. Turn this setting on to resume where you left off the last time the job was closed or the printer was turned off while running this job.
- Auto Queue Job: Turn this on to automatically add jobs to the print queue when they are sent to the printer. If this is off, then you have to use the Files button on the home screen to add jobs to the queue.
- Close Print Job When Completed: Turn this on to automatically advance to the next print job in the queue after printing the last label in the file. Turn this off if you want to repeat printing the same job and manually close the job when you are done.

