Purchase the print head (part A5500-PRINT-HEAD) from BradyID.
Remove the Old Printhead
- Tap Load Supplies.
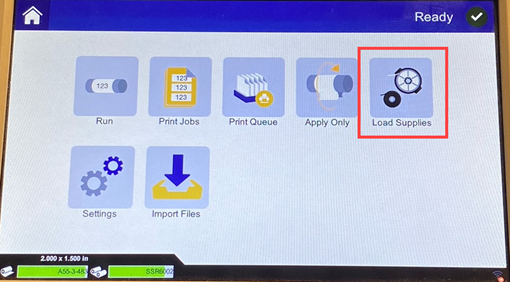
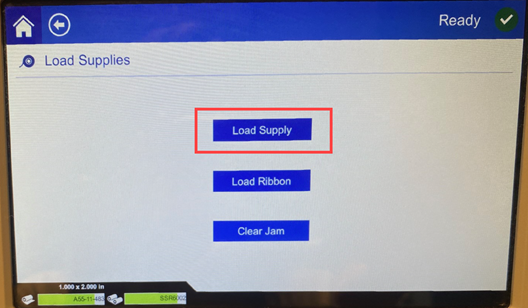
- Tap Load Supply.
The print mechanism shuttles back.
Warning: Power off and unplug the BradyPrinter A5500 printer prior to performing any cleaning or maintenance!
- Open the side door on the printer.
- Remove the label material making sure to release the label roll to avoid damaging the smart-cell.
- Remove the ribbon.
- Use a 7/64" hex key to remove the screw that is located above the print head assembly stamping. Save the screw for installation of the new assembly.
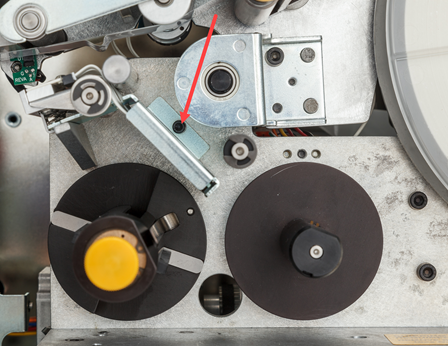
- Using a 5/32" hex key, remove the washer and screw located opposite the print head mounting pivot shaft. You will need to reach around to the back of the printer to remove the washer and screw. Save the washer and screw for installation of the new assembly.
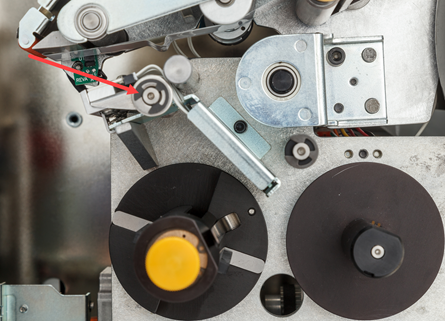
- Remove the print head assembly. Make sure that the print head ribbon cable is eased part way through the cable slot.
- Remove the strain relief tape (if present) from the print head ribbon cable.
- Disconnect the print head ribbon cable from the assembly, noting the orientation of the cable.
Note: It is important to note the orientation of the print head ribbon cable when disconnecting to re-connect it the same way.
Install the New Print Head Assembly
- Connect the print head ribbon cable to the assembly, orientating it the same way as it was when removed.
- Replace strain relief tape, if it was present while disconnecting, on the print head ribbon cable.
- Install the print head assembly, ensuring that the print head ribbon cable and connector are eased back through the cable slot.
- Using a 5/32" hex key, replace the washer and screw located opposite the printhead mounting pivot shaft.
- Using a 7/64" hex key, replace the screw that is located above the print head assembly stamping.
- Replace label material and ribbon and close the side door.

