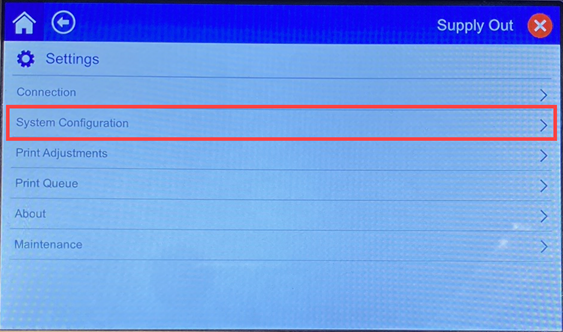
Use the touch screen on the printer to configure standard settings, such as the language.
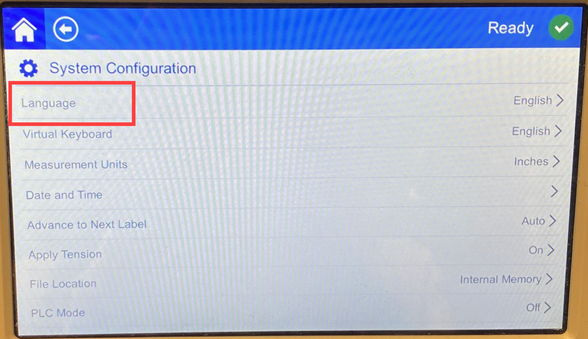
Language
- With the printer turned on, tap Settings.

- Tap System Configuration.

- Tap Language.
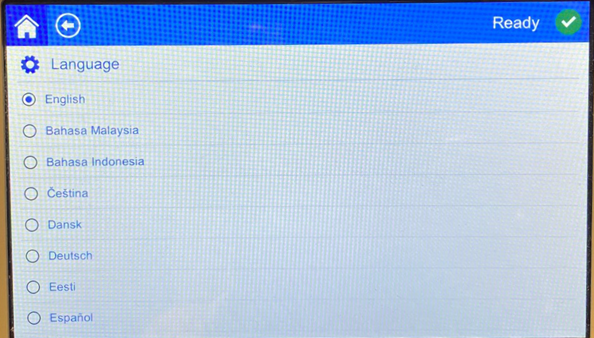
- Tap the desired language. Touch the screen and drag your finger up or down to scroll all available languages.
- Return to the home screen.
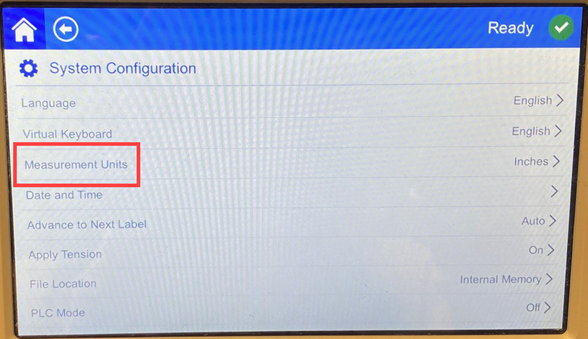
Units of Measure
- With the printer turned on, tap Settings.

- Tap System Configuration.

- Tap Measurement Units.
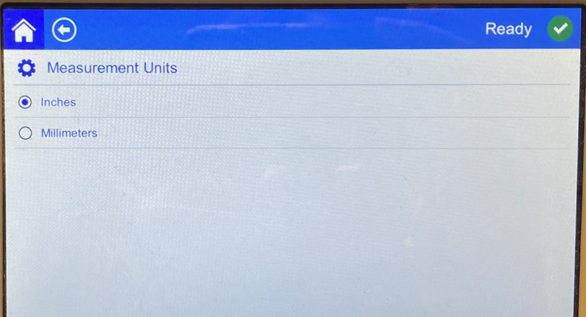
- Tap either Inches or Millimeters.
- Return to the home screen.
Date and Time
Set the printer’s clock to the current date and time. You do not need to reset the date and time after power is removed from the printer.
- With the printer turned on, tap Settings.

- Tap System Configuration.

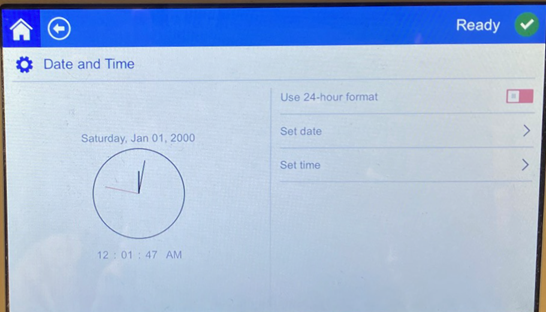
- Tap Date and Time. The left side of the screen displays the current settings.
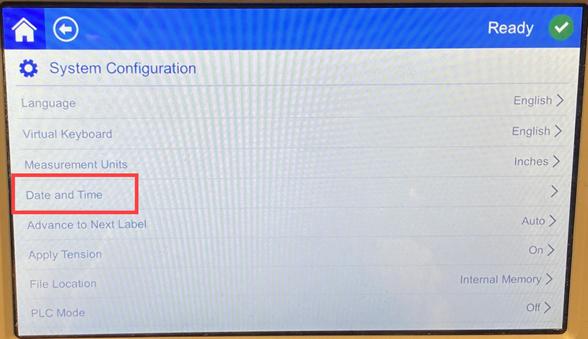
- To change the settings, tap the controls on the right.
-
- Use 24-hour format: Tap the switch to change between 24-hour format (green) and 12-hour format (red) with AM and PM.
- Set date: Tap to display date controls. To change the date, either tap on an element and select a new value, or tap the arrows above or below an element.
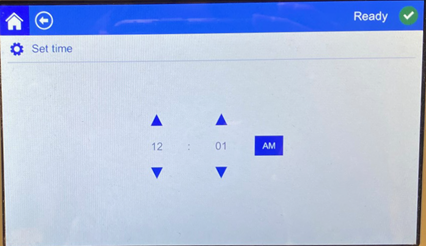
- Set time: Tap to display time controls. To change the time, either tap on an element and select a new value, or tap the arrows above or below an element.
- Return to the home screen.
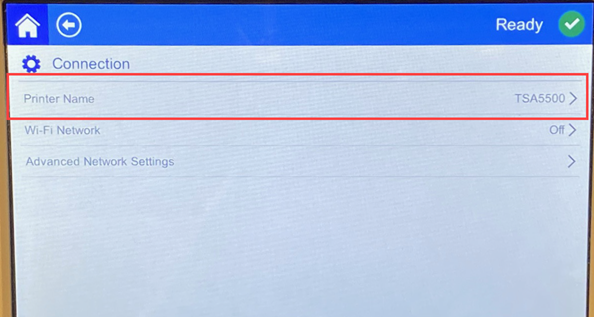
Printer Name
The printer name is displayed when a computer searches for the printer on a Wi-Fi connection. If the printer does not have a name the serial number will be displayed instead.
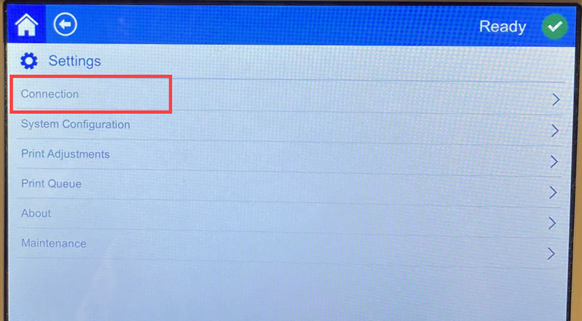
- With the printer turned on, tap Settings.
- Tap Connection.
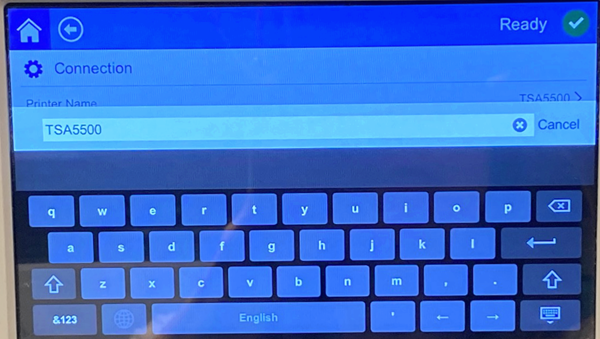
- Tap Printer Name. The printer displays a keyboard. The printer name can only contain the characters A-Z, a-z, 0-9, and a dash (-).
- Use the keyboard on the touch screen to type a name for the printer.
- Return to the home screen.
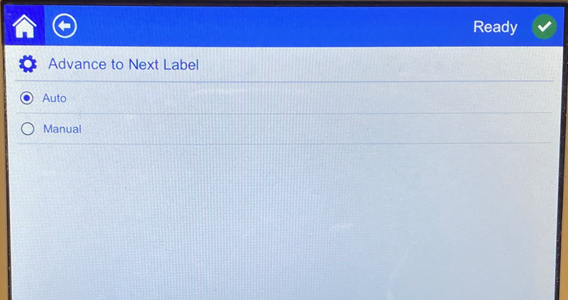
Advance to Next Label
Set the mode for how the printer advances to the next label in a print file.
- With the printer turned on, tap Settings.

- Tap System Configuration.

- Tap Advance to Next Label.
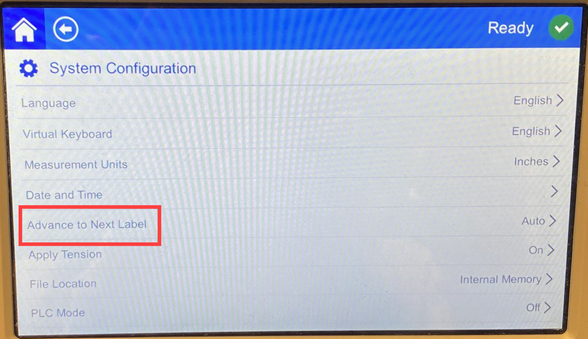
- Choose Auto or Manual.
-
- In Auto mode, the printer automatically advances to the next label after a print and flag cycle. This is the typical mode of operation.
- In Manual mode, you must advance the printer to the next label using the navigation buttons on the Run (Printing) page.
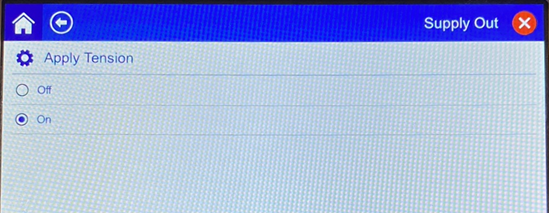
Wrapper Tension
Turn the tension on or off depending on the type of wire being flagged.
- With the printer turned on, tap Settings.

- Tap System Configuration.

- Tap Apply Tension.
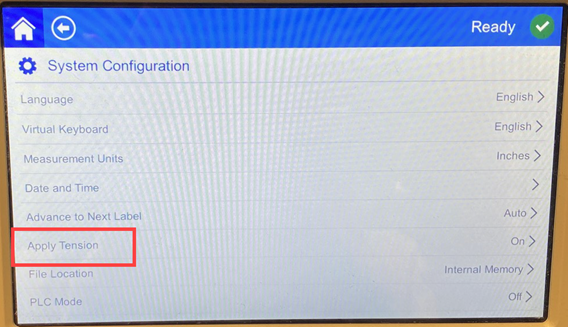
- Choose ON or OFF.
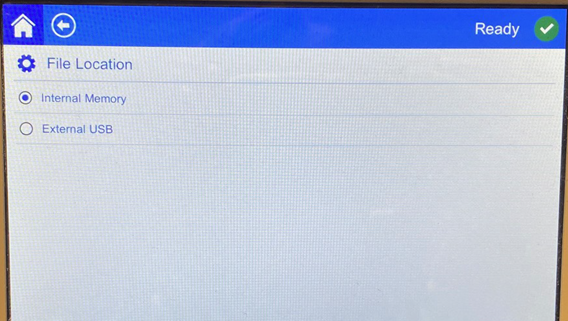
File Location
Choose whether the printer accesses files from memory or from a USB drive.
- With the printer turned on, tap Settings.

- Tap System Configuration.
- Tap File Location.
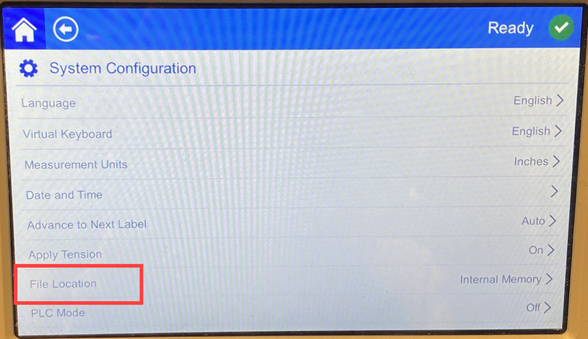
- Choose Internal Memory or External USB.
-
- Internal Memory: use when the printer is directly connected to the computer with a USB cable or on a network.
- External USB: choose this option when transferring files from one BradyPrinter A5500 printer to another using a USB drive.
- Return to the home screen

