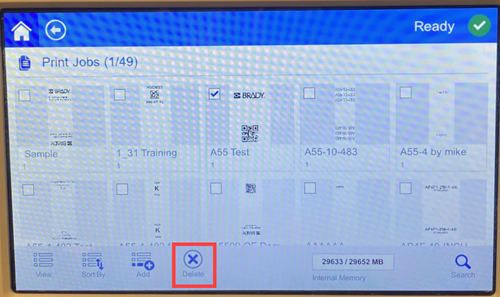
Use Print Jobs to manage print files in the printer’s memory or on a USB drive, depending on whether internal memory or external USB is set in File Location.
The Internal Memory box at the bottom of the screen indicates how much memory is available on the printer. The first number represents the amount of memory available and the second number is the total memory capacity of the printer. The green bar gives a visual indication of the percent full. The bar turns red when memory is low.
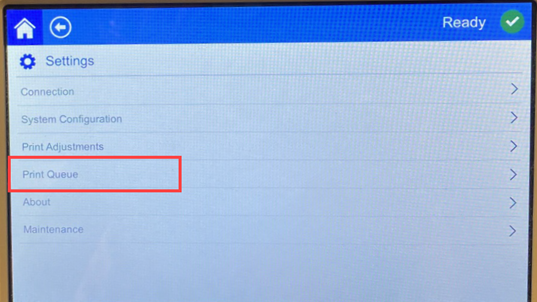
Print Queue Settings
The Print Queue settings must be turned on in the Settings menu.
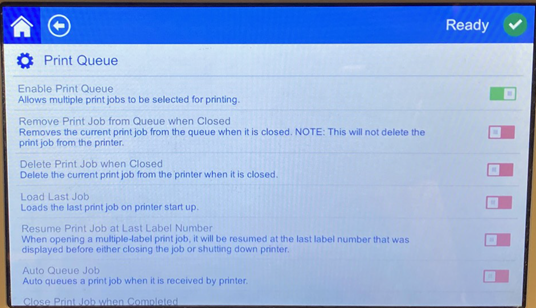
- Enable Print Queue: If this setting is off, only one job at a time can be added to the print queue.
- Remove Print Job from Queue when Closed: Removes the current print job from the queue when it’s closed. This will not delete the print job from the printer.
- Delete Print Job when Closed: Delete the current print job when it is closed. Job files are closed either when you tap the Close Job button on the Run page, or if the job is set to automatically close when completed. Jobs are not deleted when you cancel them from the print queue.
- Prompt for Delete Confirmation: This is only visible when the feature Delete Print Job when Closed is turned on. Turn this on to see a confirmation message before the printer automatically deletes a print job when it closes.
- Load Last Job: If this setting is on, the last job that was running at the time the printer was turned off remains in the print queue so that you can continue printing.
- Resume Print Job at Last Label Number: When opening a print job that contains multiple labels, the printer can start at label one, or resume where you left off. Turn this setting on to resume where you left off the last time the job was closed or the printer was turned off while running the job.
- Auto Queue Job: Turn this on to automatically add jobs to the print queue when they are sent to the printer. If this is off, then you have to use the Print Jobs button on the home screen to add jobs to the queue.
- Close Print Job When Completed: Turn this on to automatically advance to the next print job in the queue after printing the last label in the file.
Finding a Print Job
If the list of jobs is long, you can find the job by sorting or searching. Also, the view can be changed to display a list or thumbnail image of the first label in the file.
To scroll through a list, drag your finger up or down on the screen through the list of files.
Add a Job to the Queue
You must add jobs to the queue in order to run them, that is, to print labels and flag a wire or cable.
- Find the job you wish to add to the queue and tap the check box for that print job.
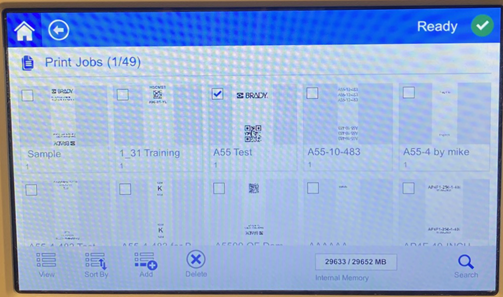
- Tap the Add button. If the Add button is not visible when you have multiple jobs selected, then you need to enable the print queue.
The printer runs the print job and the touch screen displays the Printing page.
Note: With Auto Queue enabled you do not have to manually add jobs to the queue.

Delete a Job
Deleting a job removes the label file from the printer’s memory or from the USB drive depending on the setting in File Location.
- Find the job you wish to delete and tap the check box for that print job.
Note: You cannot delete jobs that are in the print queue.
- Tap the Delete button.
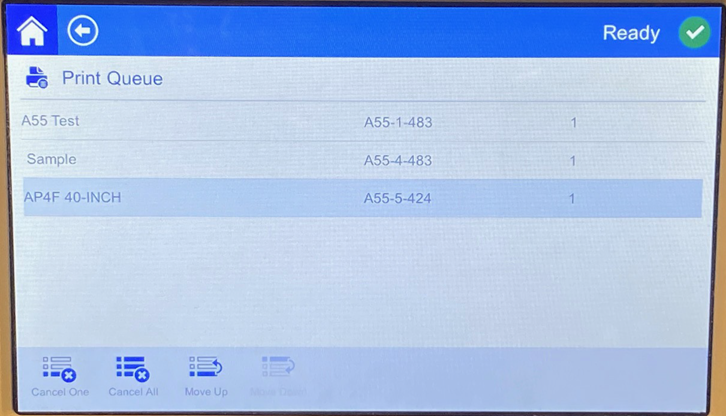
Print Queue
The Print Queue is used to change the order of jobs in the queue or to cancel print jobs.
IMPORTANT! Enable Print Queue in Settings to be able to select multiple print jobs.
A print job must be in the queue in order to print it. Jobs print in the order they are listed in the queue. Tap a print job and then tap one of the following buttons.
| Button | Description |
 | Cancel One removes the selected job from the queue. |
 | Cancel All removes all jobs from the queue. |
 | Move Up moves the selected print job up one position in the queue. |
 | Move Down moves the selected print job down one position in the queue. |
Apply Only
Tap Apply Only to flag a wire or cable with pre-printed label media. Leave the wire diameter on the auto setting or change to a specific diameter.

